
Equator 2WD V6-4.0L (2009)
REMOVAL
1) Remove the front wheel and tire.
2) Remove master cylinder reservoir cap.
3) Remove lower sliding pin bolt using power tool and swing the caliper body up to access the brake pads.
4) Support the caliper body with a suitable wire to avoid pulling on the front brake hose.
5) Remove the front inner and outer brake pads, shim, shim covers, pad return spring and retainers from the torque member.
INSTALLATION
1) Apply Molykote M-77 grease between outer brake pad backing and shim, then attach shim and shim covers to brake pads.
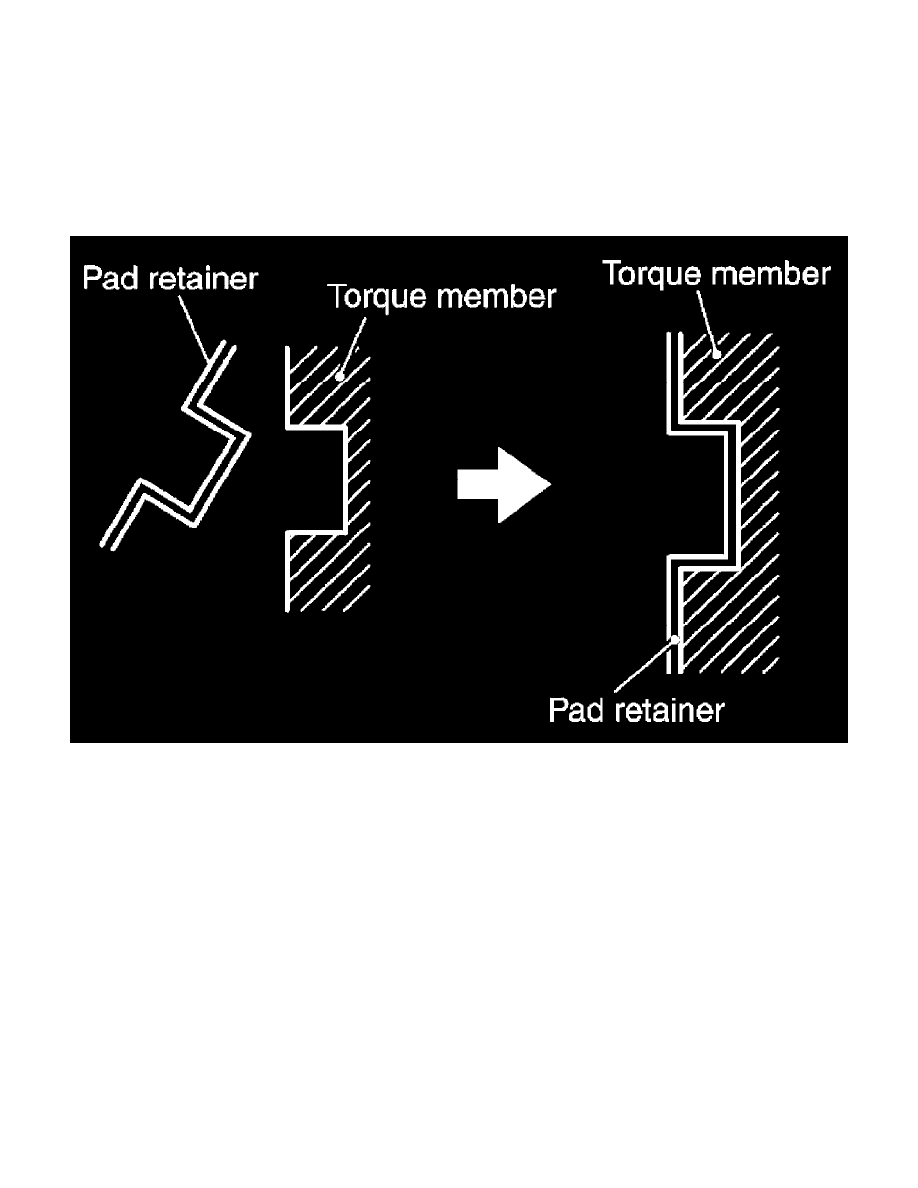
2) Attach pad retainer to torque member, then install the brake pad, shims and shim covers to the torque member.
CAUTION:
When attaching pad retainer, attach it firmly so that it is flush with torque member, as shown.
3) Using a suitable tool push pistons into caliper body.
CAUTION:
When pushing in piston, brake fluid returns to master cylinder reservoir tank. Watch the level of the brake fluid in the reservoir tank.
NOTE:
Use a suitable tool to make it easier to push the pistons into the caliper body.
4) Install pad return spring to bottom edge of the brake pads in the holes provided.
5) Remove the suitable wire, then swing the caliper body down over the brake pad assemblies.
6) Install the lower sliding pin bolt and tighten to 26.48 N-m (2.7 kg-m, 20 ft-lb).
7) Check the brakes for drag.
8) Inspect the brake fluid level, then install the master cylinder reservoir cap.
9) Install the front wheel and tire.
Rear Brake Pad: Exploded View
Rear Brake Pad: Exploded View