
Equator 2WD V6-4.0L (2009)
CAUTION:
Use new exhaust manifold nuts for installation.
NOTE:
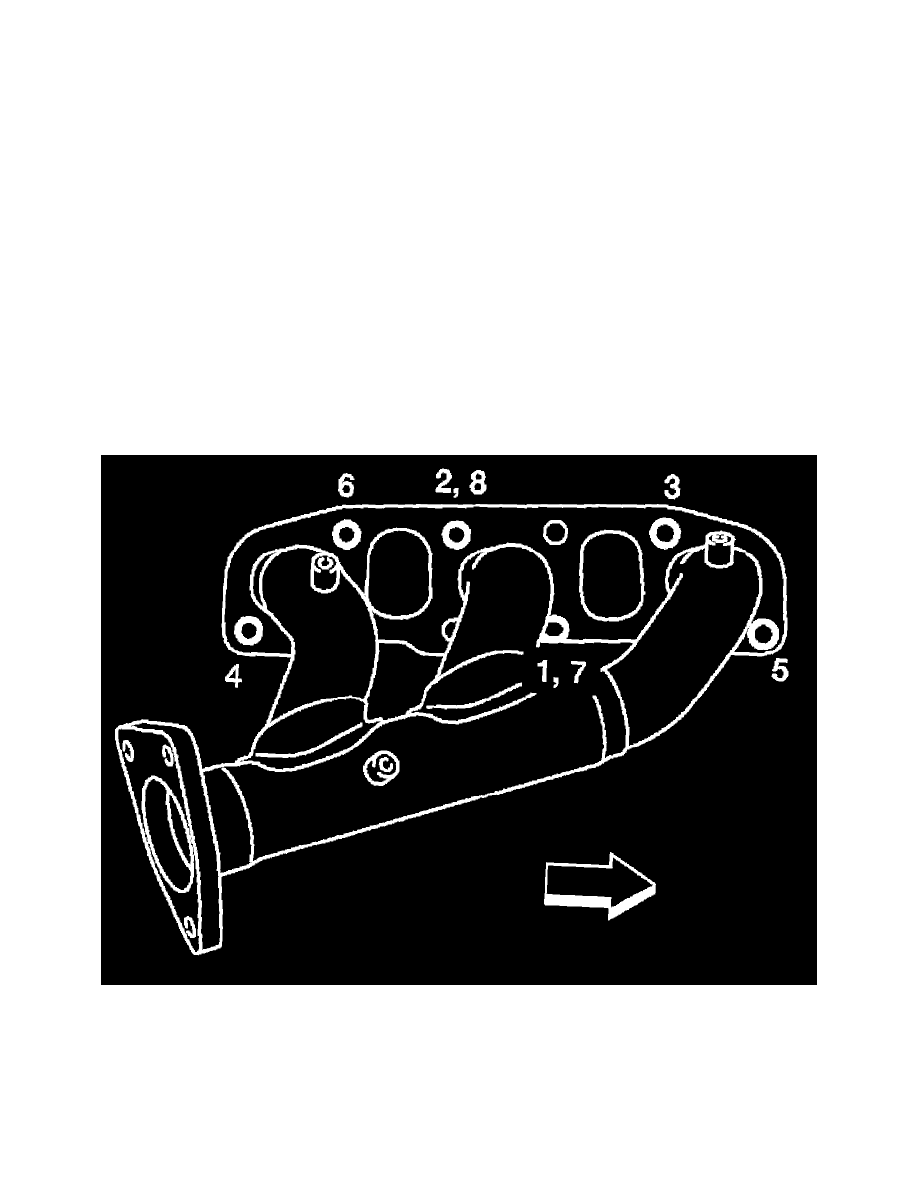
Tighten nuts No. 1 and 2 in two steps. The numerical order No. 7 and 8 show second step.
-
White Arrow Indicates Front
Heated Oxygen Sensor
CAUTION:
^
Do not over tighten air fuel ratio sensor 1 and heated oxygen sensor 2. Doing so may cause damage to air fuel ratio sensor 1 and
heated oxygen sensor 2, resulting in the "MIL" coming on.
^
Before installing a new air fuel ratio sensor 1 and heated oxygen sensor 2, clean exhaust system threads using oxygen sensor thread
cleaner and apply anti-seize lubricant.
Tool number
: - (J-43897-12)
: - (J-43897 18)
REMOVAL (RH)
1) Remove engine assembly.
2) Loosen nuts with power tool in reverse order as shown.
^
White Arrow Indicates Front
NOTE:
Disregard the numerical order No. 7 and 8 in removal.
3) Remove gaskets.
CAUTION: