
Equator 2WD V6-4.0L (2009)
Fuel Pressure: Testing and Inspection
FUEL PRESSURE CHECK
CAUTION: Be careful not to scratch or get the fuel hose connection area dirty when servicing, so that the quick connector o-ring maintains
sealability.
NOTE:
-
Prepare pans or saucers under the disconnected fuel line because the fuel may spill out. The fuel pressure cannot be completely released because
D40 models do not have fuel return system.
-
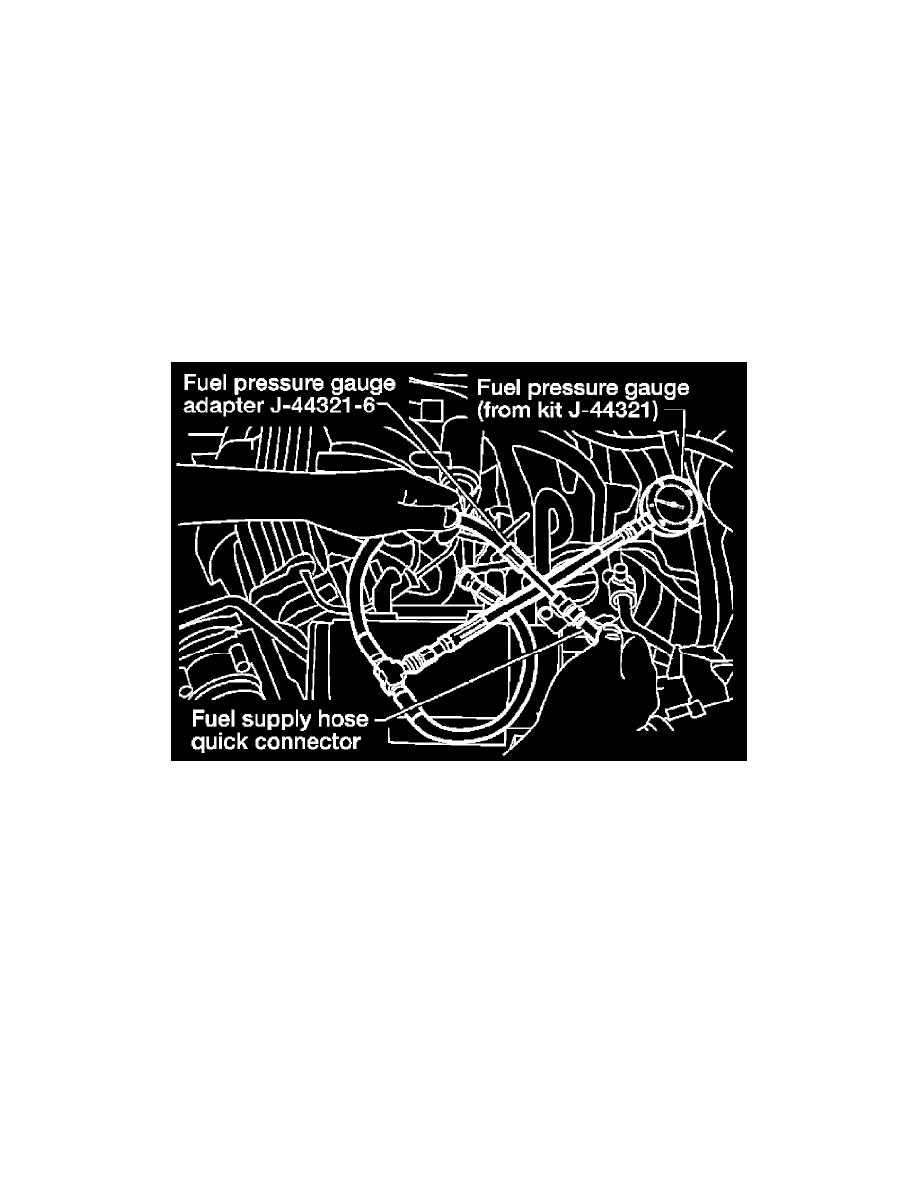
Use Fuel Pressure Gauge Kit J-44321 and Fuel Pressure Adapter J-44321-6 to check fuel pressure.
1. Release fuel pressure to zero. Refer to "FUEL PRESSURE RELEASE".
2. Remove fuel hose using Quick Connector Release J-45488.
-
Never twist or kink fuel hose because it is plastic hose.
-
Never remove fuel hose from quick connector.
-
Keep fuel hose connections clean.
3. Install Fuel Pressure Adapter J-44321-6 and Fuel Pressure Gauge (from kit J-44321) as shown in figure.
-
Never distort or bend fuel rail tube when installing fuel pressure gauge adapter.
-
When reconnecting fuel hose, check the original fuel hose for damage and abnormality.
4. Turn ignition switch ON (reactivate fuel pump), and check for fuel leakage.
5. Start engine and check for fuel leakage.
6. Read the indication of fuel pressure gauge.
-
During fuel pressure check, check for fuel leakage from fuel connection every 3 minutes.
At idling:
Approximately 350 kPa (3.57 kg/cm2, 51 psi)
7. If result is unsatisfactory, go to next step.
8. Check the following.
-
Fuel hoses and fuel tubes for clogging
-
Fuel filter for clogging
-
Fuel pump
-
Fuel pressure regulator for clogging
If OK, replace fuel pressure regulator.
If NG, repair or replace.
9. Before disconnecting Fuel Pressure Gauge and Fuel Pressure Adapter J-44321-6, release fuel pressure to zero. Refer to "FUEL PRESSURE