
Equator 2WD V6-4.0L (2009)
Power Distribution Module: Scan Tool Testing and Procedures
Diagnosis System (IPDM E/R): Diagnosis Description
Diagnosis System (IPDM E/R): Diagnosis Description
Auto Active Test
Description
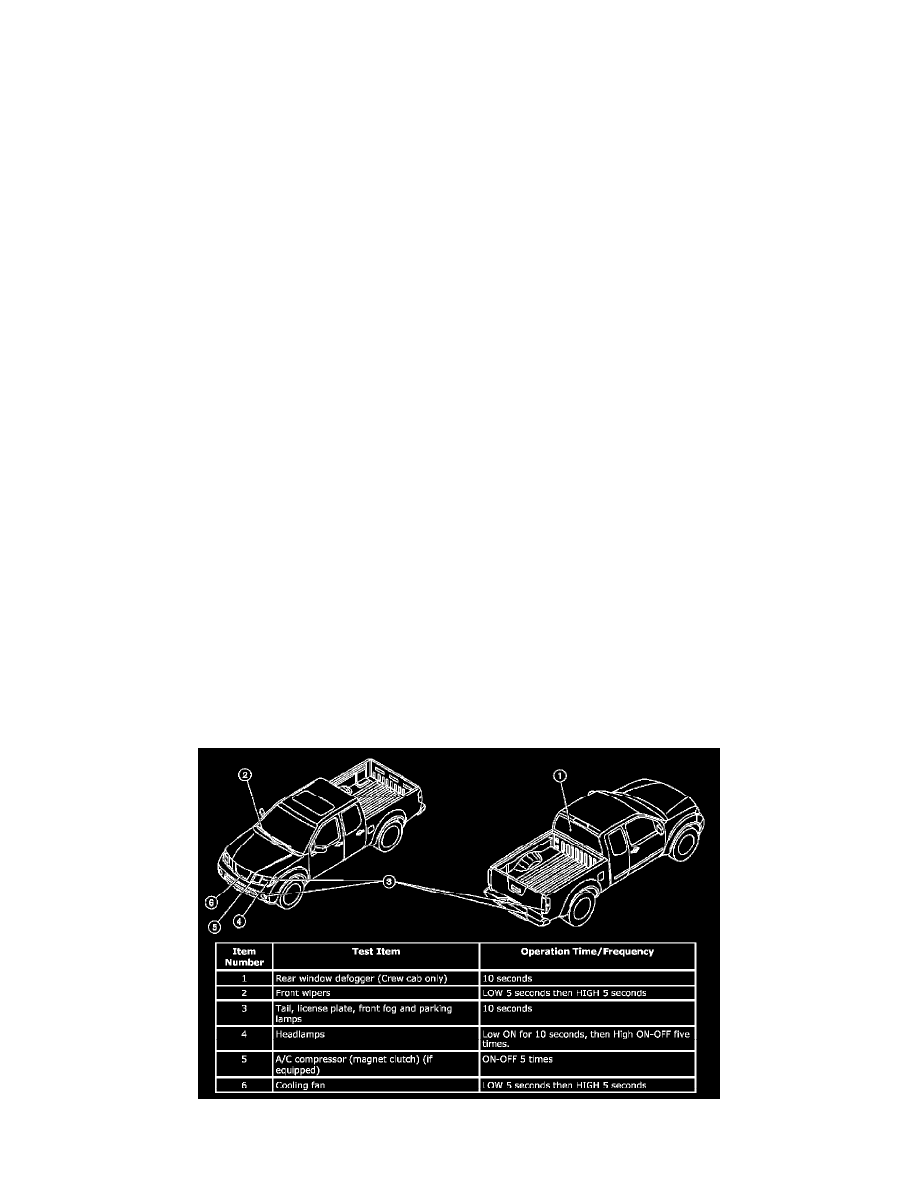
In auto active test mode, the IPDM E/R sends a drive signal to the following systems to check their operation.
-
Oil pressure low warning indicator
-
Oil pressure gauge (if equipped)
-
Rear window defogger
-
Front wipers
-
Tail, license and parking lamps
-
Front fog lamps (if equipped)
-
Headlamps (Hi, Lo)
-
A/C compressor (magnetic clutch) (if equipped)
-
Cooling fan
Operation Procedure
1. Close the hood and front door RH, and lift the wiper arms from the windshield (to prevent windshield damage due to wiper operation).
NOTE: When auto active test is performed with hood opened, sprinkle water on windshield before hand.
2. Turn ignition switch OFF.
3. Turn the ignition switch ON and, within 20 seconds, press the front door switch LH 10 times. Then turn the ignition switch OFF.
4. Turn the ignition switch ON within 10 seconds. After that the horn sounds once and the auto active test starts.
5. After a series of the following operations is repeated 3 times, auto active test is completed.
NOTE: When auto active test mode has to be cancelled halfway through test, turn ignition switch OFF.
CAUTION:
-
If auto active test mode cannot be actuated, check door switch system. Refer to [Door Switch Circuit Check [King Cab]] or [Door
Switch Circuit Check [Crew Cab]].
-
Do not start the engine.
Inspection in Auto Active Test Mode
When auto active test mode is actuated, the following 7 steps are repeated 3 times.
Concept of auto active test