
Equator 2WD V6-4.0L (2009)
Windshield: Service and Repair
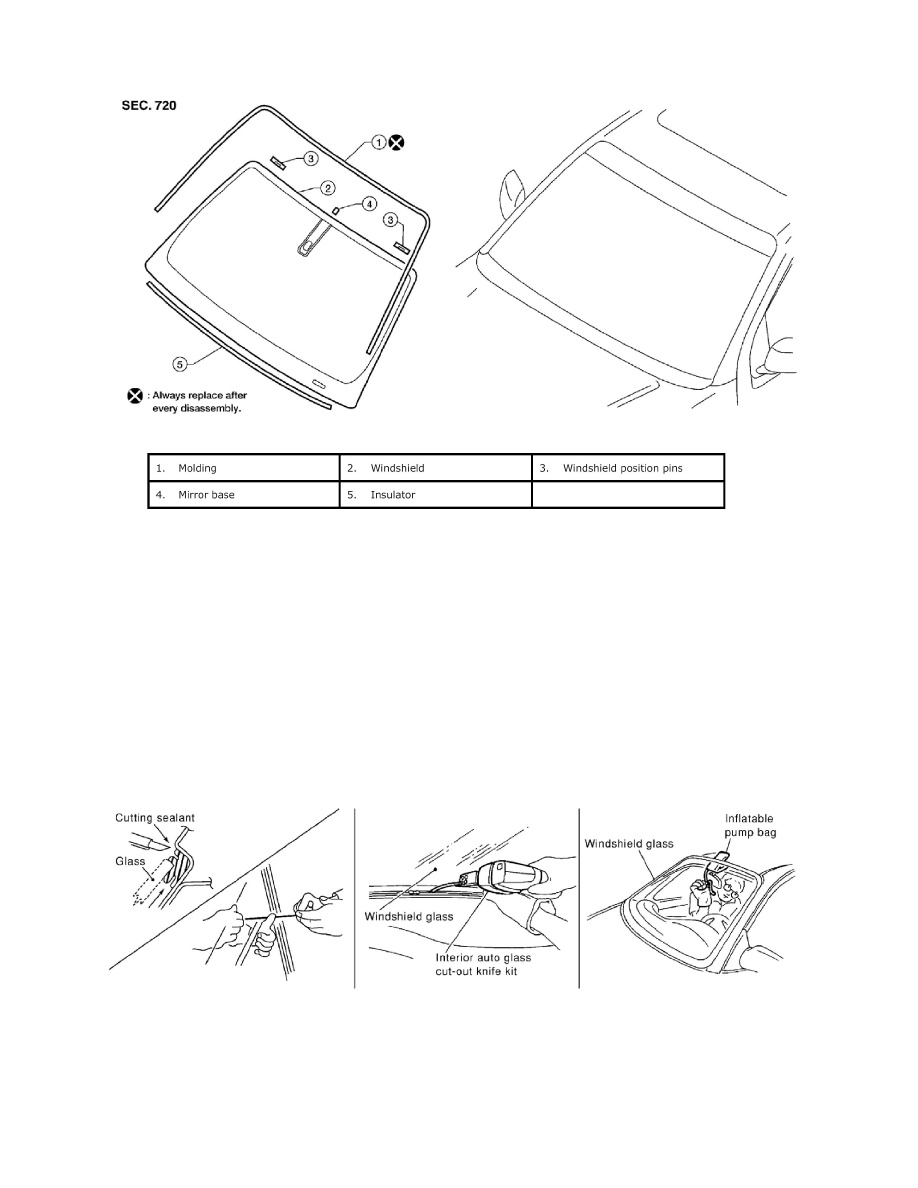
Windshield Glass: Removal And Installation
REMOVAL
1. Remove inside mirror. Refer to [Inside Mirror: Removal].
2. Partially remove the headlining (front edge). Refer to [Headlining: Removal and Installation].
3. Remove cowl top cover. Refer to [Cowl Top: Removal and Installation].
4. Apply a protective tape around the windshield glass to protect the painted surface from damage.
-
If the windshield glass is to be reused, mark the body and the glass with mating marks.
-
Remove the glass using piano wire or power cutting tool and an inflatable pump bag.
WARNING: When cutting the glass from the vehicle, always wear safety glasses and heavy gloves to help prevent glass splinters from
entering your eyes or cutting your hands.
CAUTION:
-
Be careful not to scratch the glass when removing.
-
Do not set or stand glass on its edge. Small chips may develop into cracks.
INSTALLATION
Installation is in the reverse order of removal.
-
Use an Urethane Adhesive and follow the instructions furnished with it.
-
While the urethane adhesive is curing, open a door window. This will prevent the glass from being forced out by passenger compartment air
pressure when a door is closed.
-
The molding must be installed securely so that it is in position and leaves no gap.
-
Inform the customer that the vehicle should remain stationary until the urethane adhesive has completely cured (preferably 24 hours). Curing time