
Esteem L4-1590cc 1.6L SOHC 0 MFI 16V (1995)
DISASSEMBLY
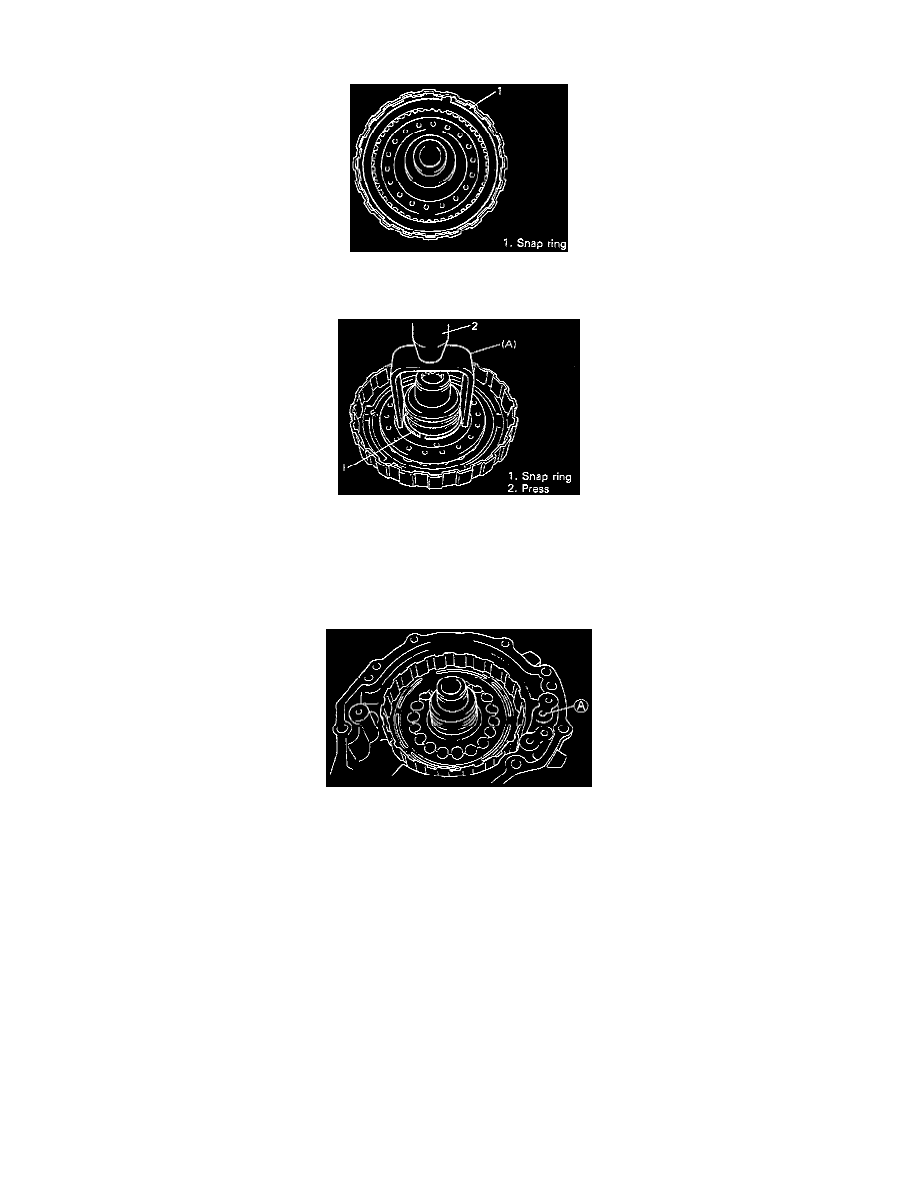
1. Remove flange, discs and plates by removing snap ring in following order. (1) Flange -> (2) Disc -> (3) Plate -> (4) Disc -> (5) Plate.
2. Remove clutch drum thrust washer.
3. Using Special Tool (C): 09926-98330, or equivalent and hydraulic press, compress forward clutch return spring subassembly and remove snap
ring.
CAUTION: Be careful when applying pressure, for overpressure will cause plate section of forward clutch return spring subassembly to deform.
4. Remove forward clutch return spring subassembly.
5. Install forward clutch piston subassembly to transmission rear cover.
6. Remove forward clutch piston subassembly with O-rings installed through oil hole (A) using compressed air (400- 800 kPa, 57 - 113 psi).
NOTE:
^
If piston does not pop out, it is recommended to use needle-nose pliers for removal.
^
Never reuse removed O-rings.