
Esteem L4-1590cc 1.6L SOHC 0 MFI 16V (1995)
Valve Body: Service and Repair
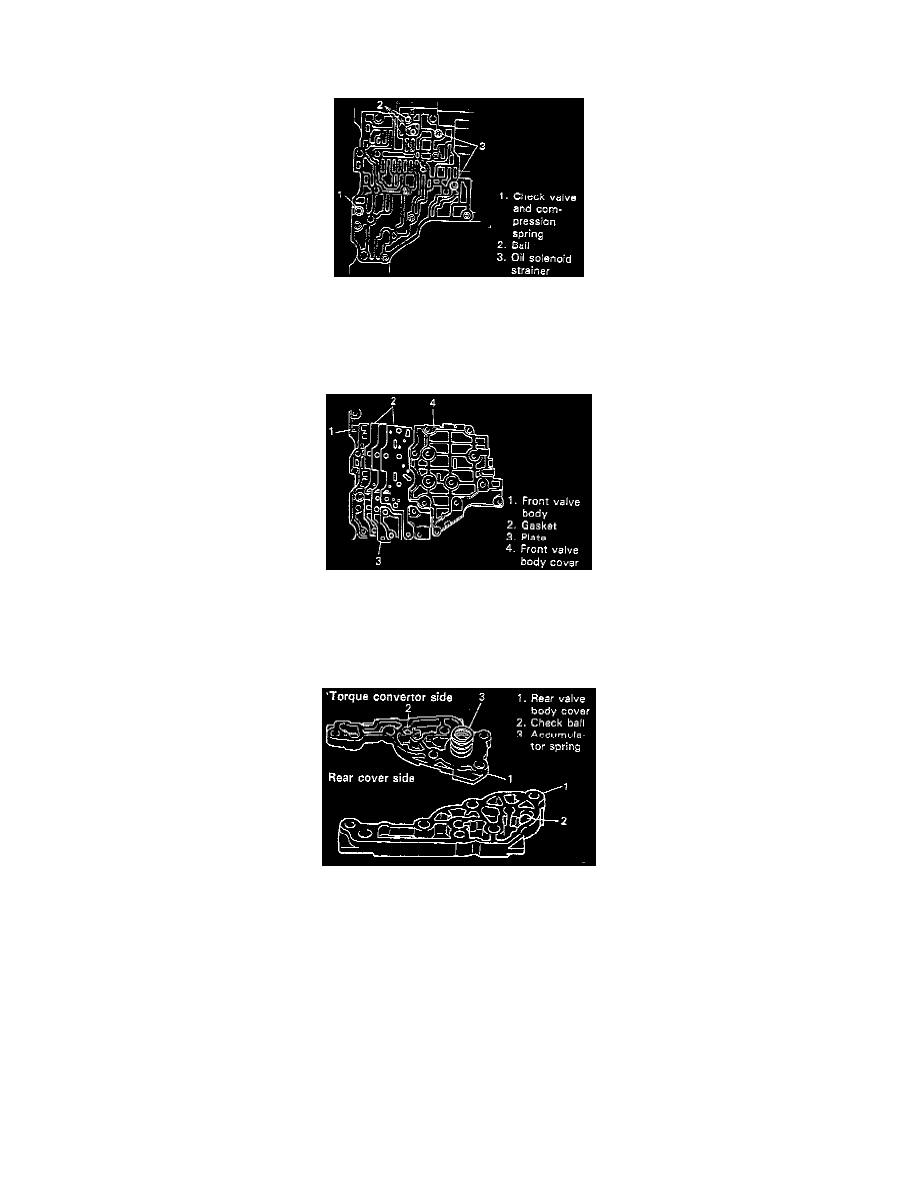
Assembly
1. Install valves and compression springs to torque convertor side of front valve body.
NOTE: To identify correct spring or valve, refer to Compression Spring Identification.
2. Place check balls, check valve, solenoid strainers. compression spring and oil
3. Install gaskets, plate, and front valve body cover and tighten bolts to specified torque.
Tightening Torque Front valve body cover: 6.8 Nm (58.8 inch lbs.)
4. Install valves and compression springs to rear cover side of front valve body.
NOTE: To identify correct spring or valve, refer to Compression Spring Identification.
5. Install accumulator pistons, valves and compression springs to rear valve body.
NOTE:
^
Don't reuse accumulator O-ring.
^
To identify correct piston, valve or spring, refer to Compression Spring Identification.
6. Place check balls and accumulator spring to rear valve body covers.