
Esteem GLX Sedan Plus L4-1.8L (1999)
3.
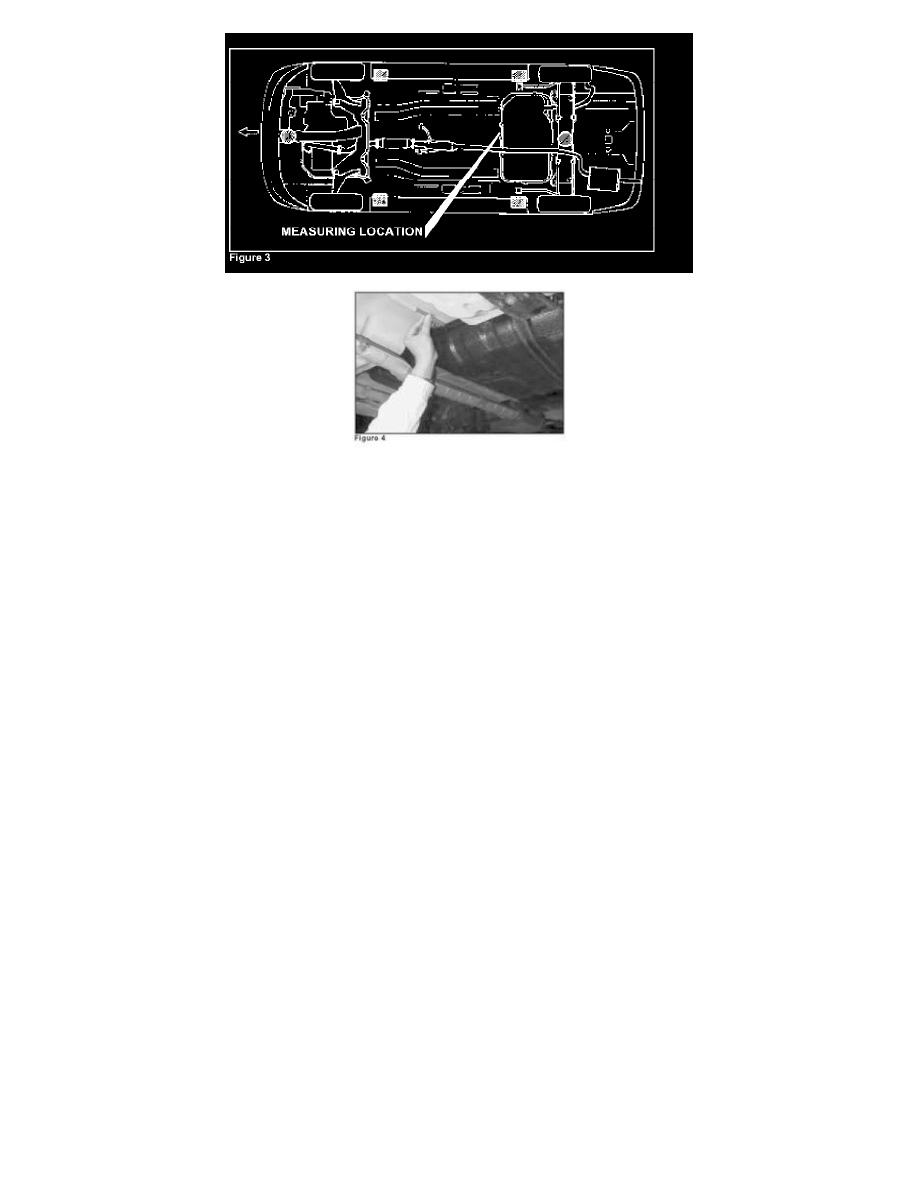
Refer to Figure 3 for the measuring location under the vehicle. Using the 18 mm end of the gauge measure and note the clearance between the fuel
tank flange and the underside of the floor panel as shown in Figure 4.
If the clearance is more than 18 mm the vehicle's fuel tank needs to be removed refuel vapor control valve inspected for damage the valve's hose
clamp tabs adjusted a valve pad installed and the fuel tank reinstalled with more than 18 mm of fuel tank flange clearance.
NOTE:
In reference to the above, it is not necessary to replace the refuel vapor control valve unless it is damaged.
^
If the clearance is less than 18 mm the vehicle's fuel tank needs to be removed the refuel vapor control valve replaced the valve's hose clamp tabs
adjusted a valve pad installed and the fuel tank reinstalled with more than 18 mm of fuel tank flange clearance.
4.
Proceed to C. REPAIR PROCEDURE."
C. Repair Procedure
1.
Release vehicle fuel pressure using the following procedure:
CAUTION:
Make sure that the engine is cold before releasing the fuel pressure. Damage to the catalyst may occur if this procedure is done when the
engine is hot.
A.
Place the transmission gear shift in Neutral (M/T) or Park (A/T), set the parking brake and block the drive wheels.
B.
Remove the fuel filler cap to release fuel vapor pressure in the fuel tank. Reinstall the fuel filler cap.