
Esteem GLX Wagon L4-1.8L (1999)
11.
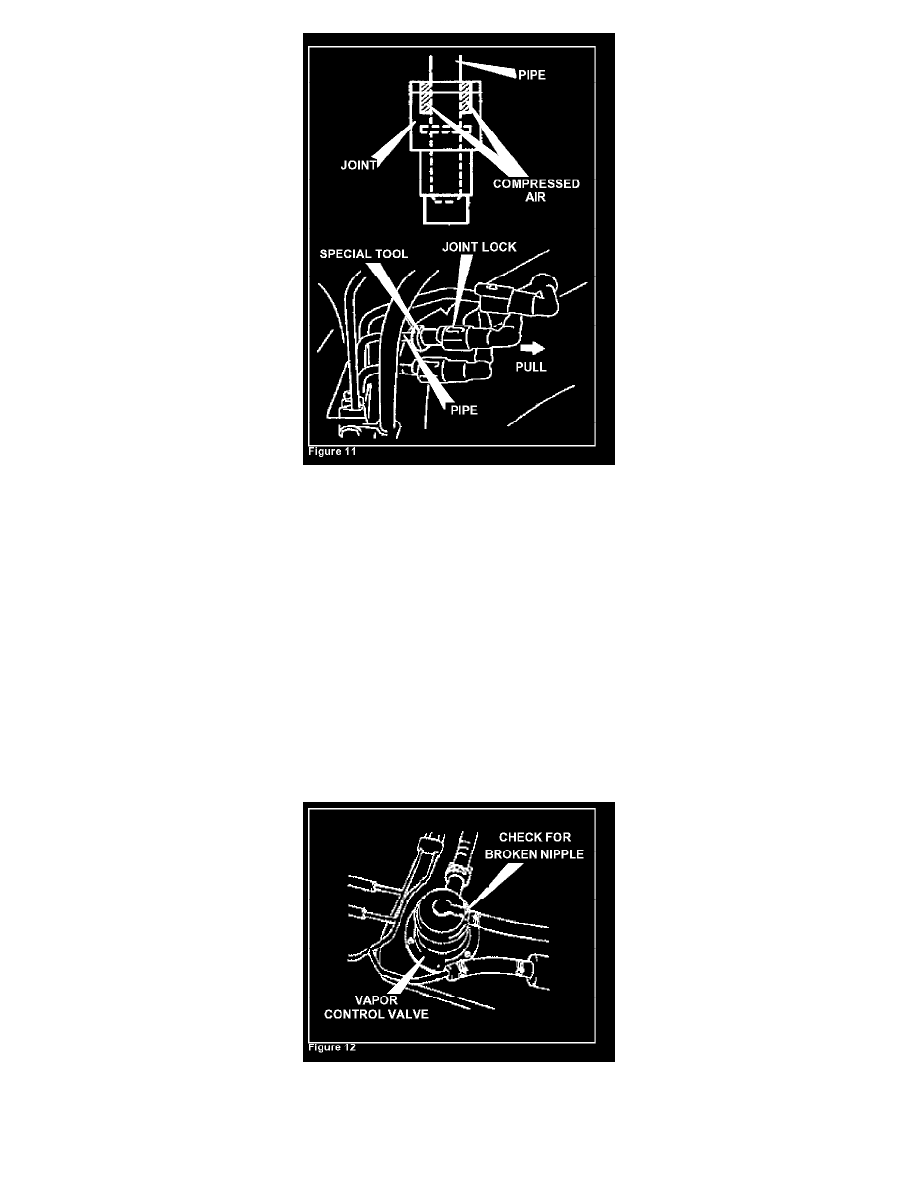
Remove all debris around the quick connectors with compressed air. Disconnect fuel pipe joints from pipes. To disconnect the quick connectors
locate the special tool enclosed with this bulletin and insert it between joint and pipe (Figure 11).
SPECIAL TOOL:
09919-47020
NOTE:
Additional Special Tools are available via ASMC's Parts Department.
WARNING:
A small amount of fuel may be released after the fuel hose is disconnected. To reduce the chance of personal injury, cover hose and pipe to be
disconnected with a shop cloth. Be sure to place the cloth in an approved container when the disconnection has been completed.
12.
Support the fuel tank with a jack and remove the fuel tank from the vehicle.
13.
Using the clearance measurement from Step B.
FUEL TANK MEASUREMENT PROCEDURE", perform one of the following:
^
If the clearance was less than 18 mm or if the vapor control valve nipple is found to be broken, replace the vapor control valve (Figure 12).
^
If the clearance was more than 18 mm and the nipple is not broken, reposition the hose clamp tab to face downward, then go to Step 18.