
Esteem GLX Wagon Plus L4-1.8L (1999)
Stabilizer Bushing: Service and Repair
Front
REMOVAL
1. Remove stabilizer link nuts, washers and cushions. When loosening link nut, hold stud with wrench.
2. Remove stabilizer mount brackets.
3. Remove stabilizer.
4. Remove stabilizer joints from stabilizer. When loosening joint nut, hold stud with wrench.
INSTALLATION
1. Loosely assemble all components in reverse order of removal.
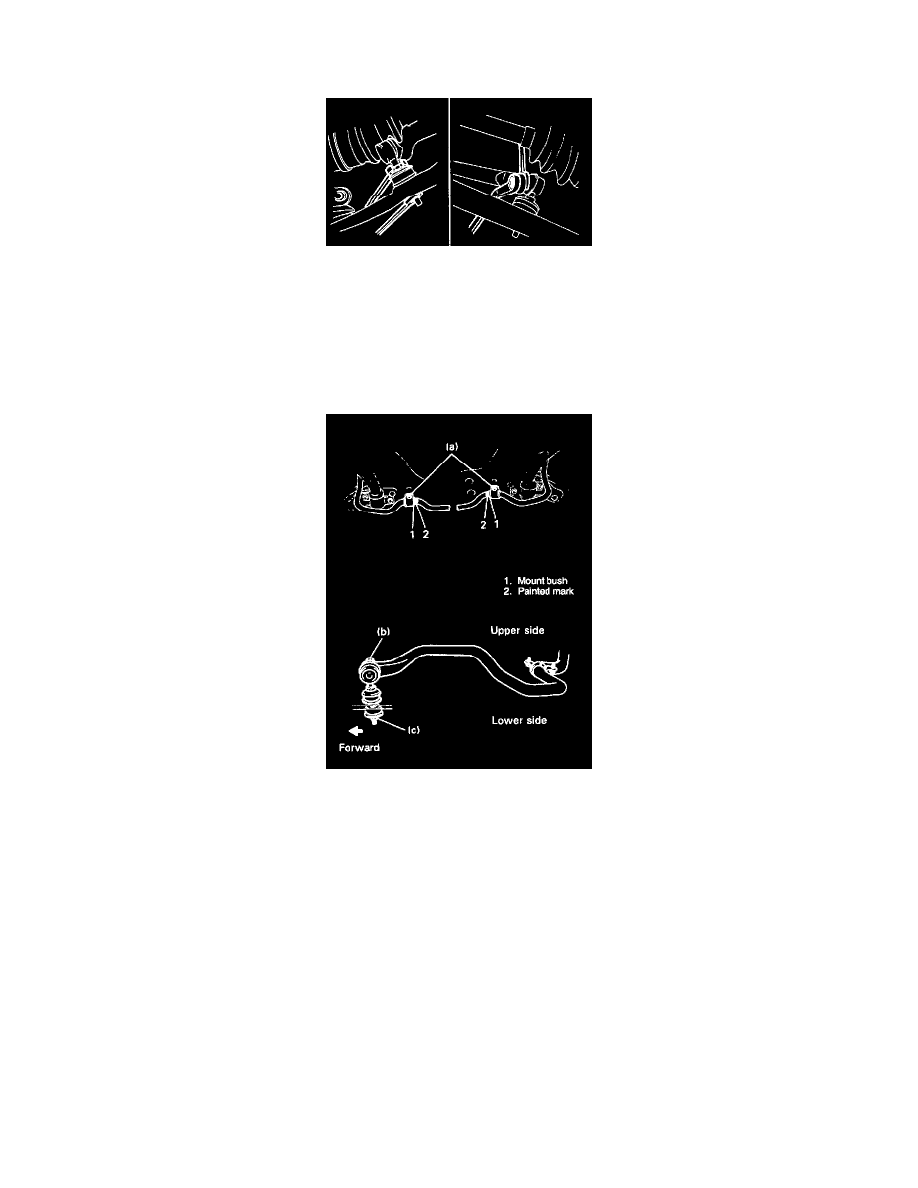
2. With painted mark on stabilizer bar and end face of mount bushing aligned, tighten mount bracket bolts to specified torque.
NOTE: If painted mark has gone, align the vehicle center and the center of stabilizer bar.
Tightening Torque (a): 23 Nm (2.3 kg-m, 17.0 ft. lbs.)
3. Tighten each nut to specified torque. When tightening, hold stud with wrench.
NOTE: Use new nuts for stabilizer joint nut.
Tightening Torque
(b): 50 Nm (5.0 kg-m, 36.5 ft. lbs.)
(c): 28 Nm (2.8 kg-m, 20.5 ft. lbs.)