
Grand Vitara 4WD L4-2.4L (2009)
8. Apply primer for molding along molding surface all around.
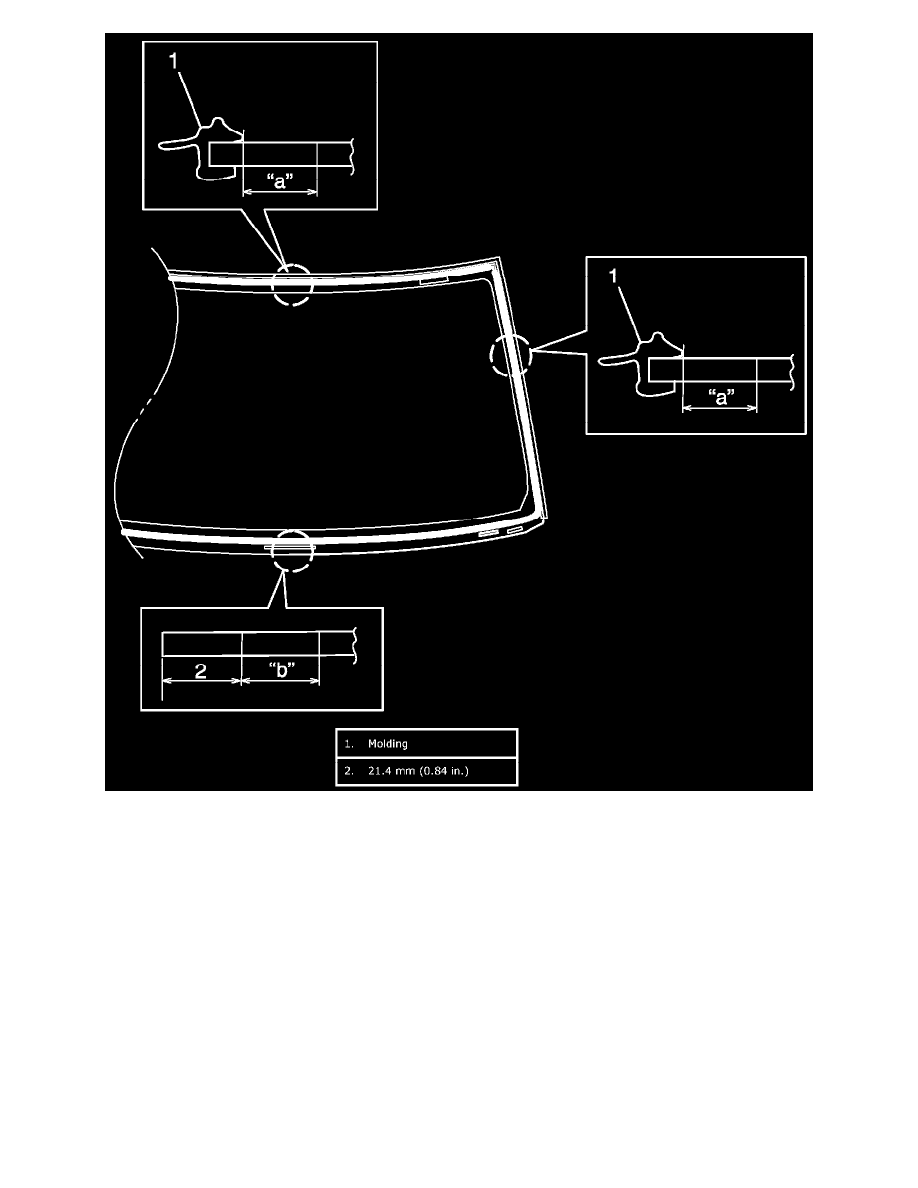
9. Apply adhesive (1) referring to figure.
NOTE:
-
Press glass (2) against fittings surface of body panel quickly after adhesive (1) is applied.
-
Use of rubber sucker grip is helpful to hold and carry glass after adhesive (1) is applied.
-
Perform steps 8) to 9) within 10 min. to ensure sufficient adhesion.
-
Be sure to refer to adhesive maker's instruction for proper handling and drying time.
-
Start from bottom side of glass (2).
-
Be careful not to damage primer.
Adhesive amount specifications and position for windshield
Width "a": Approx. 7 mm (0.27 in.)
Height "b": Approx. 15 mm (0.59 in.)
Position "c": Approx. 4 mm (0.15 in.)
Position "d": Approx. 35 mm (1.38 in.) for bottom section