
Grand Vitara 4WD V6-2.5L (2003)
NOTE:
-
Be sure to refer to primer maker's instruction for proper handling and drying time.
-
Do not touch body and old adhesive surfaces where glass is to be adhered.
5. Install new molding (1) to glass (2).
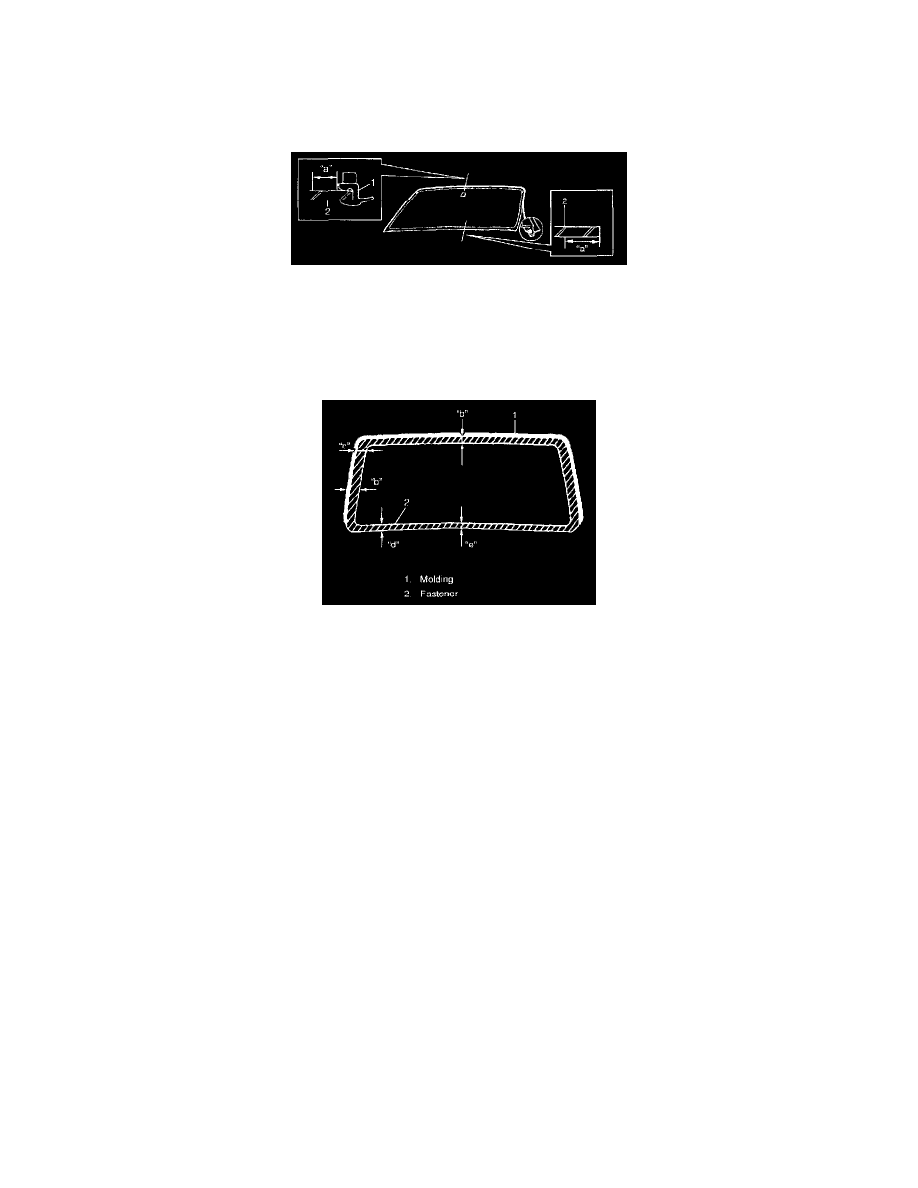
Cleaning Area For Windshield (Distance From The Edge Of Glass Or Molding)
6. Clean glass surface to be adhered to body with clean cloth. If cleaning solvent is used, let it dry for more than 10 minutes.
Cleaning area for windshield (distance from the edge of glass or molding)
"a": 30 - 50 mm (1.18 - 1.97 in.)
Area Applied Primer For Windshield
7. Using new brush, apply sufficient amount of primer for glass along glass surface to be adhered to body.
NOTE:
-
Be sure to refer to maker's instruction for proper handling and drying time.
-
Do not apply primer on outside of ceramic coated surface.
-
Do not touch primer coated surface.
Area applied primer for windshield
Width "b": 18 - 19 mm (0.71 - 0.75 in.)
Width "c": 16 - 17 mm (0.63 - 0.67 in.)
Width "d": 24 mm (0.94 in.)
Width "e": 27 mm (1.06 in.)
8. Apply primer for molding (1) along molding surface all around as shown in the figure.
9. Apply adhesive (2) referring to the figure.
NOTE:
-
Start from bottom side of glass (3).
-
Be careful not to damage primer.
-
Height of adhesive (2) applied to lower side should be higher than that of other 3 sides.
Adhesive amount specification for windshield (upper, right and left sides)
Width "e": Approx. 11 mm (0.43 in.)
Height "f": Approx. 17 mm (0.67 in.)
Height "g": Approx. 25 mm (0.98 in.)
Distance "h": Approx. 16 mm (0.63 in.)