
Grand Vitara JLS Plus 2WD V6-2.5L (2000)
11.
Apply a thin coat of gasoline to the 0-ring on the new fuel pressure regulator and insert the fuel pressure regulator into the delivery pipe (Figure 7).
Install and tighten the fuel pressure regulator bolts to the specified torque.
Tightening torque:
10 N.m (1.0 kg-m, 7.5 lb-ft)
12.
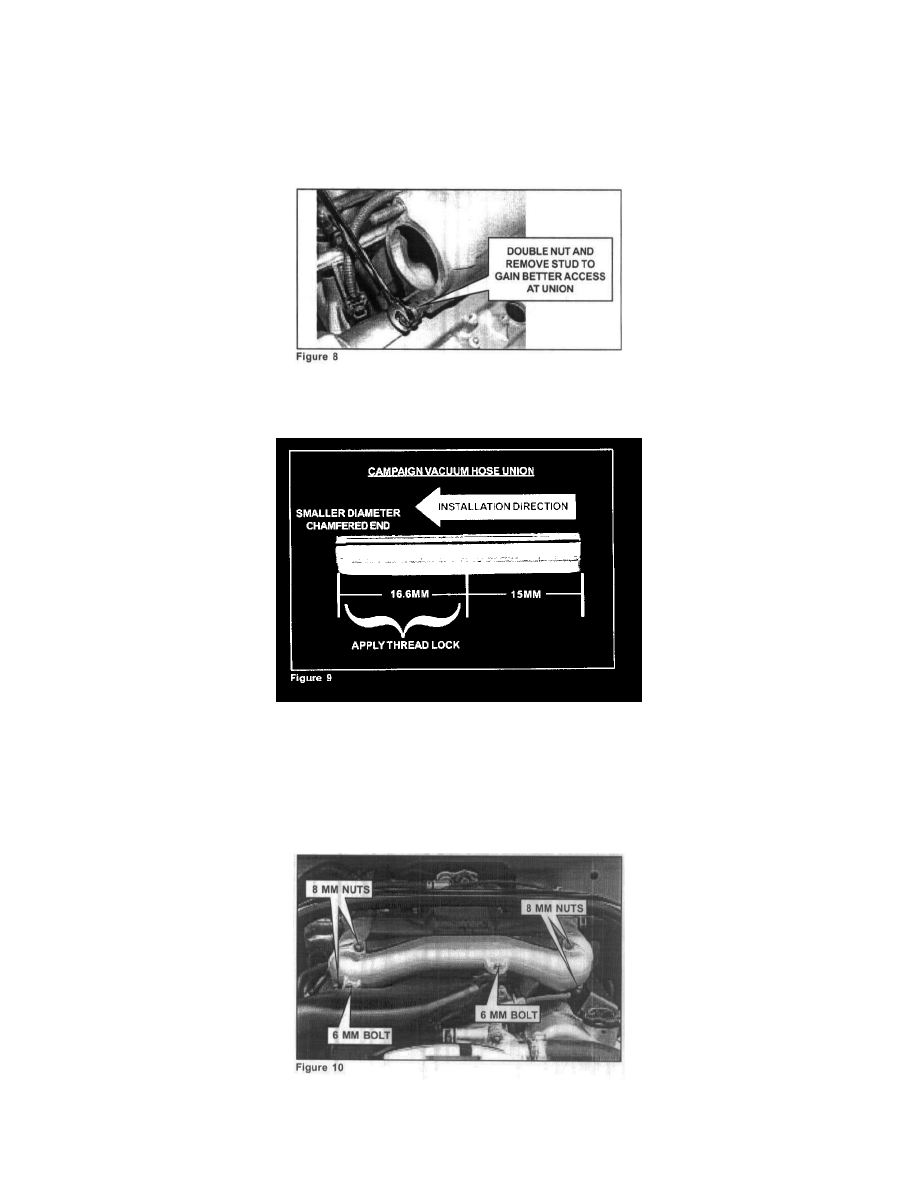
Remove the fuel pressure regulator vacuum hose union from the surge tank using locking pliers and pry bar.
NOTE:
Double nut and remove stud as shown (Figure 8). This will provide better access to remove hose union using locking pliers and pry bar.
13.
Apply thread lock (99000-32030) to a 10 mm portion of the outer surface of the smaller OD end of the campaign fuel pressure regulator vacuum
hose union (Figure 9). The tip of the smaller OD end of the campaign fuel pressure regulator vacuum hose union is chamfered. Using a bronze
drift pinch and hammer, drive the new fuel pressure regulator vacuum hose union into the surge tank with the small OD end (chamfered) facing
inward. Stop when the union reaches the step between the smaller OD end and larger OD end. At this point the campaign fuel pressure regulator
vacuum hose union will extend 15 mm from the surge tank.
14.
Install the vacuum hose to the surge tank vacuum hose union and fuel pressure regulator.
15.
Install the new surge tank pipe gaskets and surge tank pipe. Tighten the surge tank pipe mount nuts and bolts to the specified torque (Figure 10).
Nut Tightening torque: