Grand Vitara LTD 2WD V6-2.5L (2001)

Brake Proportioning/Combination Valve: Service and Repair
P (Proportioning) Valve
REMOVAL
CAUTION: Do not allow brake fluid to get on painted surfaces.
1. Clean around reservoir cap and take out fluid with syringe or such.
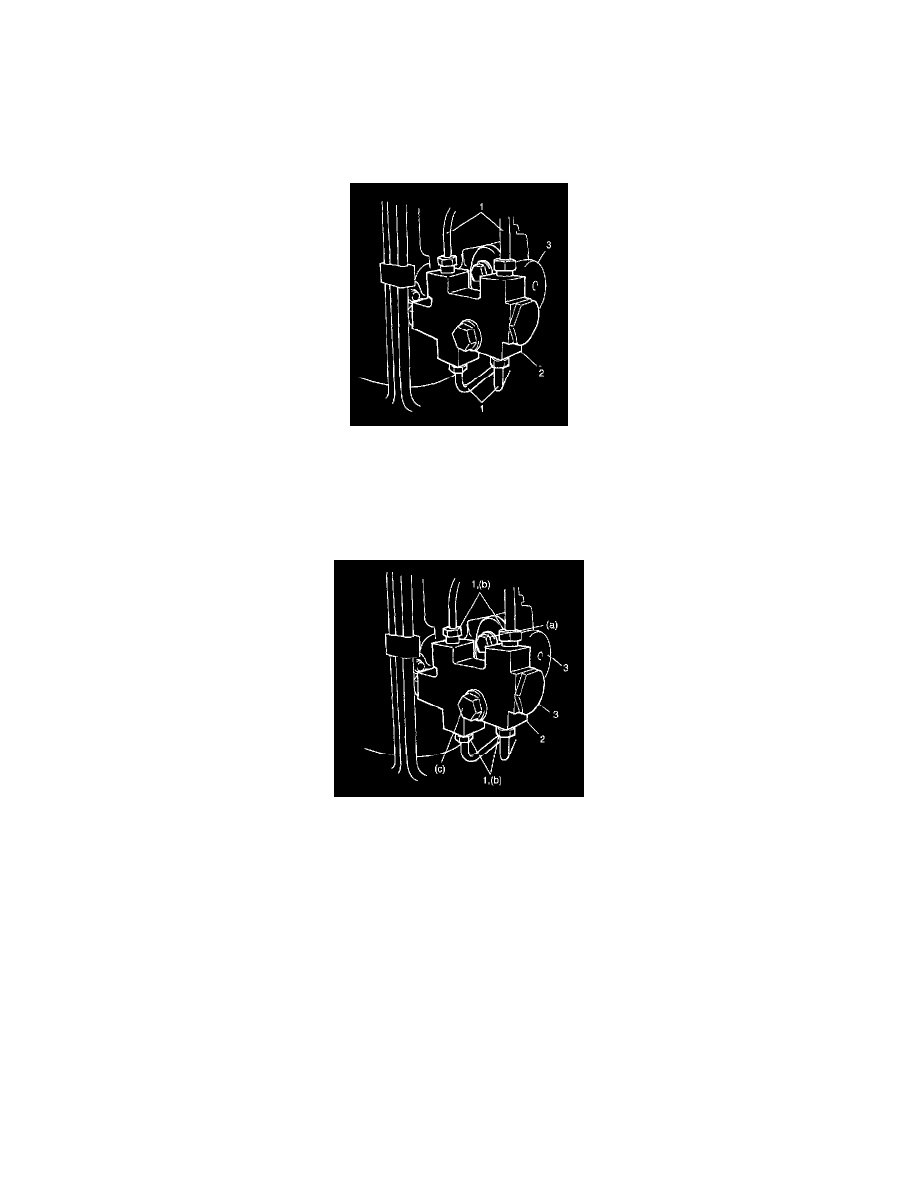
2. Disconnect brake pipes (1) from P valve (2).
3. Remove P valve (2) from master cylinder (3).
WARNING: Never disassemble P valve assembly. if it is found faulty, replace it with new assembly.
INSTALLATION
1. Install P valve (2) to master cylinder (3).
Tightening torque
P valve bracket (a): 10 Nm (1.0 kg-m, 7.5 ft. lbs.)
P valve bolt (c): 23 Nm (2.3 kg-m, 17.0 ft. lbs.)
2. Tighten flare nuts (1) to specified torque.
Tightening torque
Brake pipe flare nut (b): 16 Nm (1.6 kg-m, 12.0 ft. lbs.)
3. Fill reservoir with specified brake fluid.
4. After installing, check brake pedal play and bleed air from system.
5. Perform brake test and check each installed part for fluid leakage.
