
Kizashi AWD L4-2.4L (2010)
Power Brake Assist: Service and Repair
Brake Booster Removal and Installation
Brake Booster Removal and Installation
Reference: Brake Booster Components
Removal
1) Remove following parts.
^
Battery and battery tray.
^
Air cleaner.
2) Disconnect brake pipes from ESP(R) hydraulic unit/control module assembly and from brake master cylinder assembly.
3) Remove brake master cylinder assembly from brake booster.
4) Disconnect vacuum hose from brake booster.
5) Disconnect brake light switch connector.
6) Remove push rod clevis pin.
7) Remove brake booster nuts to remove brake booster from dash panel.
Installation
Reference: Brake Booster Inspection
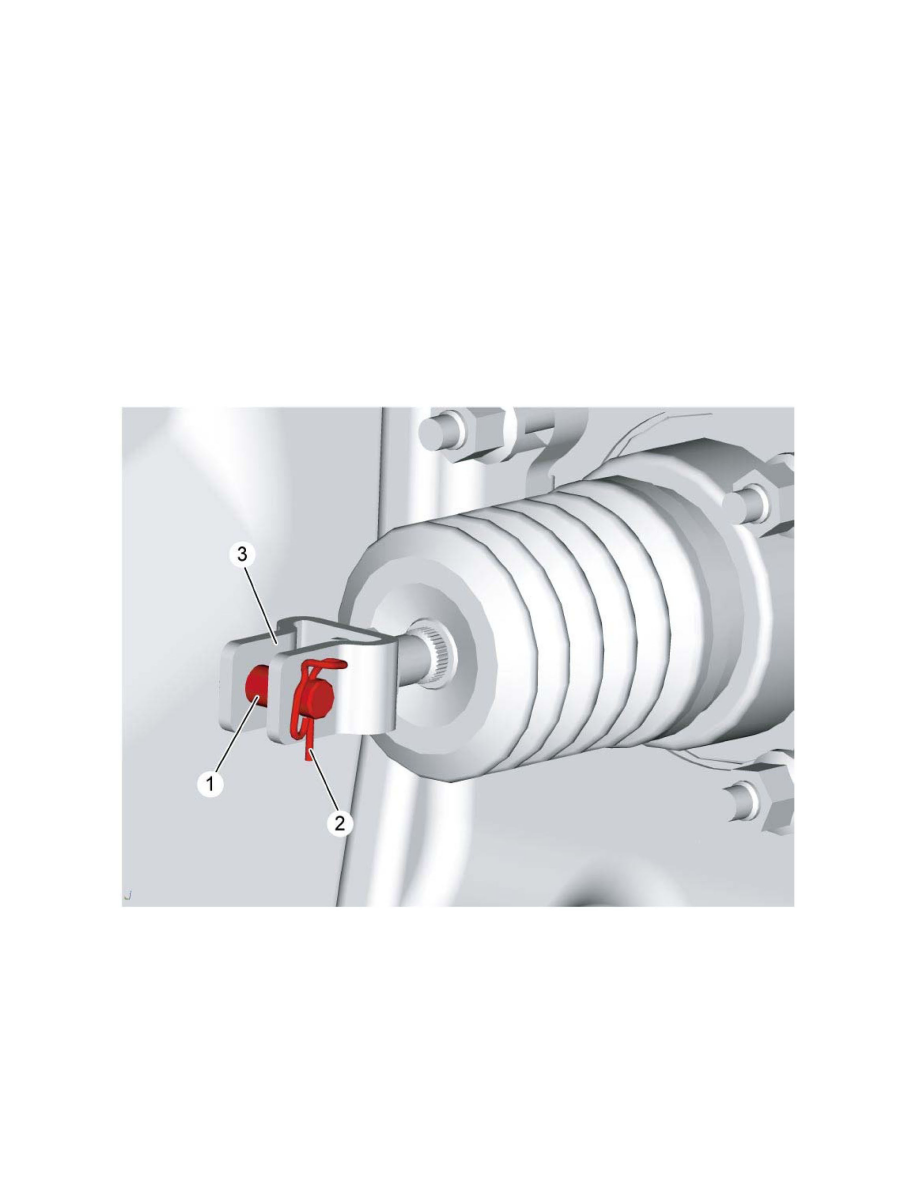
1) Install brake booster to dash panel. Then connect push rod clevis (3) to pedal arm with clevis pin (1) and clip (2).
2) Tighten brake booster nuts to specified torque.
Tightening torque
Brake booster nut*: 13 Nm (1.3 kg-m, 9.5 lbf-ft)
3) Install brake master cylinder assembly to brake booster.
4) Connect brake pipes to ESP(R) hydraulic unit/control module assembly and to brake master cylinder assembly.
5) Install the following parts.
^
Battery and battery tray.
^
Air cleaner.
6) Bleed air from brake system.
7) Check brake pedal free height and play.
^
Brake pedal free height:
^
Brake pedal play: