
Kizashi AWD L4-2.4L (2010)
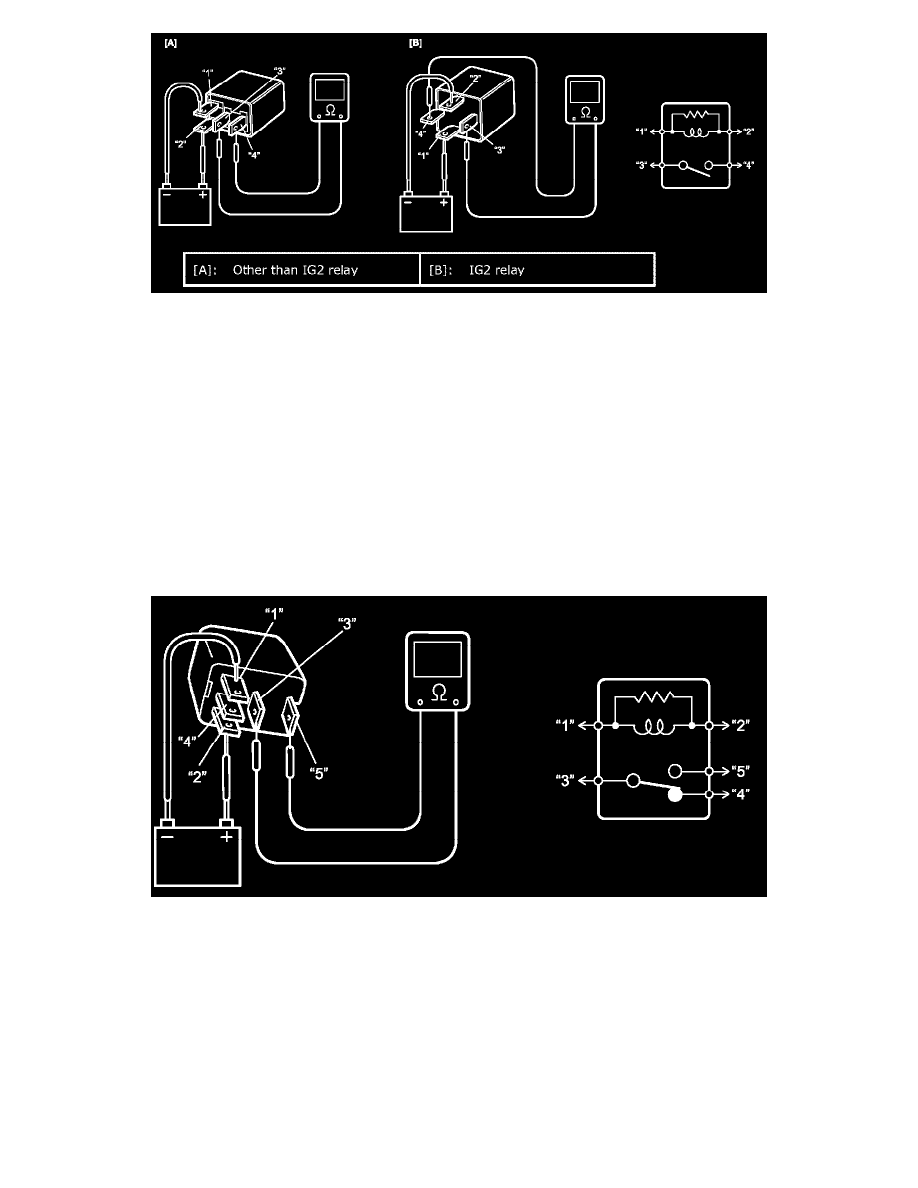
Wiper Hi/Lo relay, wiper relay and radiator cooling fan relay No.2
1. Disconnect relay(s) to be checked.
2. Check that there is no continuity between terminal "3" and "5".
If there is continuity, replace relay.
3. Check that there is continuity between terminal "3" and "4".
If there is no continuity, replace relay.
4. Measure resistance between "1" and "2" terminal of relay.
If checked result is not as specified, replace relay.
Relay resistance
Between terminal "1" and "2": Approx. 110 Ohms at 20 °C (68 °F)
5. Connect battery positive (+) terminal and negative (-) terminal to relay as shown in figure, check for continuity between terminal "3" and "5".
If there is no continuity when relay is connected to the battery, replace relay.
6. Connect battery positive (+) terminal and negative (-) terminal to relay as shown in figure, check for no continuity between terminal "3" and "4".
If there is continuity when relay is connected to the battery, replace relay.
Power Integration Inspection
1. Disconnect power integration.
2. Check that there is no continuity between terminals of each relay as following table.
If there is continuity, replace power integration.
NOTE: Check the state of each fuse and replace any blown fuses before inspecting power integration.