
Reno L4-2.0L (2006)
10. Inspect the shaft and the inside of the compressor housing neck for dirt or foreign material. These parts must be perfectly clean before installing
any new parts.
Installation
CAUTION: Seals must not be reused. Always use a new specification service seal kit. Be sure that the seal to be installed is not scratched or damaged in
any way. The seal must be free of lint and dirt that may damage the seal surface or prevent proper sealing.
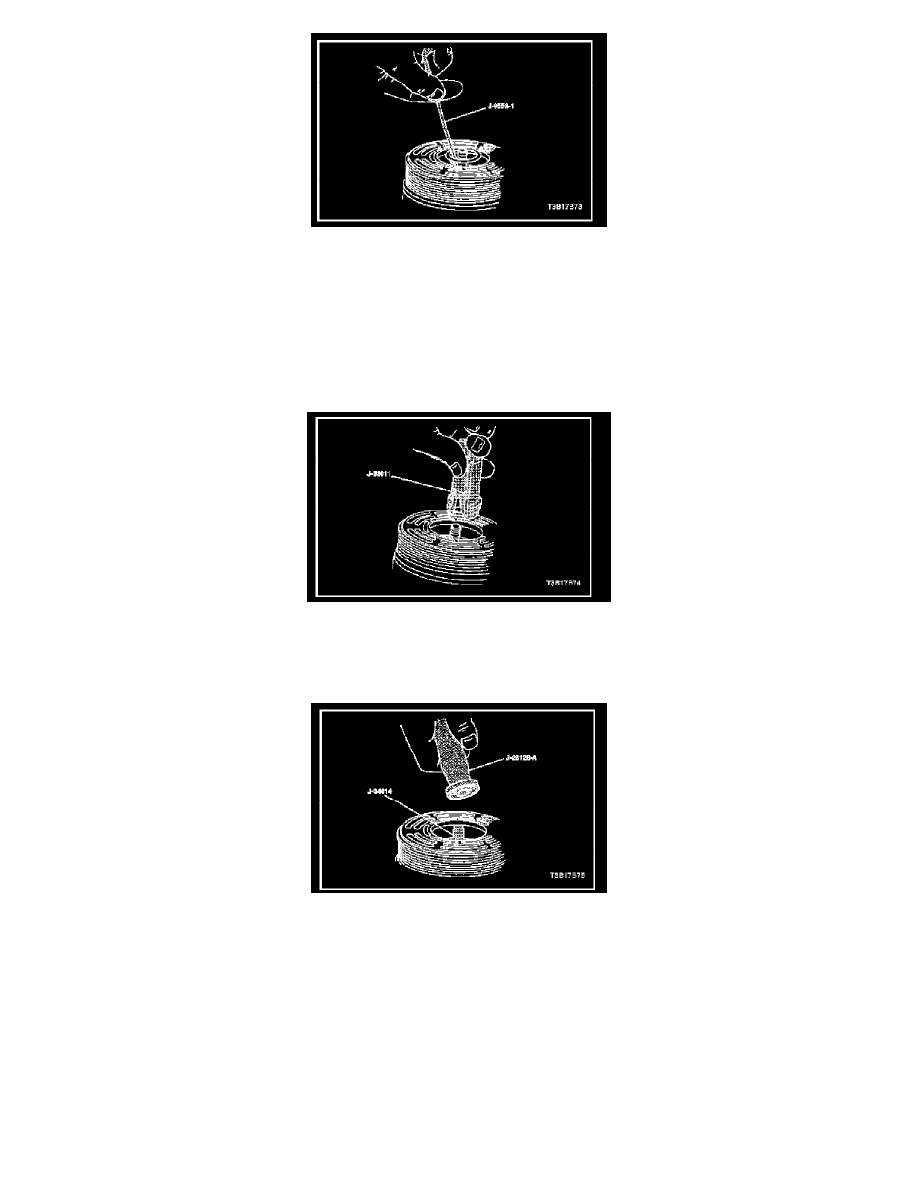
1. Dip the new seal O-ring in clean Polyalkaline Glycol (PAG) refrigerant oil and assemble the O-ring onto the O-ring installer J-33011.
2. Insert the O-ring installer J-33011 into the compressor neck until the installer "bottoms." Lower the moveable slide of the O-ring installer J-33011
to release the O-ring into the seal O-ring lower groove. (The top groove of the compressor neck is for the shaft seal retainer ring.) Rotate the
installer to seat the O-ring and then remove the installer.
3. Attach the shaft lip seal to the seal seat remover/installer J-23128-A. Dip the seal in clean PAG oil.
4. Install the shaft seal protector J-34614 in the seal. Place it over the shaft and push the seal into place with a rotary motion.
5. Use the snap ring pliers J-5403 to install the shaft seal retaining ring with its flat side against the seal.
6. Remove any excess oil around the shaft and the inside of the compressor housing neck.
7. Install the clutch plate and hub assembly.
8. Reposition the compressor in its mounting.
9. Adjust the tension on the serpentine accessory drive belt.
10. Connect the negative battery cable.
11. Evacuate and recharge the A/C system. Refer to Discharging, Adding Oil, Evacuating, and Charging Procedure for A/C System.