
Reno L4-2.0L (2006)
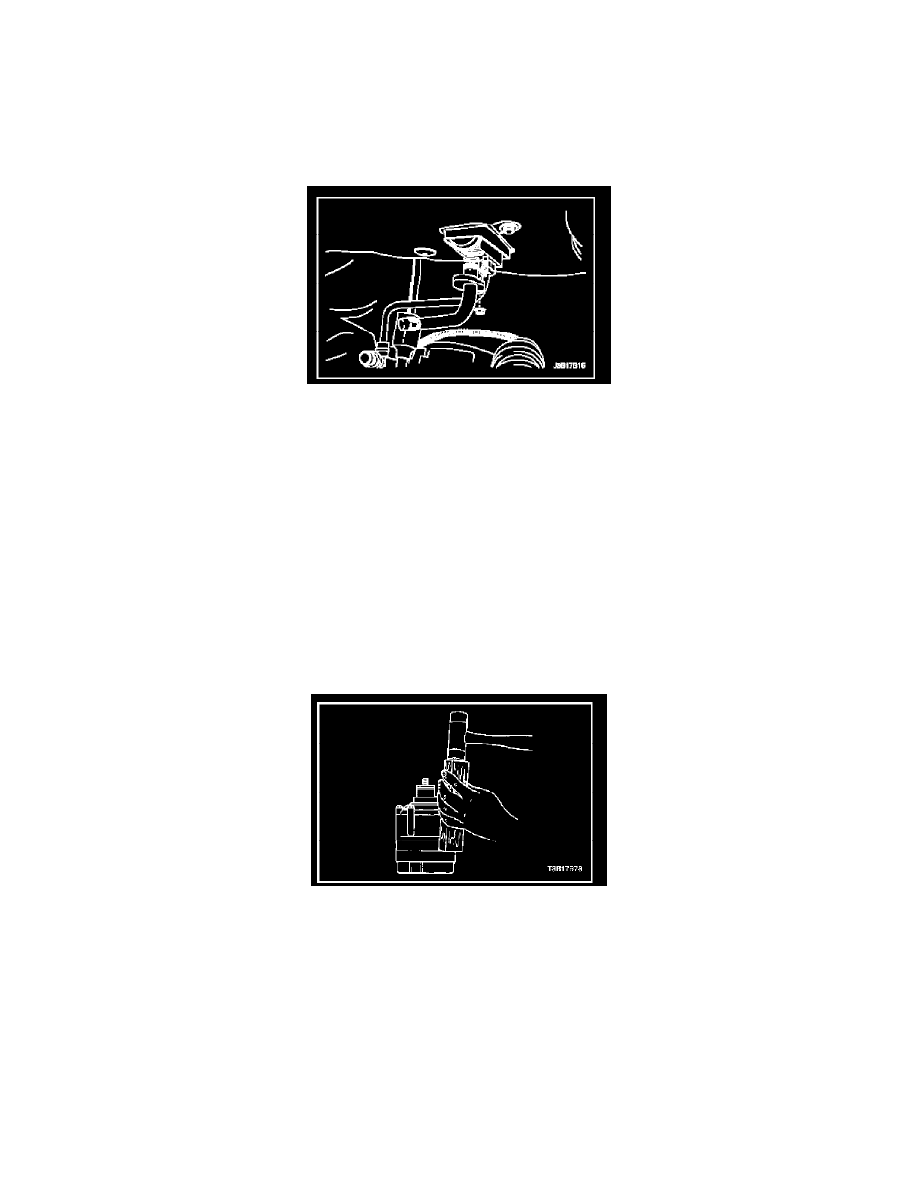
5. Install the suction hose block-to-expansion valve retaining nut at the fire wall.
Tighten: Tighten the suction hose block-to-expansion valve retaining nut to 14 Nm (10 ft. lbs.).
6. Connect the electrical connector at the pressure transducer.
7. Install the air cleaner housing bolts and the air filter housing assembly.
8. Connect the negative battery cable.
9. Evacuate and recharge the A/C system. Refer to Discharging, Adding Oil, Evacuating, and Charging Procedures for A/C System.
Cylinder-to-Front Head O-Ring Removal and Installation
Cylinder-to-Front Head O-ring Removal and Installation
Tools Required:
J-34993 Cylinder Alignment Rods
J-35372 Support Block
Removal
1. Recover the refrigerant. Refer to Discharging, Adding Oil, Evacuating, and Charging Procedures for A/C System.
2. Remove the compressor.
3. Drain the oil from compressor into a suitable container. Measure and record the amount of oil drained from the compressor. Discard all used oil.
4. Remove the clutch plate and hub assembly.
5. Remove the clutch rotor and bearing.
6. Remove the clutch coil.
7. Remove and discard the shaft seal parts.
8. Remove the compressor through-bolts. Remove and discard the gaskets.
9. Using a wooden block and a plastic-headed hammer, tap the compressor housing at the mounting locations to disengage the housing from the
compressor cylinder.
10. Remove the thrust washer and the bearing.
11. Remove and discard the compressor housing-to-cylinder O-ring.
Installation
1. Rest the rear head on the support block J-35372. Locate the control valve at the 6 o'clock position.
2. Install cylinder alignment rod J-34993 through the 11 o'clock and the 5 o'clock bolt holes.
3. Lubricate the new cylinder-to-compressor housing O-ring with clean Polyalkaline Glycol (PAG) oil.
4. Install the new O-ring in the cylinder O-ring groove.
5. Install the thrust washer and bearing in the same order as they were removed.