
Reno L4-2.0L (2006)
Wheels: Procedures
On-Vehicle Balancing
On-Vehicle Balancing
On-vehicle balancing will help correct vibrations due to brake drum, rotor, and wheel cover imbalances.
CAUTION: Do not allow the front suspension to hang free. When the drive axle is run at an extreme angle, extra vibrations can occur, as well as
damage to seals and joints.
1. During on-vehicle balancing, do not remove the balance weights from the off-vehicle dynamic balance.
2. If more than 1 ounce of additional weight is required, split the weight between the inner and the outer rim flanges.
3. Spin the driven tire and wheel assemblies using the engine.
Off-Vehicle Balancing
Off-Vehicle Balancing
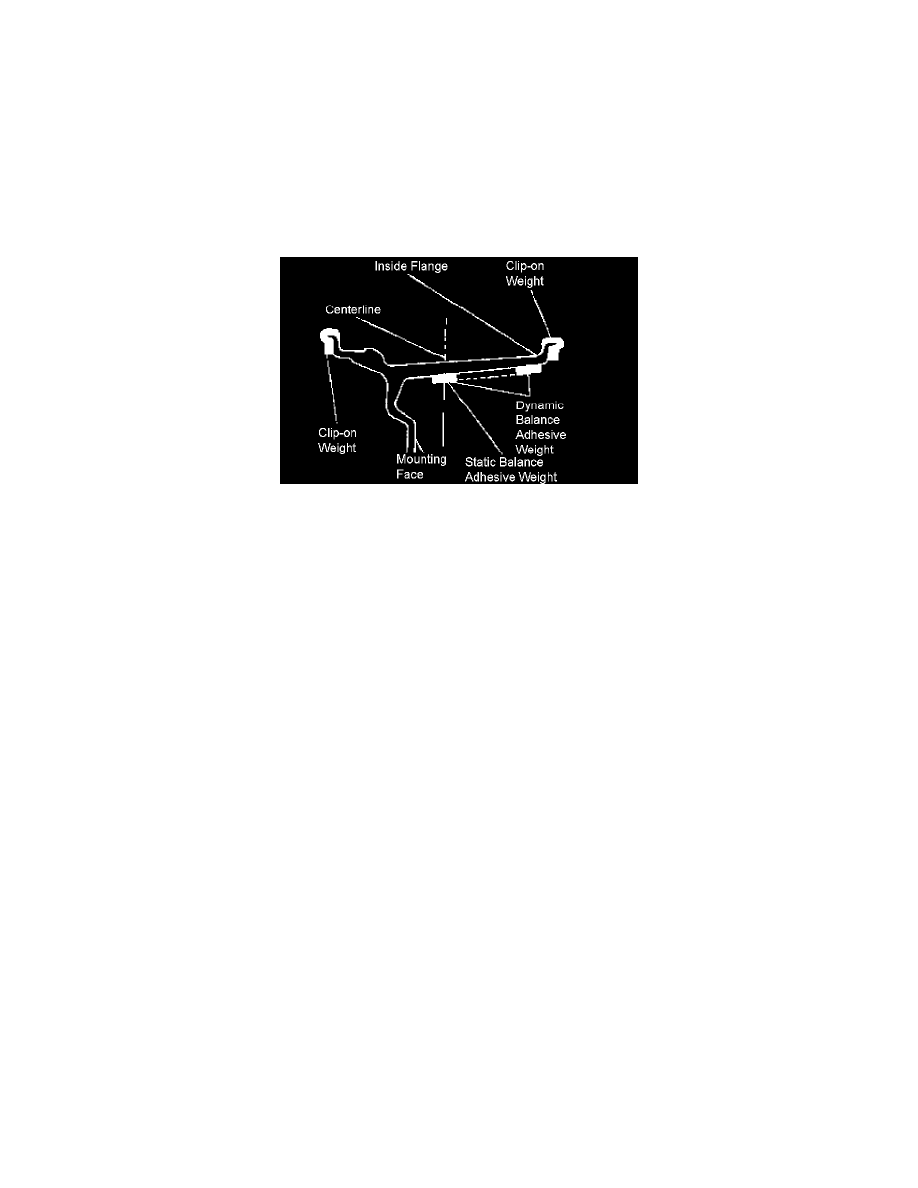
Perform wheel balancing with an electronic off-vehicle balancer. The balancer is easy to use and gives both a static and a dynamic balance. Unlike
on-vehicle balancing, the off-vehicle balancer does not correct for drum or rotor imbalance. This drawback is overcome by its accuracy (usually to
within 1/8 ounce). Secure the wheel on the balancer with a cone through the back side of the centerhole, not through the wheel bolt holes.
Alloy Wheel Porosity
Alloy Wheel Porosity
Wheel repairs that use welding, heating or peening are not approved.
1. Raise and suitably support the vehicle.
2. Remove the wheel.
3. Locate leaking areas by inflating the tire to 345 kPa (50 psi) and dipping the tire and wheel assembly into a water bath.
4. Mark the leak areas and remove the tire from the wheel.
5. Scuff the inside wheel surface at the leak area with 80-grit sandpaper. Clean the leak area with a general-purpose cleaner.
6. Apply a 3.3 mm (0.13 inch) thick layer of adhesive/sealant to the leak area. Allow it to dry for 12 hours.
7. Install the tire on the wheel. Inflate the tire to 345 kPa (50 psi) and check for leaks as in step 3.
8. Adjust the tire pressure to meet specifications.
9. Balance the wheel.
10. Install the wheel.
11. Lower the vehicle.
Alloy Wheel Refinishing
Alloy Wheel Refinishing
A protective clear or color coating is applied to the surface of the original equipment cast alloy wheels. Surface degradation can develop if this clear
coating is damaged or removed. This can happen at some automatic car wash facilities that use silicon carbide-tipped tire brushes to clean white walls
and tires. Once the protective coating is damaged, exposure to caustic cleaners or road salt causes further surface degradation. The following
procedure details how to strip, clean and recoat alloy wheels.
WARNING: To avoid serious personal injury, follow the manufacturer's recommendations and cautions when using these materials.
Required materials:
^
Amchem Alumi Prep No. 33. Stock No. DX533 or equivalent cleaning and conditioning chemical for alloys.
^
Amchem Alodine No. 1001. Stock No. DX50T or equivalent coating chemical for alloys.
^
Ditzler Delclear Acrylic Urethane Clear, Stock No. DAU-75 or equivalent.
^
Ditzler Delthane Ultra-Urethane Additive, Stock No. DXR-80 or equivalent.