
Samurai 2WD L4-1324cc 1.3L SOHC 5 Carb 8V (1987)
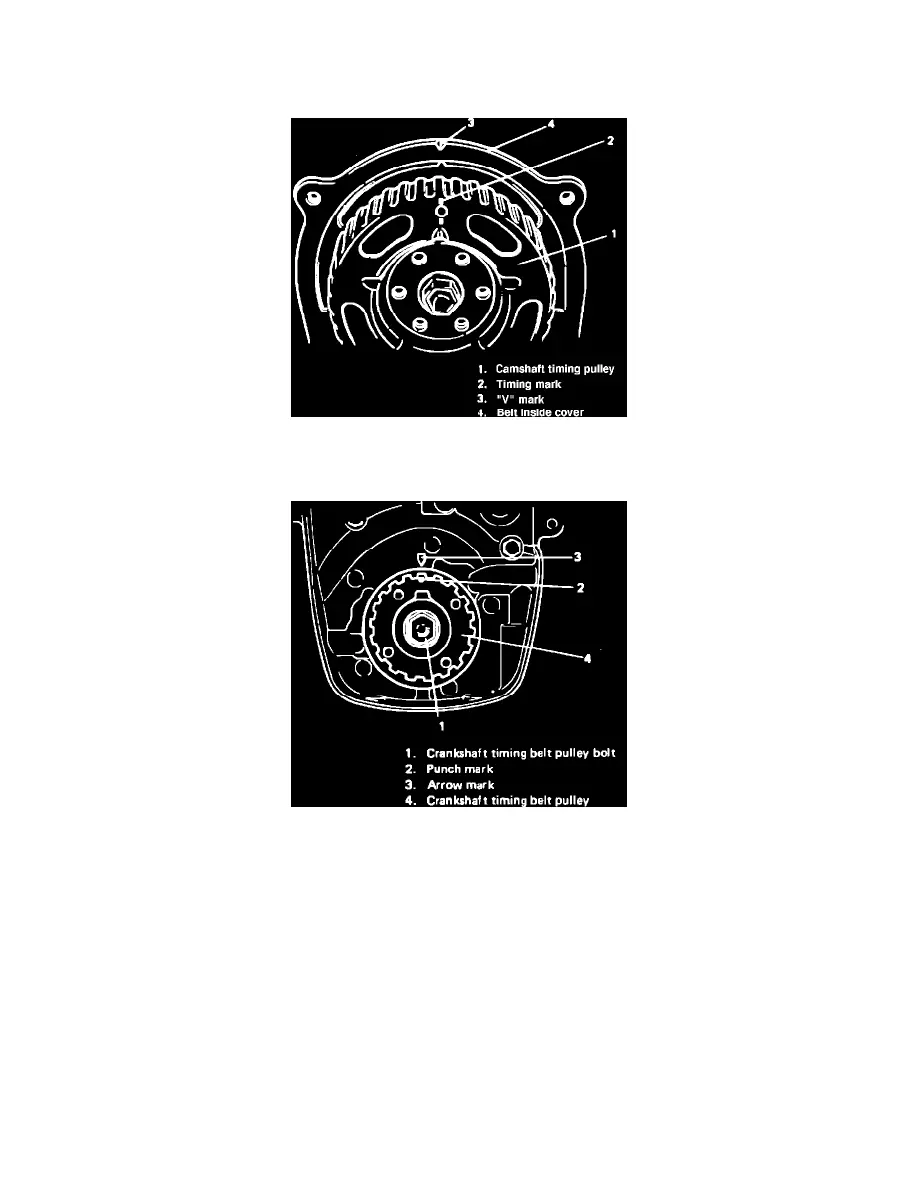
Fig. 2 Timing belt installation & removal
6.
Loosen tensioner nut and bolt, Fig. 2, and remove timing belt.
7.
Remove valve cover, then loosen all valve adjusting screws all the way to allow free rotation of camshaft.
Fig. 3 Camshaft pulley alignment
8.
Rotate camshaft pulley clockwise and align timing mark on camshaft pulley with ``V'' mark on belt inside cover as shown in Fig. 3.
Fig. 4 Aligning timing belt pulley punch mark with oil pump arrow
9.
Rotate crankshaft clockwise using a 17 mm wrench on crankshaft timing belt pulley bolt, Fig. 4, and align punch mark on timing belt pulley with
arrow mark on oil pump as shown in Fig. 4.