
Samurai 2WD L4-1324cc 1.3L SOHC 5 Carb 8V (1987)
Alternator: Testing and Inspection
When testing alternator, note the following:
1.
Do not reverse polarities of IG and L terminals.
2.
Do not short IG and L terminals. Always connect these terminals through a lamp.
3.
Do not connect any load between L & E terminals.
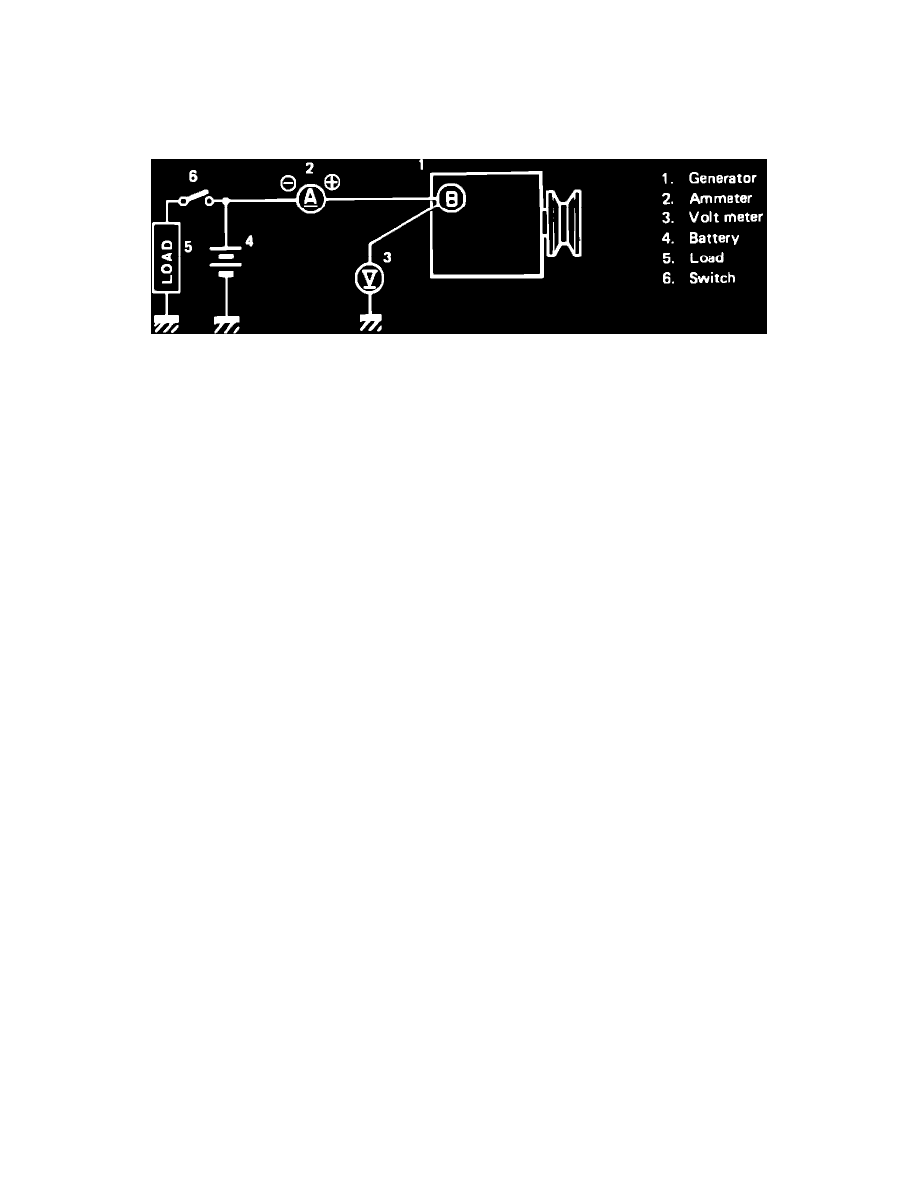
Fig. 1 Alternator test connections
UNDERCHARGED BATTERY
1.
Ensure that undercharged condition has not been caused by accessories left on for extended periods.
2.
Check drive belt for proper tension.
3.
Inspect wiring for defects. Ensure that all connections are clean and tight, including slip connectors at alternator and bulkhead. Also, check battery
cable connections at battery, starter and ignition ground cable.
4.
Connect a suitable voltmeter and ammeter as shown in Fig. 1. Connect voltmeter between alternator B terminal and ground. Connect ammeter
between alternator B terminal and battery positive terminal.
5.
Perform no-load check as follows:
a. Increase engine speed from idle to 2000 RPM and note readings. Voltage readings will vary with regulator case temperature.
b. If voltage is higher than 14.2-14.8 volts at 77°F, replace IC regulator.
c. If voltage is below specification, check IC regulator and alternator by measuring voltage at B terminal while grounding F terminal. If voltage
is above specification, replace IC regulator. If voltage is below specification, test alternator.
6.
Perform load check as follows:
a. Run engine at 2000 RPM and switch on headlights and heater blower motor. Ensure that current is at least 20 amps, if less, alternator is
defective.
OVERCHARGED BATTERY
If an overcharging condition exists, such as spewing of electrolyte, check field windings for grounds and shorts. If defective, replace rotor and test
regulator using a suitable tester.