Samurai 4WD L4-1324cc 1.3L SOHC 5 Carb 8V (1986)

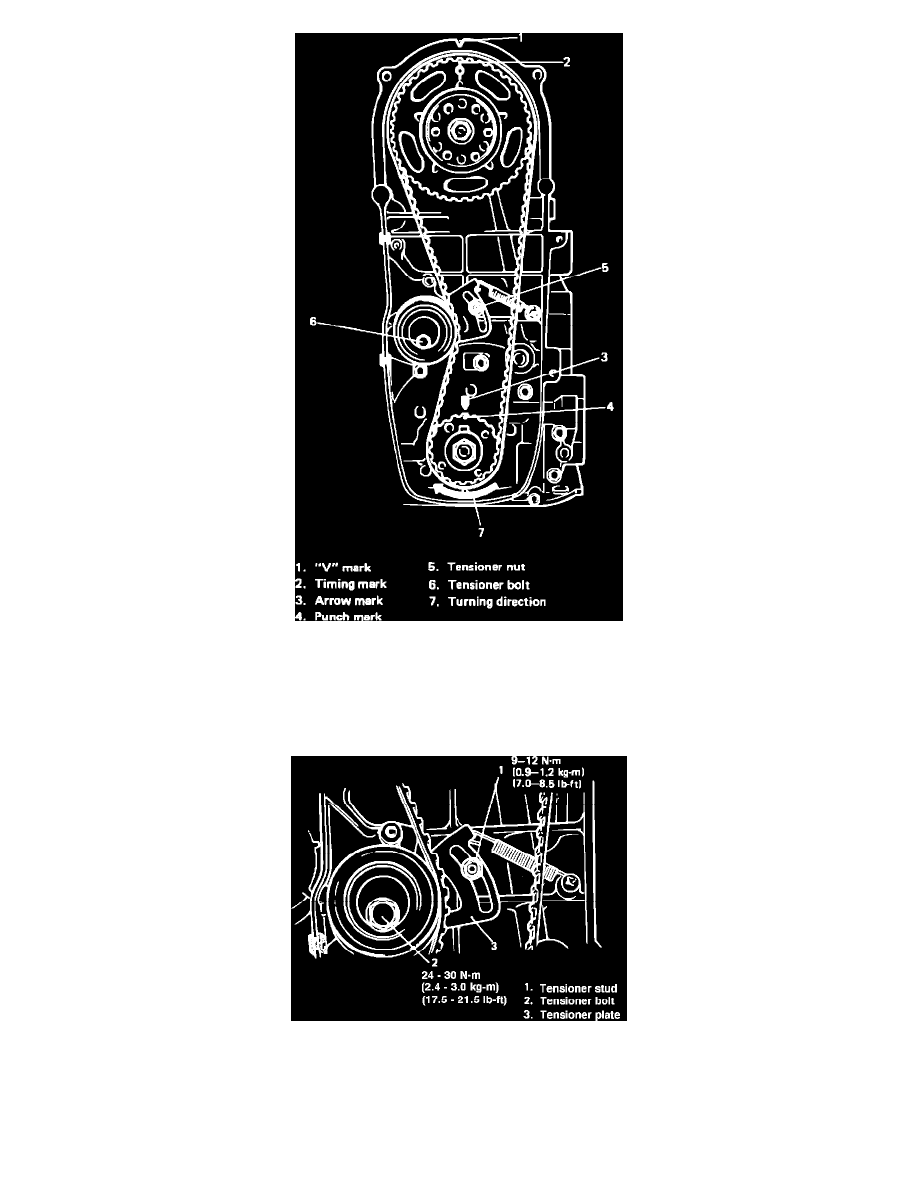
Fig. 2 Timing belt installation & removal
*** UPDATED BY TSB-ST-017-6 AUGUST, 1990.
10.
With all timing marks aligned, install timing belt so that drive side of belt is free from any slack with tensioner plate pushed up by finger, Fig. 2.
When installing timing belt, match arrow on timing belt with rotating direction of crankshaft.
Note: The belt is uni-directional and the arrows must point toward the rotation of the engine. Damage may occur if improperly installed.
Fig. 5 Adjusting timing belt tension
11.
Rotate crankshaft two complete revolutions to allow belt to be free of any slack, then tighten tensioner stud to 7-8.5 ft. lbs. and tensioner bolt to
17.5-21.5 ft. lbs., Fig. 5.
12.
Install timing belt cover and tighten bolts to 7-8.5 ft. lbs.
13.
Install water pump belt and pulley.
