
Sidekick JS 2D 2WD L4-1.6L (1998)
4) Install suitable vinyl tube onto injector nozzle to prevent fuel from splashing out when injecting.
5) Put graduated cylinder under injector as shown.
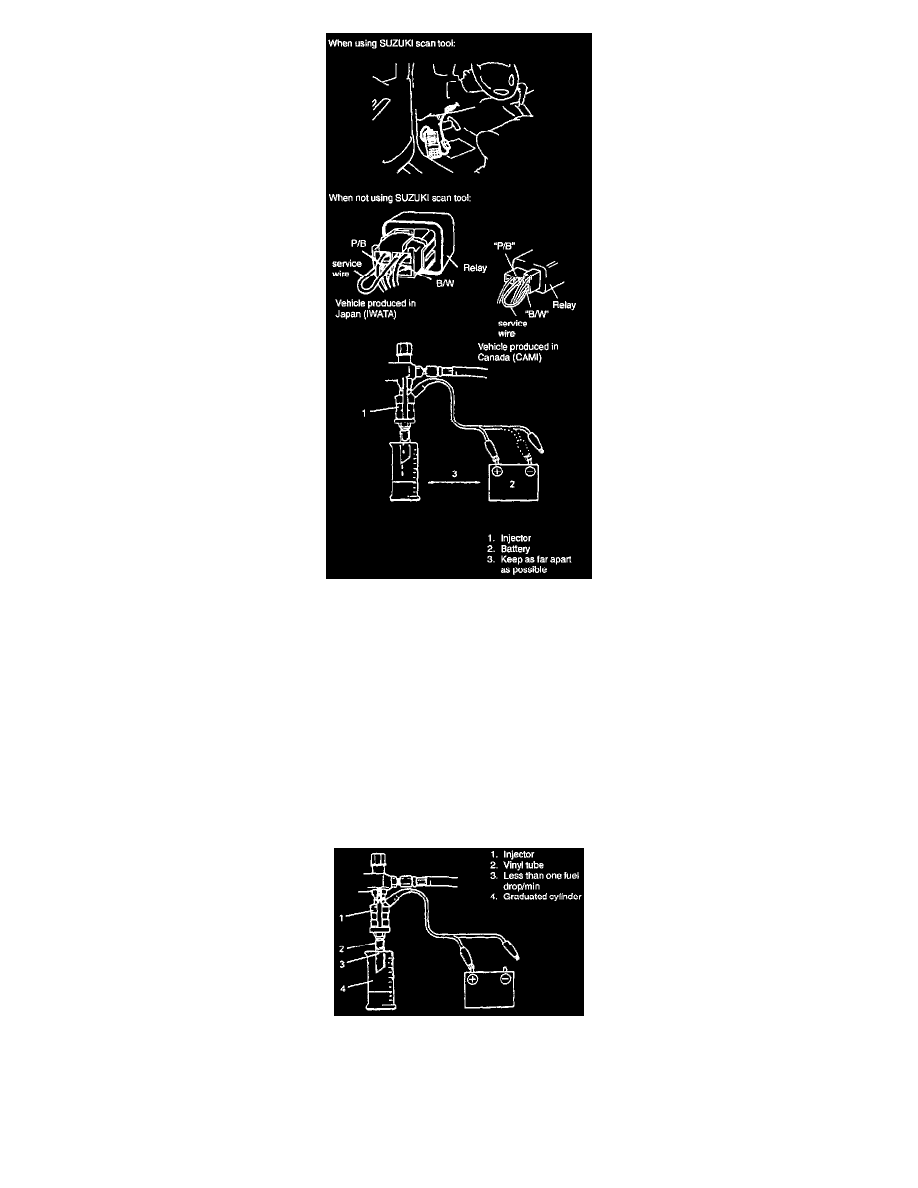
6) Operate fuel pump and apply fuel pressure to injector as follows. When using SUZUKI scan tool:
(1) Connect SUZUKI scan tool to DLC with ignition switch OFF.
(2) Turn ignition switch ON, clear DTC and select "MISC TEST' mode on SUZUKI scan tool.
(3) Turn fuel pump ON by SUZUKI scan tool. When not using SUZUKI scan tool:
Using wire harness as thick as the one used for fuel pump circuit, connect Black/White and Pink/Black wire harness terminals of fuel pump
relay coupler and turn ignition switch ON.
7) Apply battery voltage to injector for 15 seconds and measure injected fuel volume with graduated cylinder.
Test each injector two or three times.
If not within specification, replace injector.
Injected fuel volume:
39 - 49 cc/15 sec. (1.32 - 1.67 US oz./15 sec.; 1.37 - 1.72 Imp. oz/15 sec.)
8) Check fuel leakage from injector nozzle. Do not operate injector for this check (but fuel pump should be at work).
If fuel leaks more than following specifications, replace.
Fuel leakage: Less than 1 drop/minute
9) After completion of this check, be sure to turn fuel pump OFF.