
Sidekick JX 2D 4WD L4-1.6L (1998)
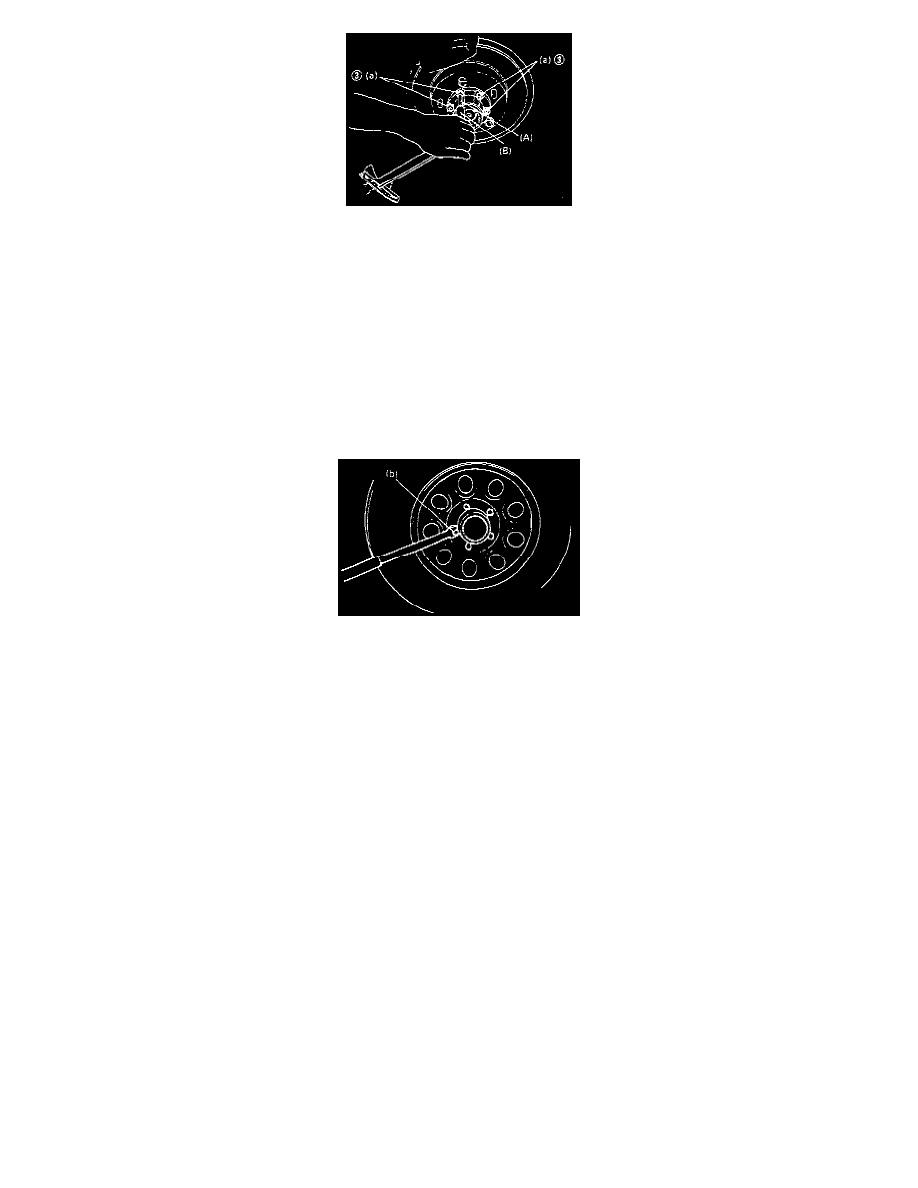
2. Using special tools, (A) and (B), tighten bolts (3) specified torque.
Special Tool:
(A): 09900-00414
(B): 09900-00411 or equivalents.
Tightening Torque (a): 33 Nm (24 ft. lbs.)
3. Install O-ring correctly in the groove provided inside hub cover.
Tighten the cover to hub body assembly by hand.
NOTE: Upon completion of operation check mentioned in the next item "post-assembly confirmation", be sure to firmly tighten this cover using
an oil filter wrench, etc.
4. Install front wheels and tighten wheel nuts to specified torque.
Tightening Torque (b): 95 Nm (69 ft. lbs.)
5. Dismount the vehicle from the lift, and be sure to carry out the operation check of free wheeling hub mentioned in "post-assembly confirmation".
Post-Assembly Confirmation
Confirm automatic free wheeling hub for proper operation in the sequence described below.
1. Set transfer gear shift lever to 4H or 4L position, and move, the car 2 m (6.5 ft.) or more forward slowly.