
Replacement of Piston Ring for Sidekick JX 4D Hard Top 4WD L4-16L (1997)
Piston Ring: Service and Repair
Replacement
REMOVAL
1. Remove cylinder head from cylinder block as previously outlined.
2. Drain engine oil.
3. Remove oil pan and oil pump strainer as previously outlined.
4. Mark cylinder number on all pistons, connecting rods anti rod bearing caps, using silver pencil or quick drying paint.
5. Remove rod bearing caps.
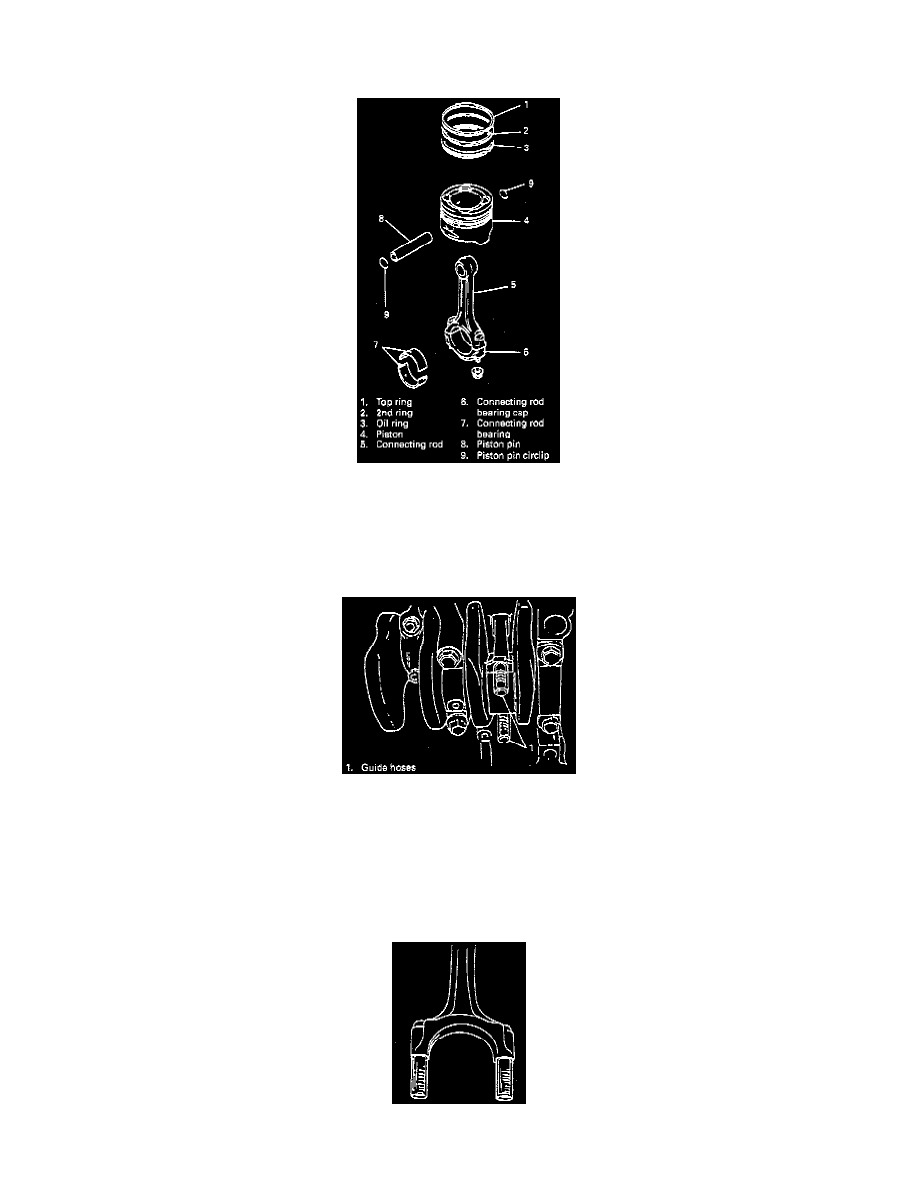
6. Install guide hose over threads of rod bolts. This is to prevent damage to bearing journal and rod bolt threads when removing connecting rod.
7. Decarbon top of cylinder bore before removing piston from cylinder.
8. Push piston and connecting rod assembly out through the top of cylinder bore.
INSTALLATION
1. Apply engine oil to pistons, rings, cylinder walls, connecting rod bearings and crankpins.
NOTE: Do not apply oil between connecting rod and bearing or between bearing cap and bearing.
2. Install guide hoses over connecting rod bolts. These guide hoses protect crankpin and threads of rod bolt from damage during installation of