
Sidekick JX 4D Hard Top 4WD L4-1.6L (1997)
Gear Shift Lever Case: Service and Repair
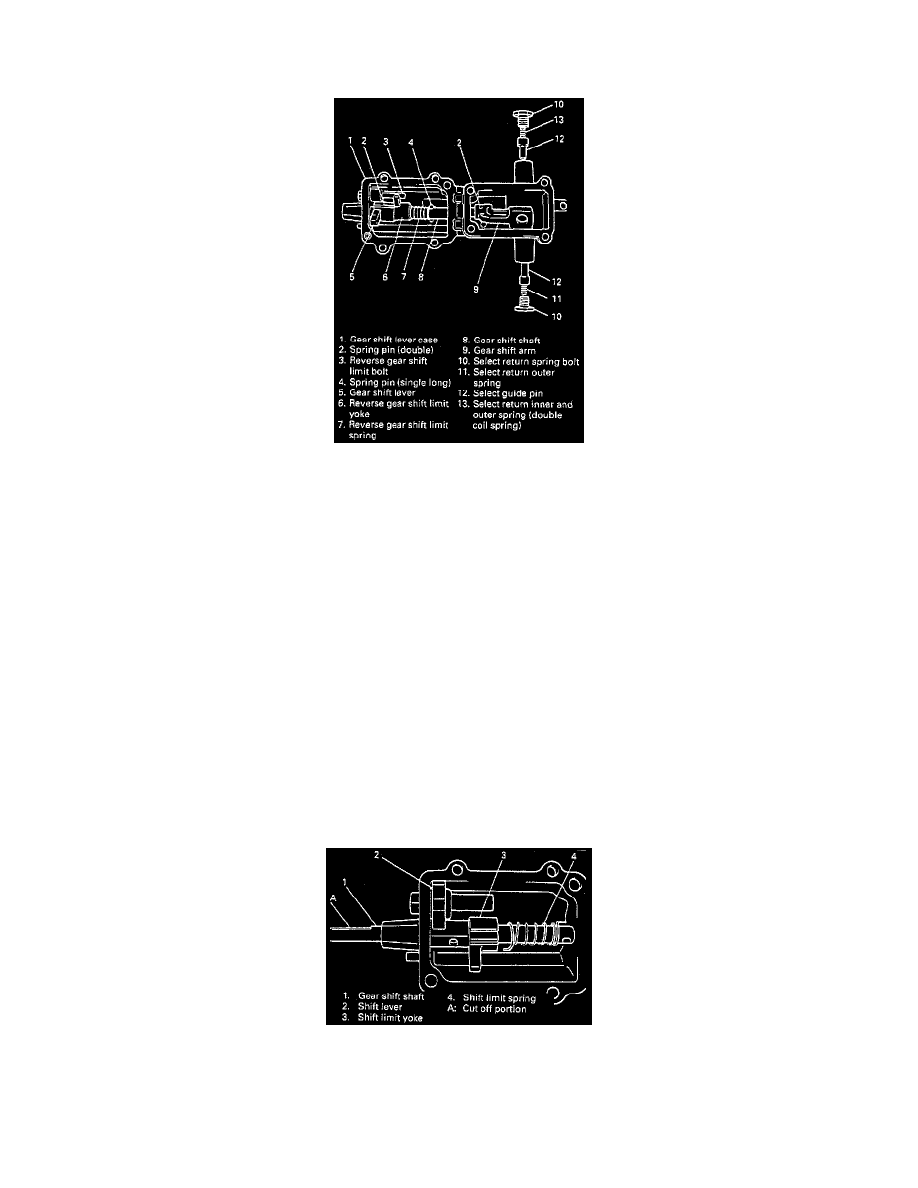
Gear Shift Lever Case
DISASSEMBLY
1. Remove 4 screws with screwdriver and remove case plate.
1. With case supported with soft jawed vise, remove select return spring bolt with wrench.
NOTE: Use aluminum plates between vise and case to protect case against damage.
3. Using spring pin remover, drive out spring pin for gear shift arm.
4. Drive out spring pin for limit spring.
5. Drive out spring pin for gear shift lever.
6. Pull out gear shift shaft a little and take out gear shift arm.
NOTE:
-
Case plug may come off during above work.
-
If it is not possible to take out gear shift arm in above step 6, do it after following steps 7 and 8.
7. Push gear shift shaft inward and drive out spring pin verse gear shift limit yoke.
8. Pull out gear shift shaft from case.
INSPECTION AND ASSEMBLY
1. Wash and inspect each part and replace if necessary. Also check items as described below and correct whatever necessary carefully by using
reamer, oilstone and the like, wash it thoroughly and reassemble them. Items to be checked are;
1. Shift shaft should go into case smoothly.
2. Shift lever, limit yoke and shift arm should go into shift shaft smoothly.
2. Insert shift shaft as shown while making sure that inner parts are in proper direction.
NOTE:
-
Cut off in shift shaft should face downward when shift shaft is installed.
-
Use care for installing direction of shift limit spring.