
Swift L4-1298cc 1.3L DOHC 3 MFI 16V (1989)
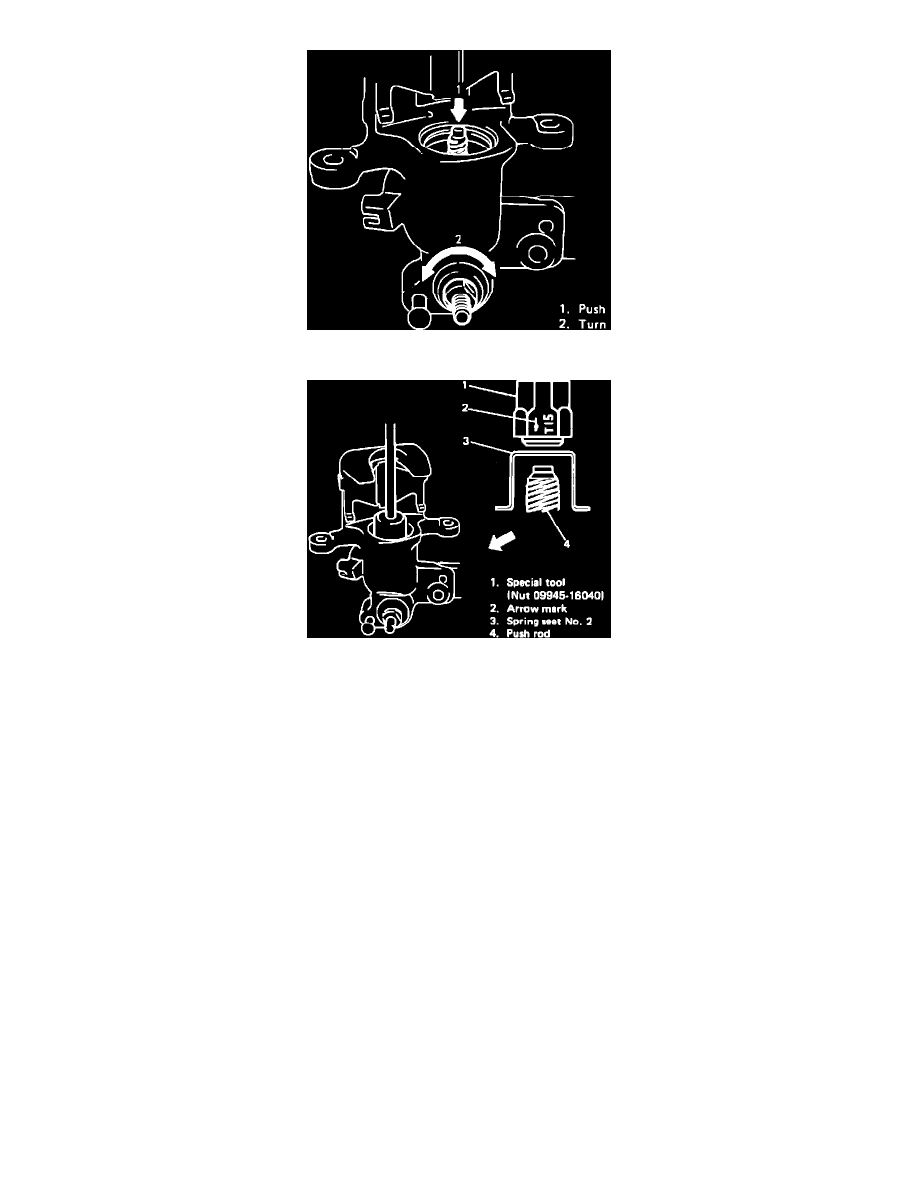
Fig. 12 Checking Push Rod Movement
Fig. 13 Tightening Coil Spring Assembly
Refer to Fig. 7, during overhaul procedure.
1.
Remove caliper as outlined under Removal/Installation. Clean caliper with brake fluid.
2.
Remove piston and boot by turning piston counterclockwise with tool shown in Fig. 6.
3.
Remove piston seal. Do not damage inside of cylinder.
4.
Using snap ring pliers, remove snap ring.
5.
Remove spring seat No. 2, coil spring and seat No. 1.
6.
Using snap ring pliers, remove key plate snap ring, then key plate, push rod and rod.
7.
Remove return spring, Fig. 8, then lever, camshaft and camshaft boot.
8.
Reverse procedure to install, noting the following:
a. Position camshaft bearing as shown, Fig. 9.
b. Determine camshaft position in the cylinder as shown in Fig. 10.
c. Install rod, seal ring, key plate onto push rod, then install as an assembly. Ensure pin A of key plate fits into hole B in cylinder when installing,
Fig. 11.
d. Turn camshaft while pressing screw part of push rod by hand. Ensure push rod moves about .039 inch (1 mm) up and down, Fig. 12.
e. After installation of seat No. 1, coil spring and spring seat No. 2, tighten with tool shown in Fig. 13, until spring seat No. 2 lightly contacts
snap ring fixing key plate. Install snap ring, then remove tool.
f.
Torque camshaft lever nut to specifications.