
Swift L4-1298cc 1.3L DOHC 3 MFI 16V (1989)
Suspension Spring ( Coil / Leaf ): Service and Repair
Rear Coil Spring & Suspension Arm
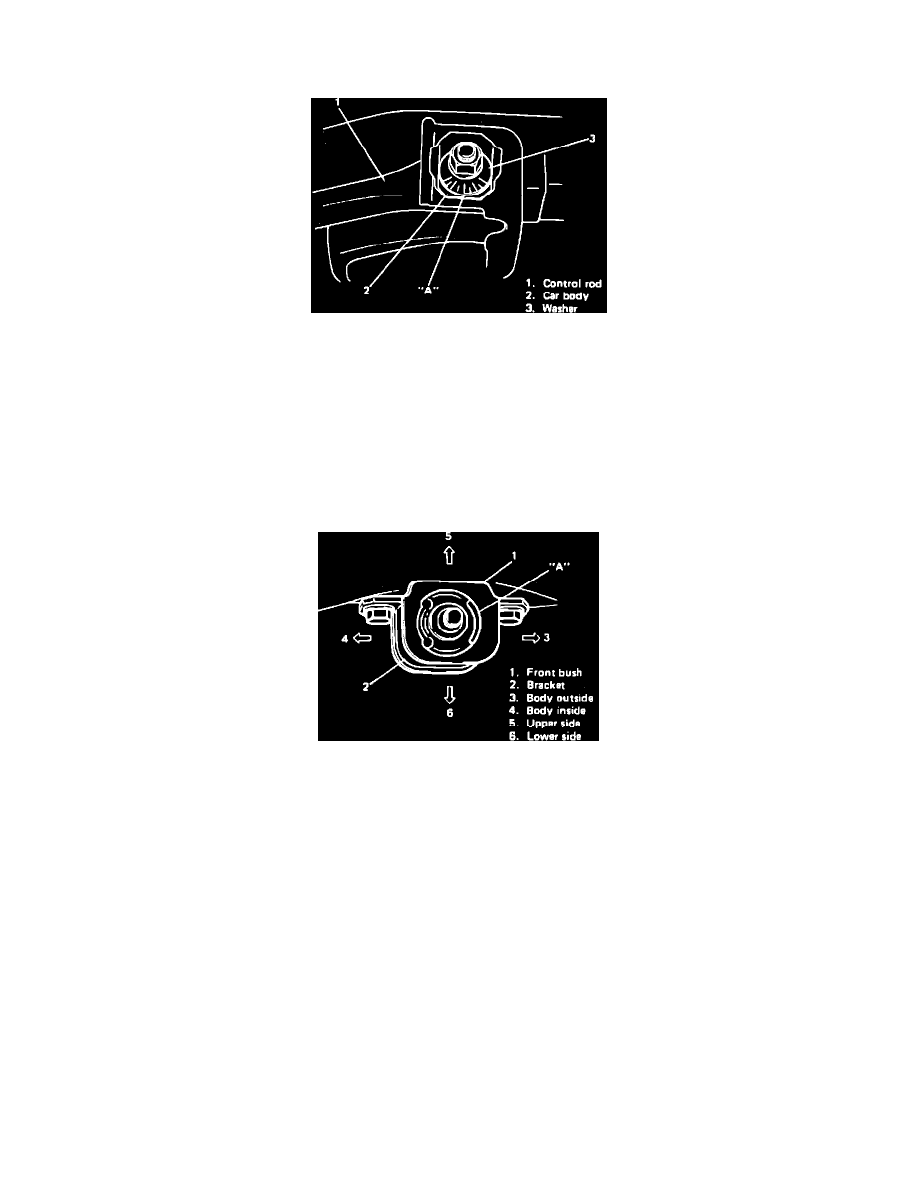
Fig. 4 Confirming Rear Toe Setting
1.
Raise and support vehicle, then remove rear wheels.
2.
Confirm rear toe setting, Fig. 4.
3.
Remove control rod inside bolt and outside nut.
4.
Disconnect stabilizer bar from suspension arm, then loosen rear mount nut of suspension arm.
5.
Loosen front nut of suspension arm, then disconnect parking brake cable clamp from suspension arm.
6.
Place suitable jack under suspension arm, then remove lower mount nut of knuckle.
7.
Separate lower mount of knuckle from suspension arm by pulling brake assembly to outside of vehicle.
8.
Lower jack gradually and remove coil spring.
9.
Remove suspension arm front bracket attaching bolts, then the suspension arm.
Fig. 5 Installing Suspension Arm Bushing
10.
Reverse procedure to install, noting the following:
a. Install suspension arm with slit A facing outside of body. Ensure bushing is installed properly in regard to its vertical direction, Fig. 5.
b. Torque all bolts/nuts to specifications.
c. Set rear toe adjustment as confirmed before removal.