
Swift L4-1298cc 1.3L SOHC MFI (1997)
Shift Solenoid: Service and Repair
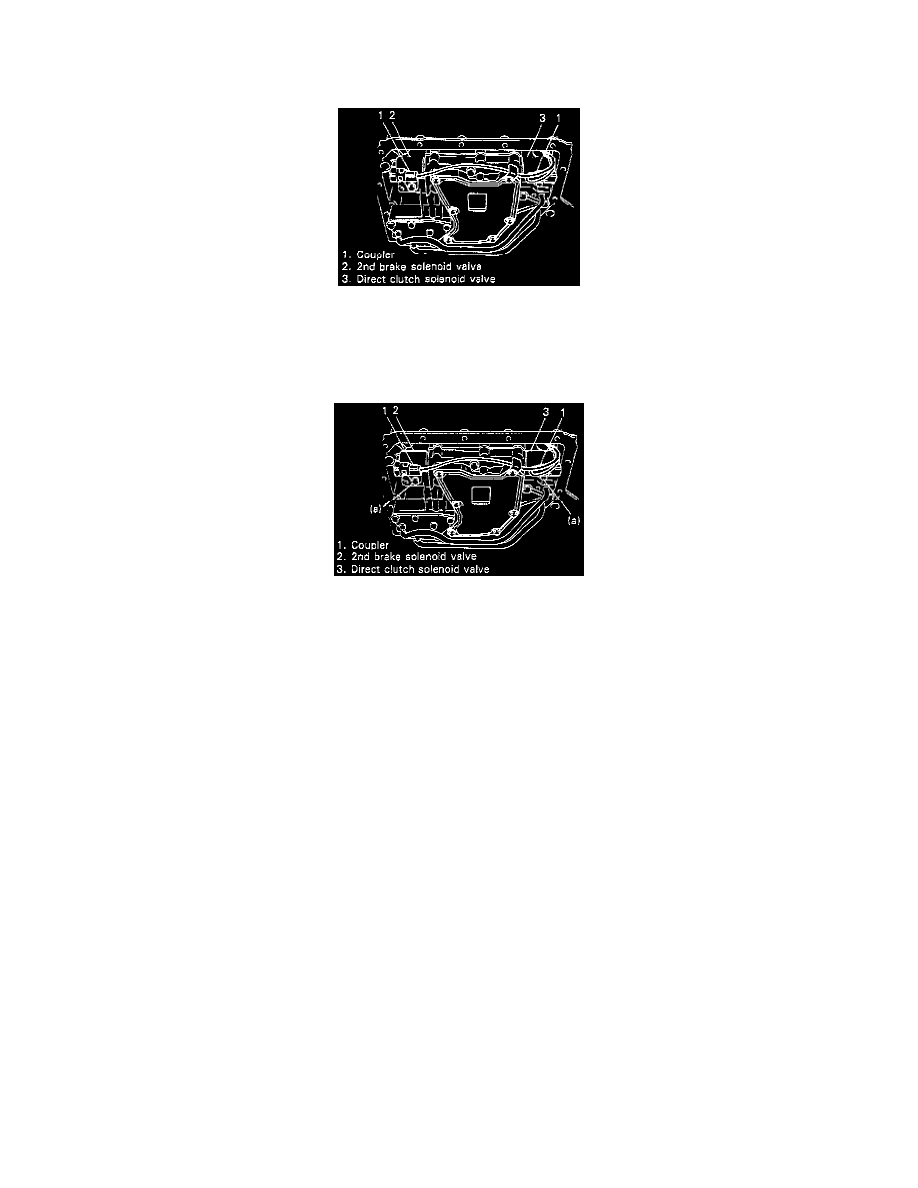
REMOVAL
1. Drain transmission fluid and remove oil pan.
2. Disconnect couplers from direct clutch and 2nd brake solenoid valves, and then remove solenoid valves.
3. Remove solenoid valve wire harness with grommet from upper side.
INSTALLATION
1. Install solenoid valve wire harness to transmission case. If grommet seal (O-ring) is damaged, replace.
2. Install direct clutch and 2nd brake solenoid valves to lower valve body. If solenoid seal (O-ring) is damaged, replace.
Tightening Torque (a): 7 - 9 N.m (66 - 78 inch lbs.).
3. Connect solenoid valve wires to each solenoid valve.
4. Install oil pan to transmission and then refill transmission fluid.
5. Connect solenoid valve wire harness coupler.
6. Upon completion of installation, warm up transmission and check for fluid level and leakage.