
Swift GL L4-1298cc 1.3L SOHC MFI (2000)
Lateral Stabilizer Rod: Service and Repair
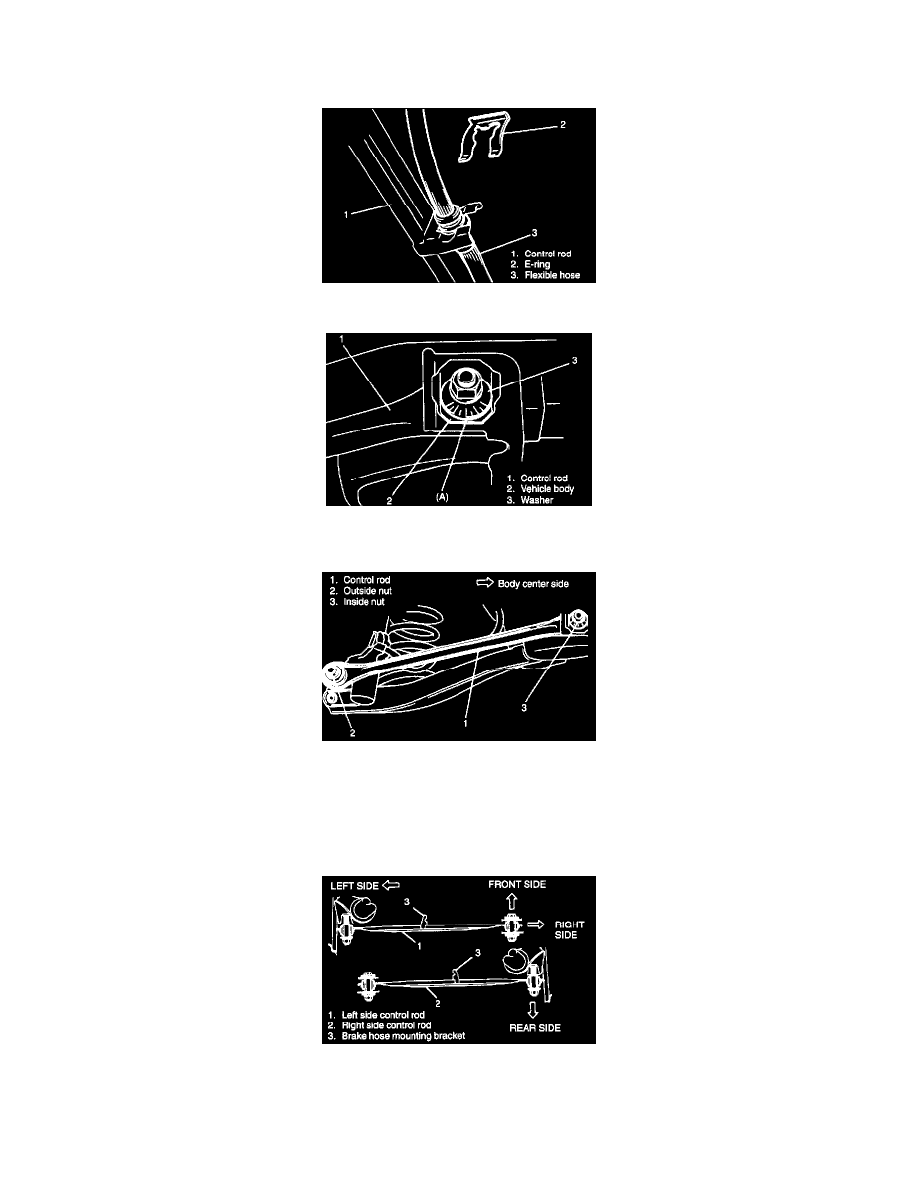
CONTROL ROD REMOVAL
1. Hoist vehicle and remove wheel.
2. Disconnect brake flexible hose from control rod.
3. To facilitate toe adjustment after reinstallation, take following preparatory step before removing control rod. Confirm which one of lines stamped
on washer is in the closest alignment with stamped line (A) on vehicle body or put match marks.
4. Remove control rod outside nut.
5. Loosen control rod inside nut (body center side). Hold inside bolt with another wrench to prevent it from turning as nut is turned.
6. Remove control rod inside bolt and control rod.
INSTALLATION
Install in reverse order of removal procedure, noting following items.
1. To determine installing direction of control rod, use installed position and shape of brake flexible hose mounting bracket welded on it, referring to
figure shown which shows both control rods installed.