
Verona L6-2.5L (2005)
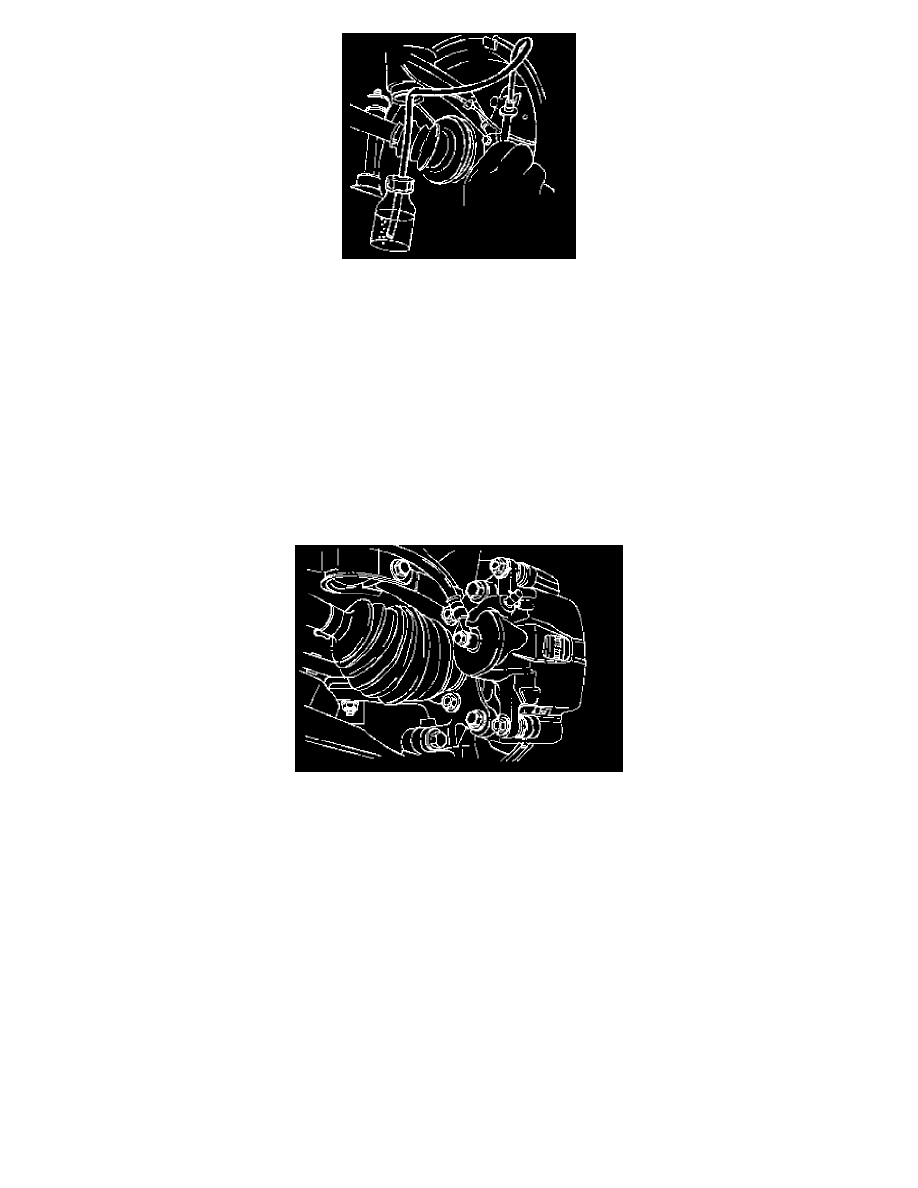
12. Attach a transparent tube over the rear bleeder valve at the right rear caliper. Allow the tube to hang submerged in the brake fluid in a transparent
container. (After the right rear caliper is bled in the following steps, use this procedure at the left front, the left rear, and the right front bleeder
valves.)
13. Slowly push and hold the brake pedal. Avoid rapid pumping of the brake pedal.
14. While the brake pedal is pushed down, loosen the bleeder valve to purge the air from the caliper.
15. After the air bubbles have escaped into the container of brake fluid, slightly tighten the rear bleeder valve.
16. Slowly release the brake pedal. Wait 15 seconds before proceeding with the next step.
17. Repeat Steps 13-16 until all of the air is removed. You will know all of the air is removed when no bubbles appear in the container when the
bleeder valve is loosened. Keep the master cylinder reservoir at least one-half full during the bleeding operation.
NOTE: Keep brake fluid away from painted surfaces because brake fluid will damage the paint finish.
18. Tighten the bleeder valve.
Tighten: Tighten the bleeder valve to 6 Nm (53 inch lbs.)
19. Bleed the remaining calipers in the following order: left front, left rear, and right front. Use the procedure in Steps 12-17.
20. After all calipers have been bled, check the brake pedal for sponginess. If the brake pedal is not firm, repeat the entire bleeding procedure to
correct this condition.