
Verona L6-2.5L (2005)
Compressor Clutch Coil: Service and Repair
Clutch Coil Removal and Installation
Clutch Coil Removal
Tools Required:
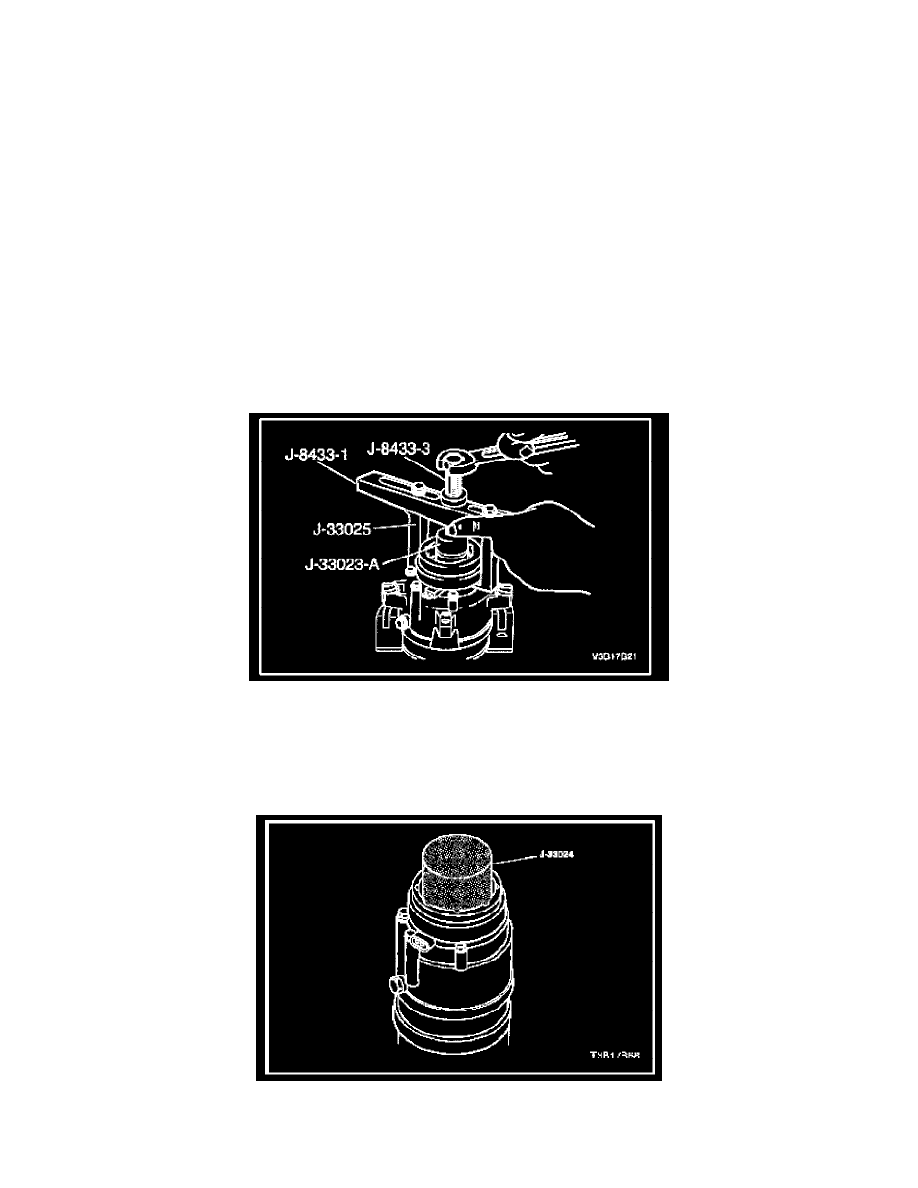
J-8433-1 Puller Crossbar
J-8433-3 Forcing Screw
J-33023-A Puller Pilot
J-33024 Clutch Coil Installer Adapter
J-33025 Clutch Coil Puller Legs
J-34992 Compressor Holding Fixture
1. Disconnect the negative battery cable.
2. Recover the refrigerant. Refer to Discharging, Adding Oil, Evacuating, and Charging Procedures for A/C System.
3. Remove the compressor. Refer to Compressor Removal.
4. Remove the clutch plate and hub assembly. Refer to Clutch Plate and Hub Assembly Disassembly.
5. Remove the clutch rotor and bearing. Refer to Clutch Rotor and Bearing Disassembly.
6. Mark the clutch coil terminal location on the compressor housing.
7. Install the puller pilot J-33023-A on the compressor housing. Also install the puller cross bar J-8433-1 with the clutch coil puller legs J-33025.
8. Tighten the forcing screw J-8433-3 against the puller pilot J-33023-A to remove the clutch coil.
Clutch Coil Installation
1. Place the clutch coil installer adapter J-33024 over the internal opening of the clutch coil housing and align the clutch coil installer adapter
J-33024 with the compressor housing.
2. Place the clutch coil installer adapter J-33024 over the internal opening of the clutch coil housing and align the clutch coil installer adapter
J-33024 with the compressor housing.
3. Center the puller crossbar J-8433-1 in the countersunk center hole of the clutch coil installer adapter J-33024. Install the through-bolts of the