
Verona L6-2.5L (2005)
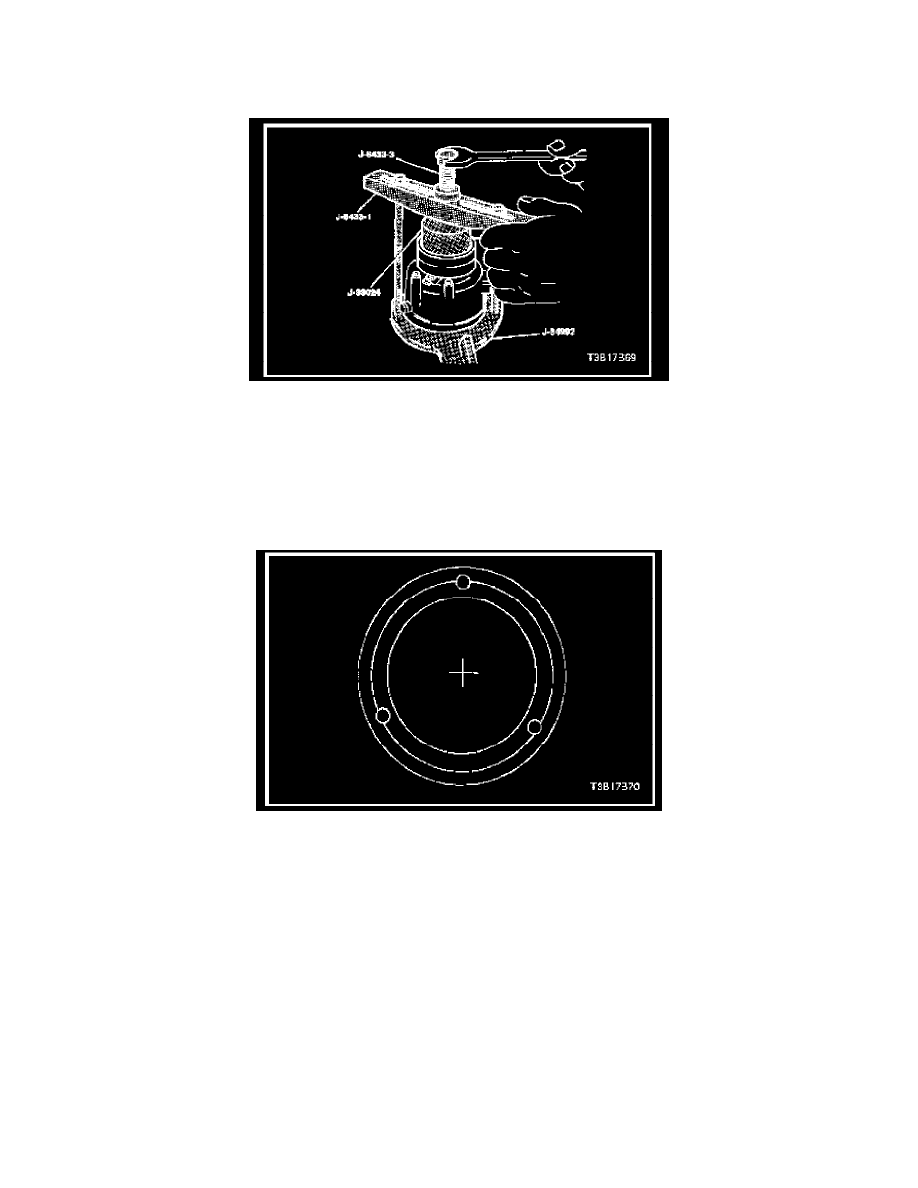
compressor holding fixture J-34992 and the washers in the crossbar slots. Thread them into the holding fixture to the full thickness of the holding
fixture.
NOTE: Be sure the clutch coil and the installer stay "in-line" during installation.
4. Turn the forcing screw J-8433-3, or use a suitable vise, to force the clutch coil onto the compressor housing.
5. When the clutch coil is fully seated on the compressor housing, use a 3 mm (1/8 inch) diameter drift punch and stake the housing at three places,
120 degrees apart, to ensure that the clutch coil will remain in position. Stake point size should be only one-half the area of the punch tip and
approximately 0.28 to 0.35 mm (0.010 to 0.015 inch) deep.
6. Install the clutch rotor and bearing assembly. Refer to Clutch Rotor and Bearing Assembly.
7. Install the clutch plate and hub assembly. Refer to Clutch Plate and Hub Assembly Reassembly.
8. Install the compressor. Refer to Compressor Installation.
9. Connect the negative battery cable.
10. Evacuate and recharge the A/C system. Refer to Discharging, Adding Oil, Evacuating, and Charging Procedures for A/C System.