
Verona L6-2.5L (2005)
9. Remove the plunger return spring.
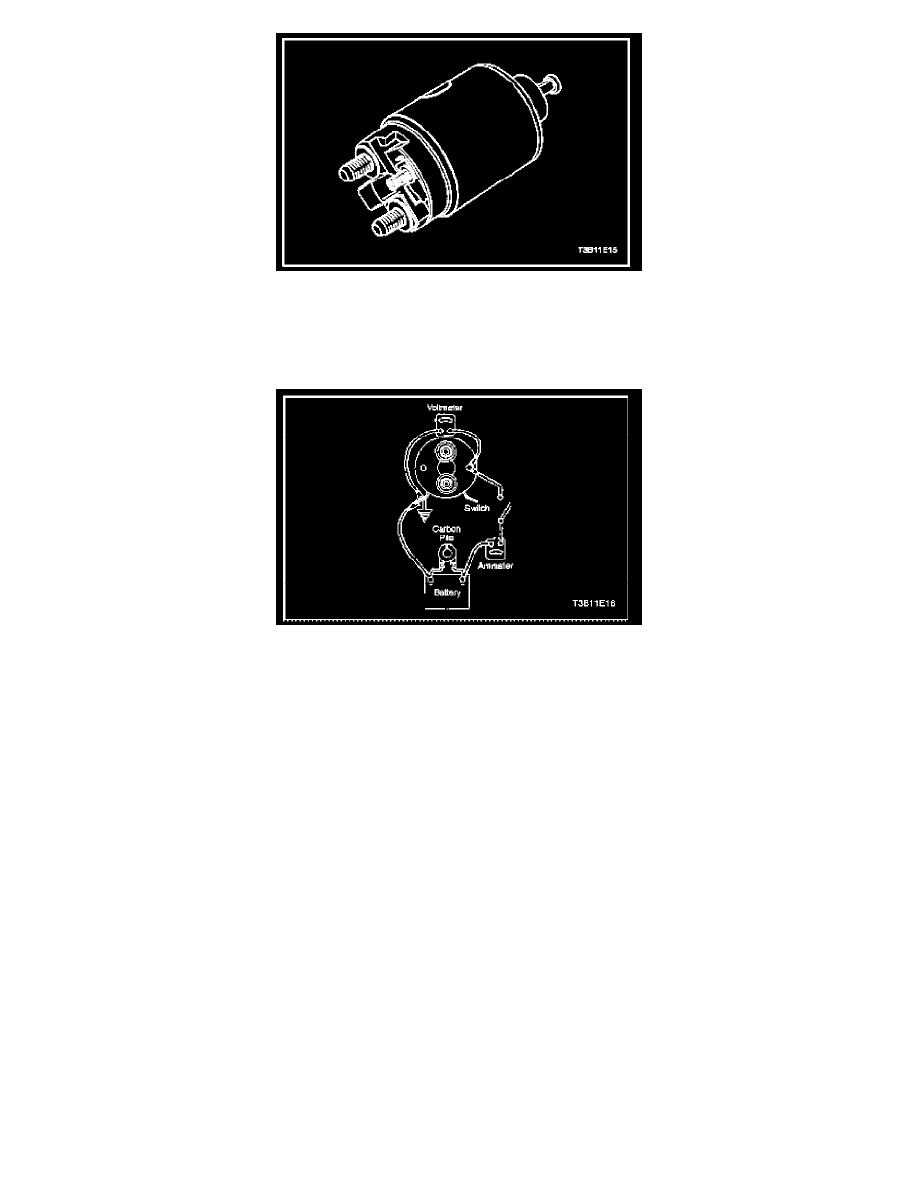
10. Test the solenoid windings by checking the current draw.
NOTE: If the solenoid is not removed from the starting motor, the connector strap terminals must be removed from the terminal on the solenoid
before making these tests.
-
Check the hold-in windings by connecting an ammeter in series with a 12-volt battery, the switch terminal, and to ground.
-
Connect the carbon pile across the battery.
-
Adjust the voltage to 10 volts. The ammeter reading should be 13 to 19 amperes.Current will decrease as the windings heat up. Current draw
readings that are over specifications indicate shorted turns or a ground in the windings of the solenoid. Both conditions require replacement of
the solenoid. Current draw readings that are under specifications indicate excessive resistance. No reading indicates an open circuit.
11. Check both windings, connecting them according to the preceding test.
NOTE: Current will decrease as the windings heat up. Current draw readings that are over specifications indicate shorted turns or a ground in the
windings of the solenoid. Both conditions require replacement of the solenoid. Current draw readings that are under specifications indicate
excessive resistance. No reading indicates an open circuit.
-
Ground the solenoid motor terminal.
-
Adjust the voltage to 10 volts. The ammeter reading should be 59 to 79 amperes.
-
Check the connections and replace the solenoid, if necessary.
12. Slide the field frame with enclosed armature assembly away from the starter assembly.