
Verona L6-2.5L (2005)
Ball Joint: Service and Repair
Ball Joint Disassembly and Assembly
Ball Joint
Disassembly
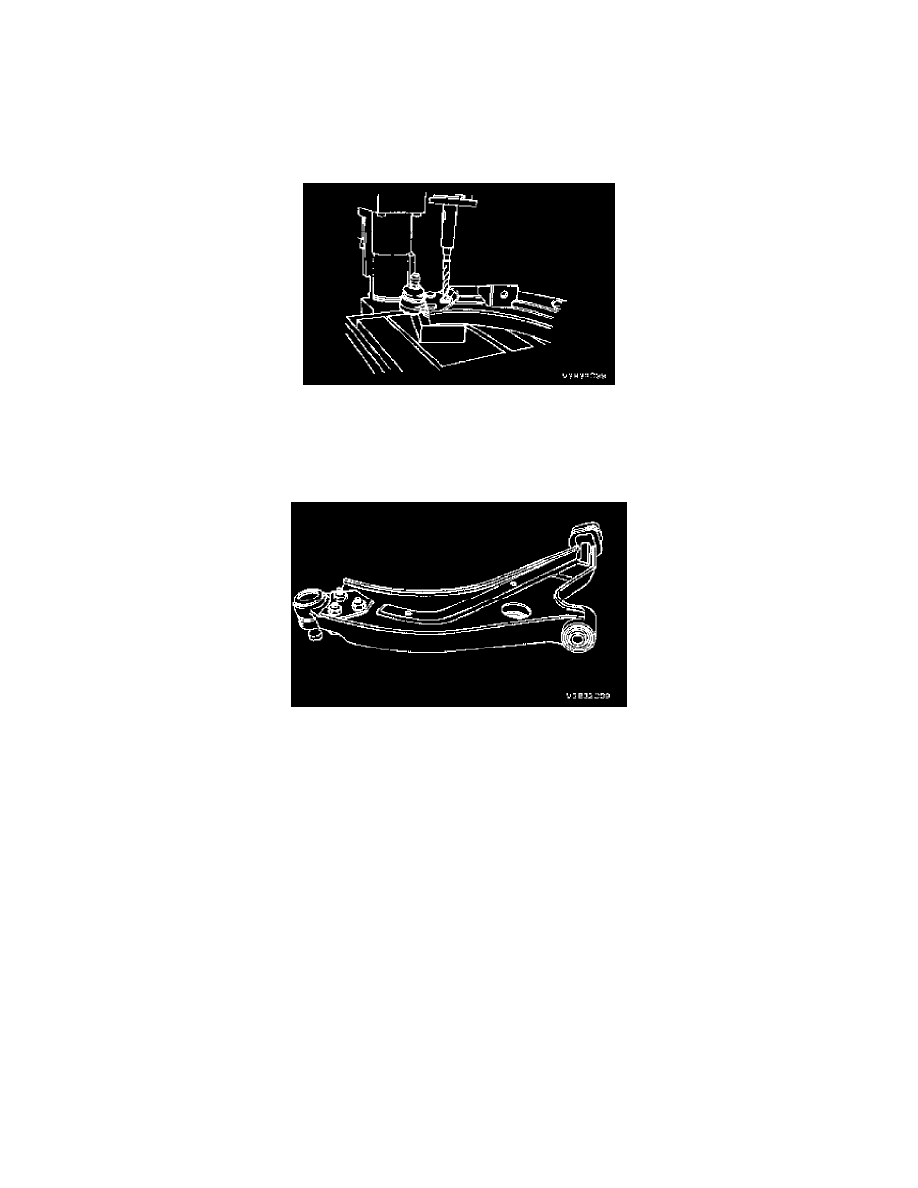
1. Remove the control arm.
2. Drill off the heads of the three rivets with a 12 mm (0.47 inch) drill bit.
3. Punch out the rivets with a drift.
Assembly
1. Connect the ball joint to the control arm by inserting three ball joint bolts from below the control arm.
Tighten: Tighten the ball joint-to-control arm nuts to 110 Nm (81 ft. lbs.).
2. Install the control arm.