
Vitara 4WD L4-2.0L (2003)
Ignition Timing: Adjustments
Ignition Timing Check and Adjustment
NOTE: Before starting engine, place transmission gear shift lever in "Neutral" (shift selector lever to "P" range for A/T model), and set parking brake.
1. Start engine and warm it up to normal operating temperature.
2. Make sure that all of electrical loads except ignition are switched off.
3. Check to be sure that idle speed is within specification.
Refer to "Idle Speed / Idle Air Control (IAC) Duty Inspection".
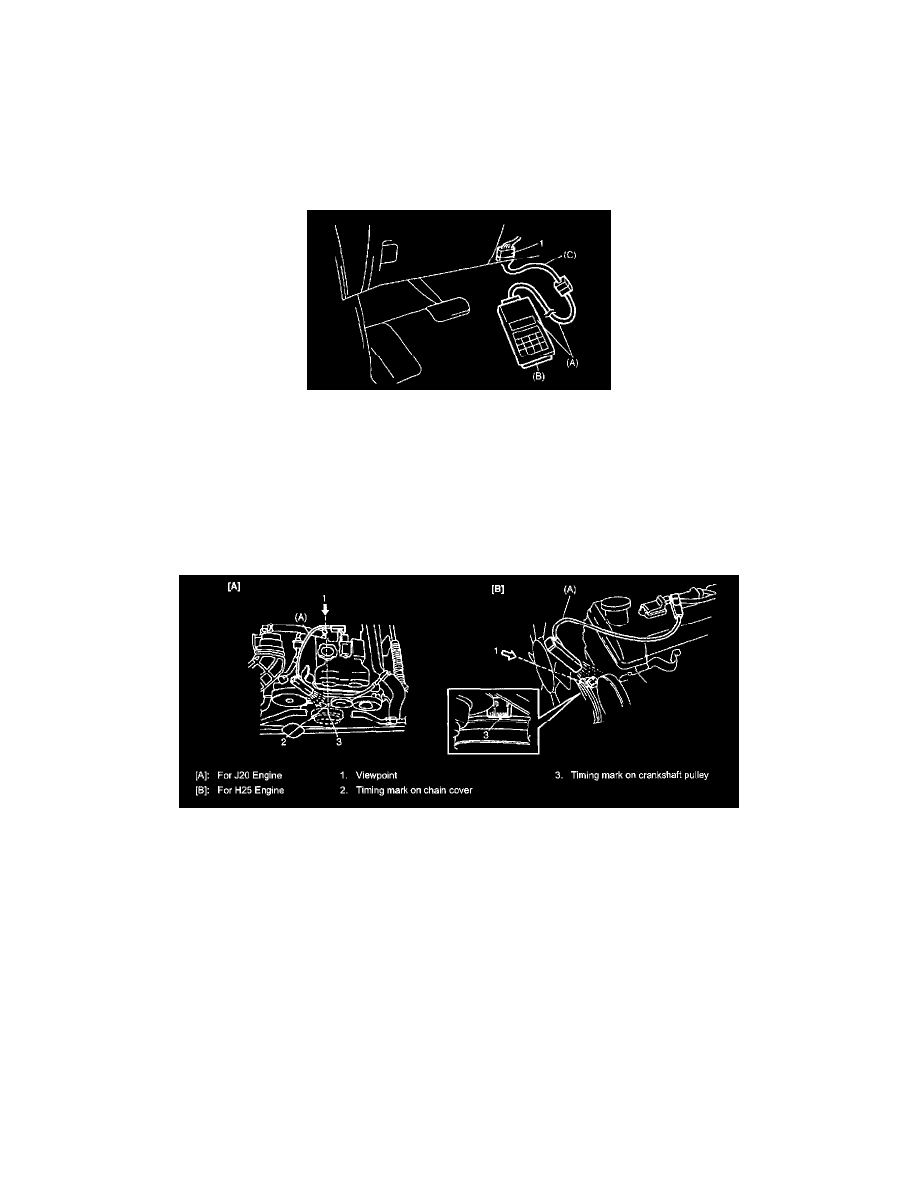
4. Connect SUZUKI scan tool to DLC (1) with ignition switch OFF, restart engine and fix ignition timing by using fixed spark mode of SUZUKI
scan tool.
Special tool
(A) : 09931 - 76011 (SUZUKI scan tool)
(B) : Mass storage cartridge
(C) : 09931 - 76030 16/14 pin DLC cable (OBD-II adapter)
5. Set timing light to ignition harness for No.1 cylinder.
6. Using timing light, check that timing observed from viewpoint is within specification.
Initial ignition timing of viewpoint (when it is fixed by SUZUKI scan tool) 5 ± 1 ° BTDC
Ignition order
For J20 (2.0L) engine: 1 - 3 - 4 - 2
For H25 (2.5L) engine: 1 - 6 - 5 - 4 - 3 - 2
Special tool
(A) : 09930 - 76420
7. If ignition timing is out of specification, loosen flange bolt (2), adjust timing by turning CMP sensor (1) while engine is running, and then tighten
bolt (2).
Tightening torque
CMP sensor bolt (a): 15 N.m (1.5 kg-m, 11.0 lb-ft)