
Vitara 4WD L4-2.0L (2003)
Clutch Master Cylinder: Service and Repair
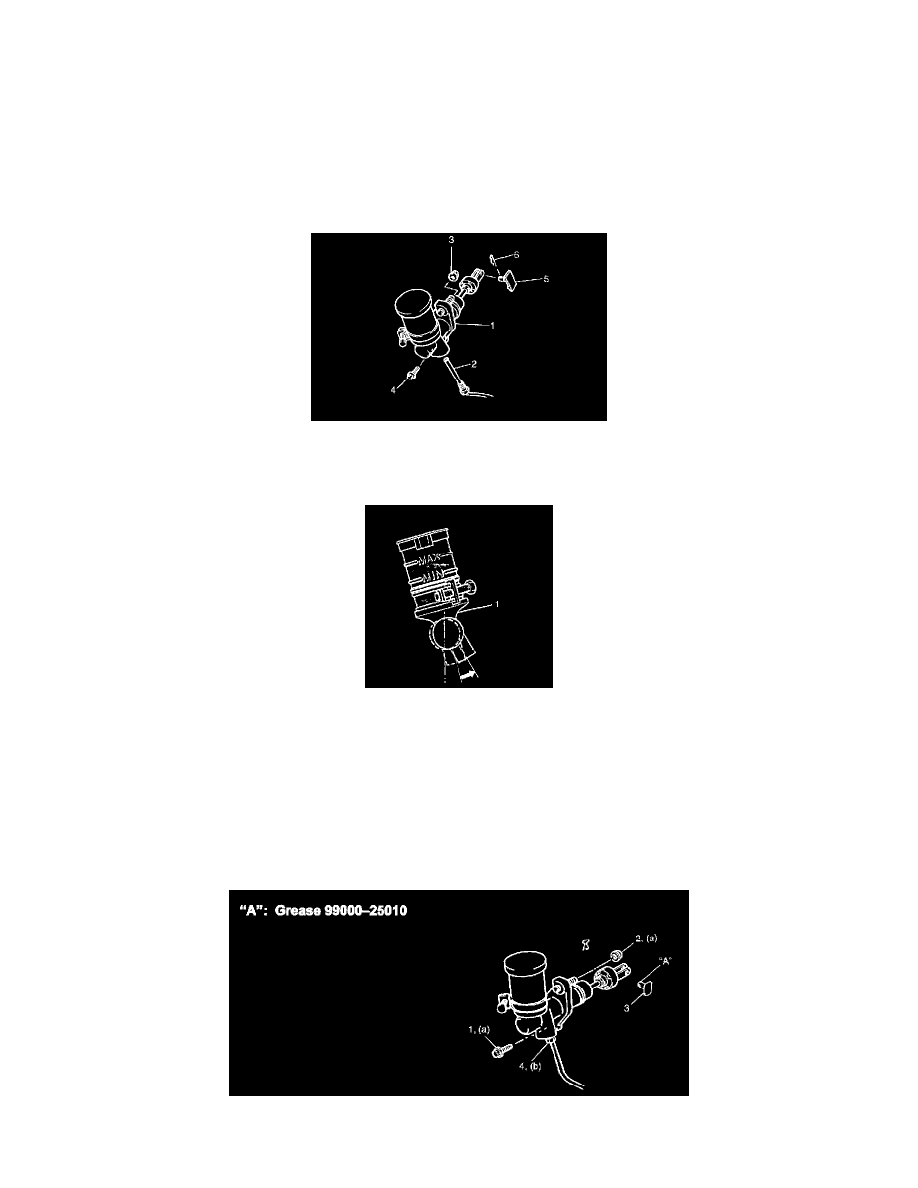
Removal and Installation
Removal
1) Clean around reservoir cap and take out fluid with syringe or such.
2) Remove clip (6) and push rod clevis pin (5).
3) Disconnect fluid pipe (2) from master cylinder assembly (1).
NOTE: Do not allow fluid to get on painted surfaces.
4) Remove master cylinder attaching nut (3) and bolt (4).
5) Remove master cylinder assembly (1) and gasket.
Installation
1) To bleed air from master cylinder (1) itself, tilt it as shown in figure and add fluid into it.
NOTE: After bleeding air from master cylinder (1), plug pipe hole in it to prevent fluid from spilling out of it till pipe is connected.
2) Install master cylinder assembly and new gasket to body, attaching bolt (1), nuts (2) and push rod clevis pin (3).
NOTE: Do not rouse gasket.
3) Torque attaching bolt (1) and nut (2) to specification.
4) Connect fluid pipe and torque flare nut (4) to specification.
5) Apply grease to clevis pin (3) and install it.