
XL-7 Limited 4WD V6-2.7L (2002)
Removal
1. Raise and suitably support vehicle. Remove tire and wheel.
This operation is not necessary when removing pipes connecting master cylinder and flexible hose (2).
2. Clean dirt and foreign material from both hose end or pipe end fittings. Remove brake hose or pipe.
Installation
1. Reverse removal procedure for brake hose and pipe installation procedure. For installation, make sure that steering wheel is in straightforward
position and hose has no twist or kink. Check to make sure that hose doesn't contact any part of suspension, both in extreme right and extreme left
turn conditions. If it does at any point, remove and correct. Fill and maintain brake fluid level in reservoir. Bleed brake system.
2. Perform brake test and check installed part for fluid leakage.
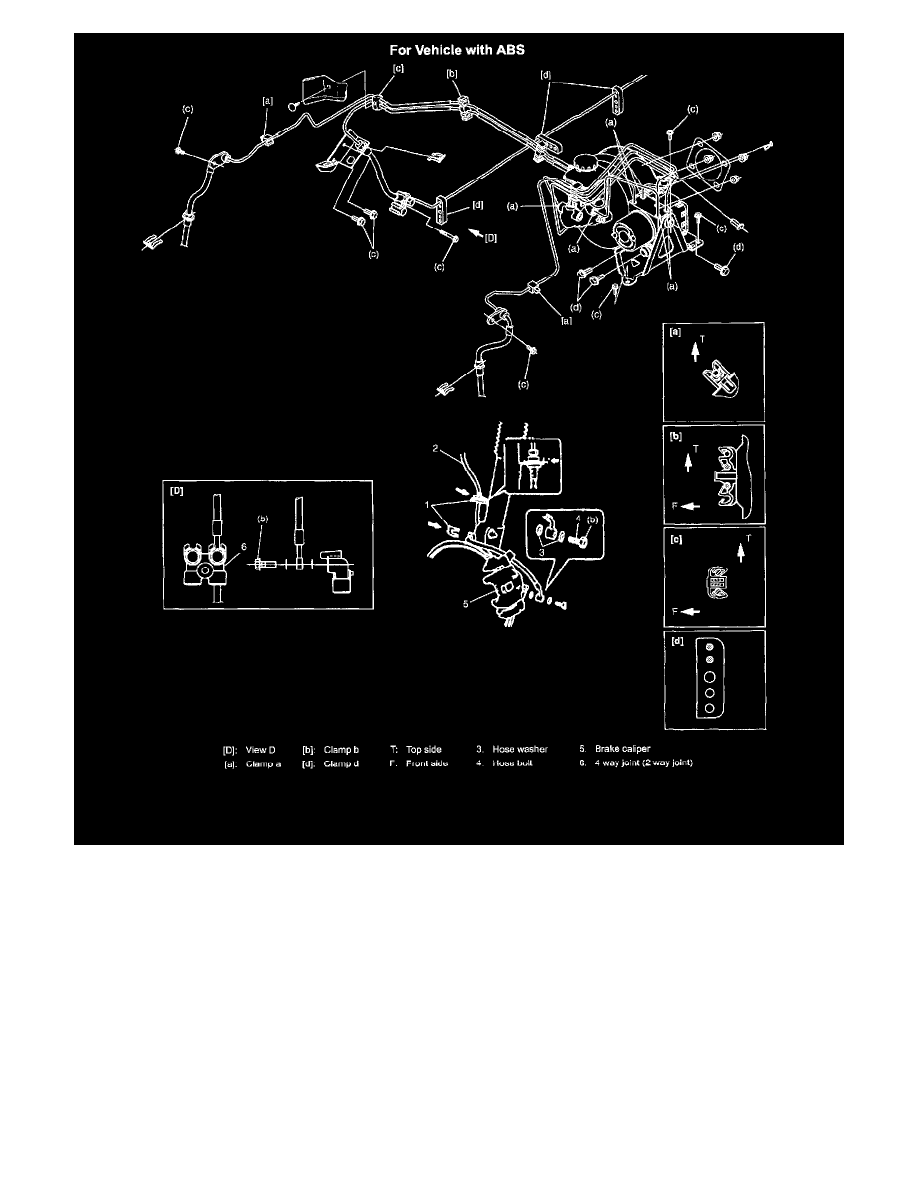
Tightening torque
Brake pipe flare nut (a): 16 Nm (1.6 kgf-m, 12.0 ft. lbs.)
Brake flexible hose bolt (brake caliper/2(4) way joint) (b): 23 Nm (2.3 kgf-m, 17.0 ft. lbs.)
2-way (or 4-way) joint mounting bolt (c): 10 Nm (1.0 kgf-m, 7.5 ft. lbs.)
Brake hose/pipe bracket bolt (c): 10 Nm (1.0 kgf-m, 7.5 ft. lbs.)
ABS actuator bracket bolt (c): 10 Nm (1.0 kgf-m, 7.5 ft. lbs.)
ABS actuator mounting bolt (d): 9 Nm (0.9 kgf-m, 6.5 ft. lbs.)