
XL-7 Limited 4WD V6-2.7L (2002)
Shift Interlock Cable: Service and Repair
Key Interlock Cable Removal and Installation
NOTE: Don't bend interlock cable excessively when removing and installing it, or system will not operate correctly.
Removal
1. Disconnect negative (-) cable from battery.
2. If equipped with air bag system, disable air bag system.
3. Remove steering column hole cover.
4. Tilt steering column if steering column is adjustable. If no adjustable, loosen steering column bolts.
5. Remove steering column cover.
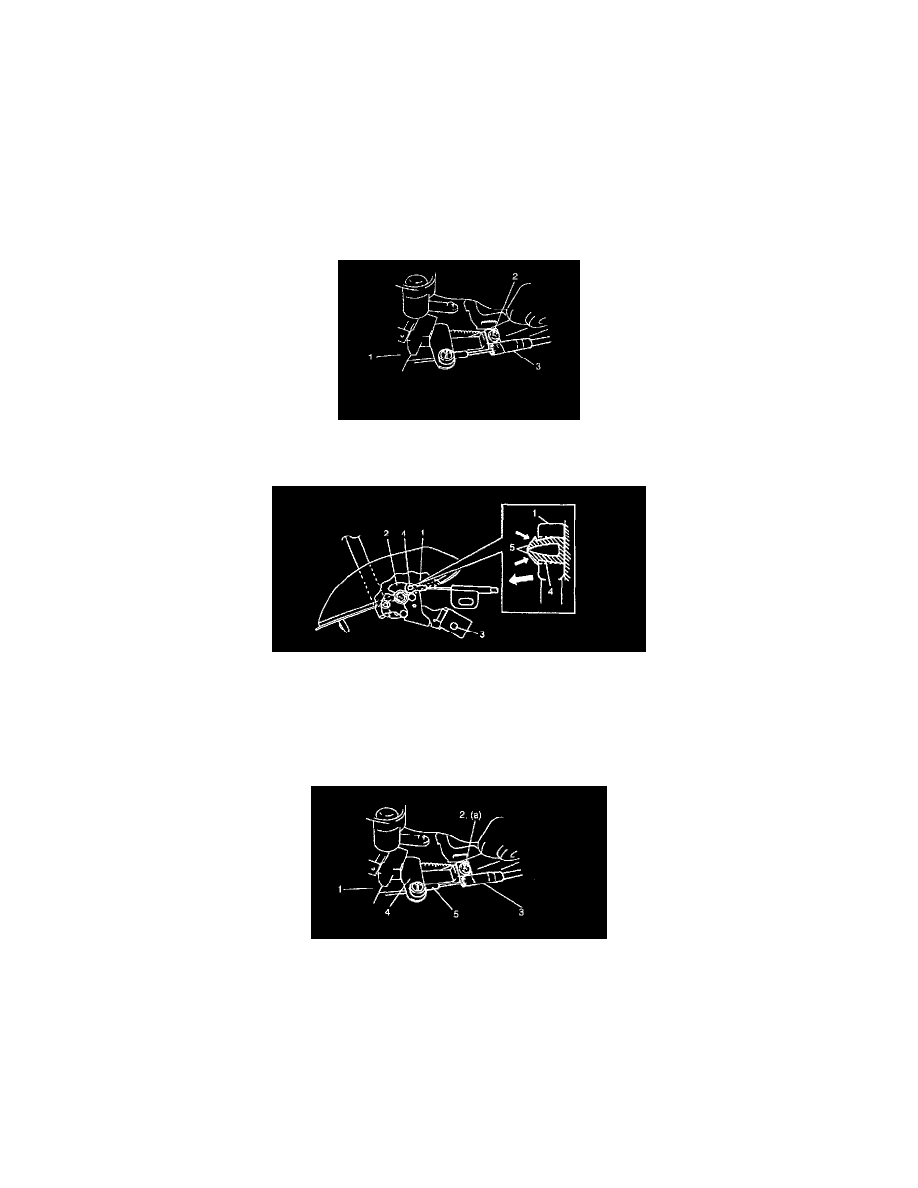
6. Remove interlock cable clamp screw (2) located at ignition switch assembly (1).
7. Remove disconnect interlock cable (3) inner end (ignition switch side).
8. With console box removed, take out interlock cable by loosening lock nuts (3).
9. Detach cable end (1) from interlock cam (2) (or key release cam (6)) while pressing claws (5) of interlock cam boss (4). At this time, be careful not
to cause damage to its claws (5).
Installation
1. Shift select lever to "N" range and turn ignition key to "ACC" position.
2. Connect inner end (5) of interlock cable to key interlock lever (4)(Ignition switch side).
3. Install outer end bracket (3) of interlock cable to ignition switch assembly (1), and tighten screw (2) to specified torque.
Tightening torque
Interlock cable clamp screw (a): 2.2 Nm (0.22 kgf-m, 1.5 ft. lbs.)