XL-7 Standard 2WD V6-2.7L (2001)

Shift Solenoid: Service and Repair
REMOVAL
1. Pull out dipstick and lift up vehicle.
2. With engine cooled, remove drain plug (1) from oil pan and drain A/T fluid.
3. Install drain plug (1) with gasket.
Tightening torque
A/T fluid drain plug (a): 23 Nm, (2.3 kg-m, 17.0 ft. lbs.)
4. Remove exhaust pipe bracket and disconnect front propeller shaft from front differential (if equipped).
5. Remove oil pan bolts.
6. Remove oil pan.
7. Remove oil tubes.
8. Remove solenoid valve No.1 (shift solenoid valve A and B) or solenoid valve No.2 (TCC solenoid valve).
OPERATION CHECK
Whenever shift solenoid valves and TCC (lock-up) solenoid valve are removed from transmission, verify their valve function physically before they
are reinstalled.
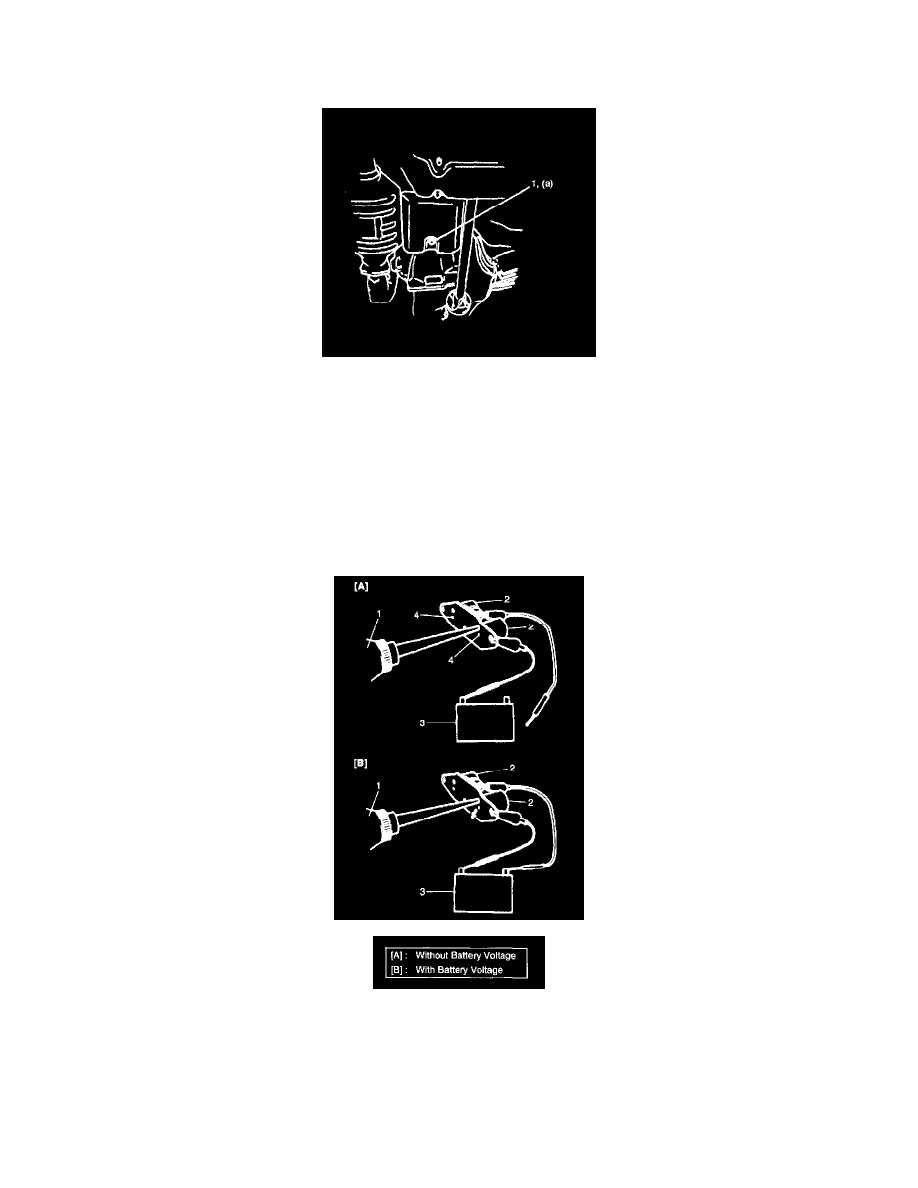
1. Apply oiler (1) to solenoid valve (2) and give compression by hands and then check to be sure that transmission fluid from oiler (1) does not come
out of holes (4) in solenoid valve (2) when battery (3) voltage is not conducted.
2. Under the same conditions, conduct battery (3) voltage and then make sure that fluid comes out with vigor.
NOTE:
^
If fluid does not come out with vigor in step 2 inspection, do not re-use that solenoid valve (2).
