
XL-7 Touring 4WD V6-2.7L (2002)
Clutch Master Cylinder: Service and Repair
Disassembly and Reassembly
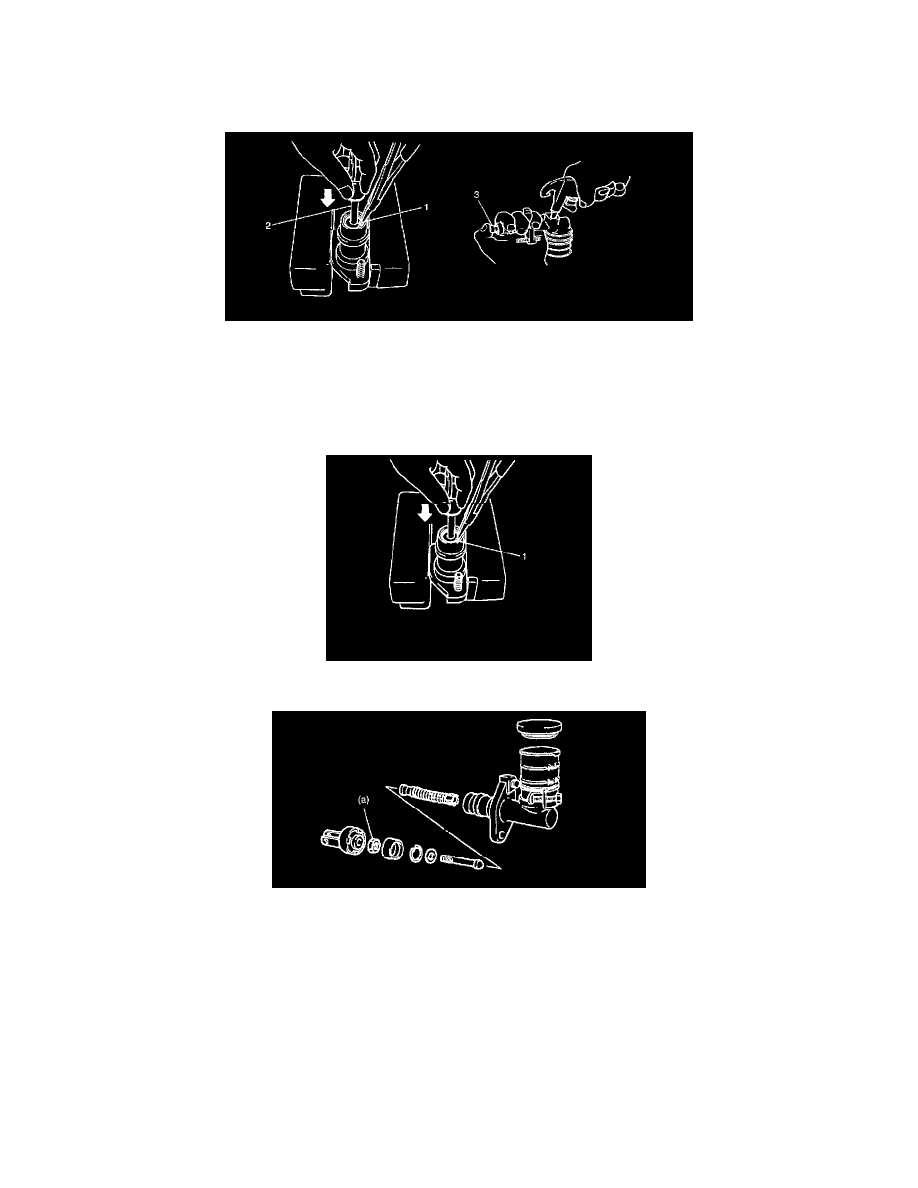
Disassembly
1. Remove boot and then circlip (1) with piston (3) pushed in.
2. Remove push rod (2) and blow compressed air gradually into hole for pipe connection to remove piston assembly, using care to prevent it from
jumping out.
Reassembly
1. Apply brake fluid to inside of piston assembly and cylinder body.
2. Install piston assembly into cylinder.
3. With piston pushed down, install circlip (1) as shown. And install boot.
4. Tighten lock nut to specified torque.
Tightening torque
Clevis lock nut (a): 10 Nm (1.0 kgf-m, 7.5 ft. lbs.)
5. For installation of master cylinder to vehicle, refer to "Clutch Master Cylinder Removal and Installation:".
Inspection
Inspect all disassembled parts for wear or damage and replace parts if necessary.
NOTE:
^
Wash disassembled parts with brake fluid.
^
Do not reuse piston assembly and circlip.
Inspect cylinder bore for scoring or corrosion. It is best to replace corroded cylinder. Corrosion can be identified as pits or excessive roughness.