
4 Runner 2WD L4-2693cc 2.7L DOHC MFI (1997)
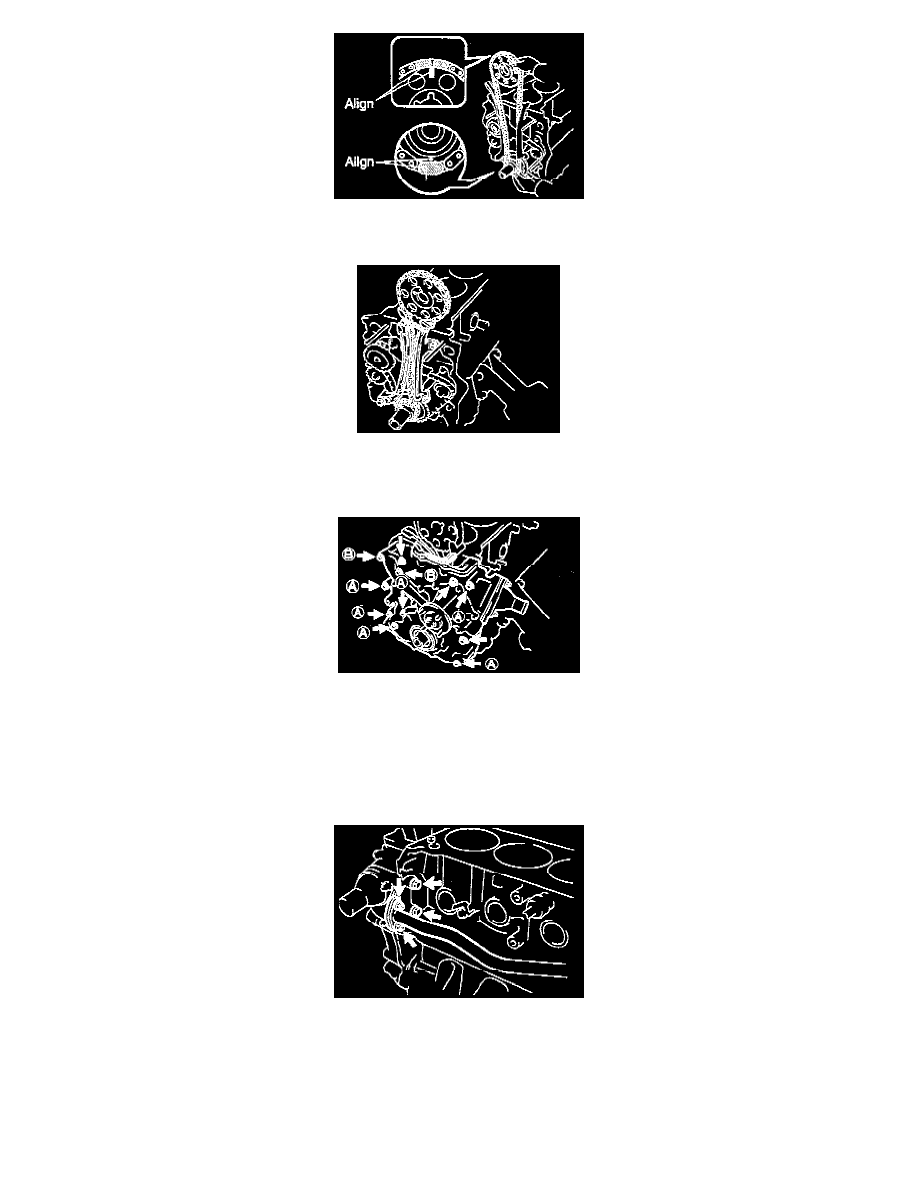
(a)
Align the timing mark between the mark link of the No. 1 timing chain, and install the No. 1 timing chain to the timing gear.
(b) Align the timing mark of the crankshaft timing gear with the mark link of the No. 1 timing chain and install the No. 1 timing chain.
(c)
Tie the No. 1 timing chain with a cord as shown in the illustration, and make sure it doesn't come loose.
7. Install timing chain cover.
(a)
Install 3 new gaskets to the cylinder block and water bypass pipe.
(b) Install the timing chain cover with the 9 bolts and 2 nuts.
Torque:
Bolt:
12 mm head A: 20 Nm (14 ft. lbs.)
12 mm head B: 24.5 Nm (18 ft. lbs.)
14 mm head: 44 Nm (32 ft. lbs.)
Nut: 20 Nm (14 ft. lbs.)
(c)
Install the 2 timing chain cover bolts.
Torque: 18 Nm (13 ft. lbs.)
(d) Install the 2 water bypass pipe nuts.
Torque: 20 Nm (14 ft. lbs.)
(e)
Remove the cord from the chain.
8. Install crankshaft pulley.
(a)
Align the pulley set key with the key groove of the pulley, and slide on the pulley.