
4 Runner 2WD L4-2693cc 2.7L DOHC MFI (1997)
(b) Using SST Crankshaft Pulley Holding Tool # 09213 - 54015, Companion Flange Holding Tool # 09330 - 00021 or equivalents, install and
torque the pulley bolt.
Torque: 260 Nm (193 ft. lbs.)
(c)
w/ A/C: Install the No. 3 and No. 2 crankshaft pulleys with the 4 bolts.
Torque: 25 Nm (18 ft. lbs.)
9. Install oil strainer.
Install a new gasket and the oil strainer with the bolt and 2 nuts.
Torque: 18 Nm (13 ft. lbs.)
10. Install oil pan.
(a)
Remove any old packing (FIPG) material and be careful not to drop any oil on the contact surface of the oil pan.
-
Using a razor blade and gasket scraper, remove all the old packing (FIPG) material from the gasket surfaces and sealing grooves.
-
Thoroughly clean all components to remove all the loose material.
-
Using a non-residue solvent, clean both sealing surfaces.
CAUTION: Do not use a solvent which will affect the painted surfaces.
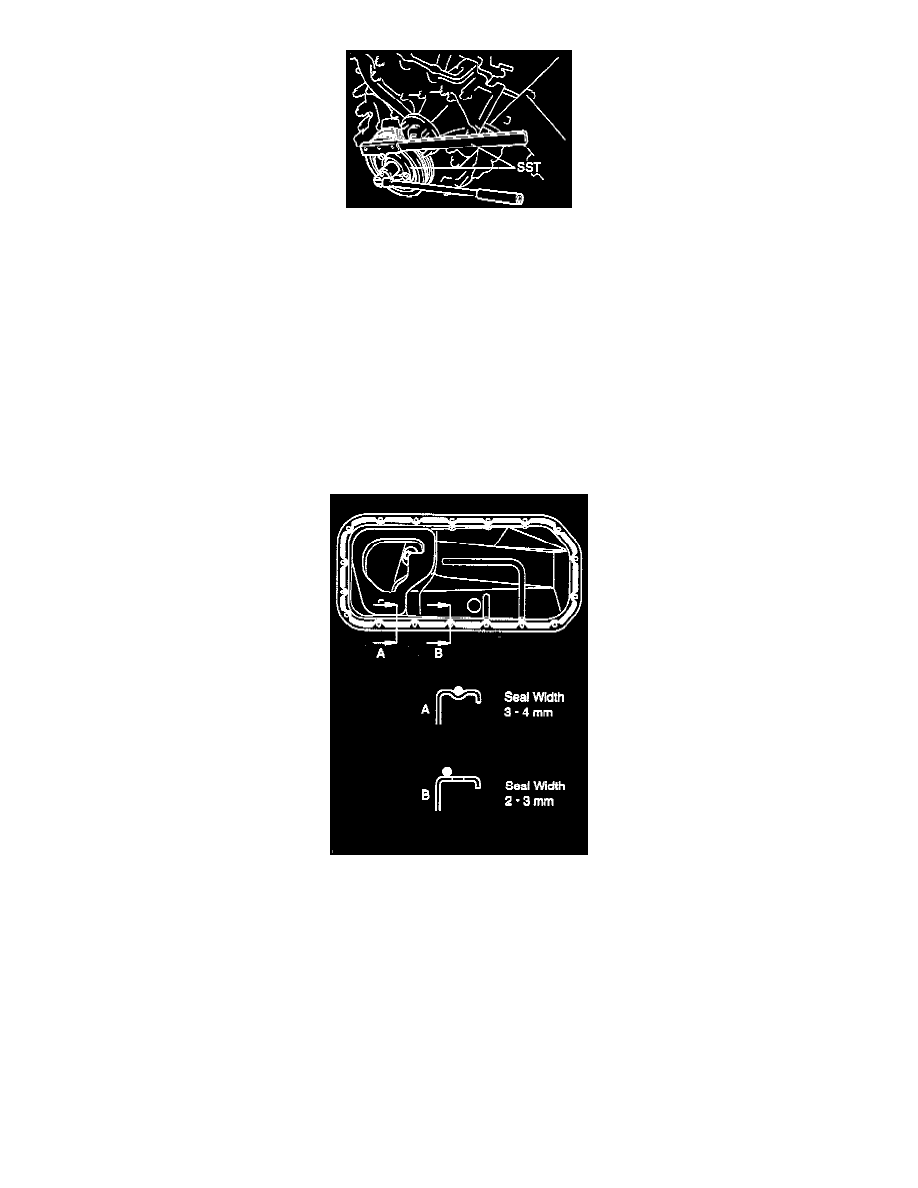
(b) Apply seal packing to the oil pan as shown in the illustration.
Seal packing: Part No. 08826 - 00080 or equivalent.
-
Install a nozzle that has been cut to a 2 - 3 mm (0.08 - 0.12 inch) opening or 3 - 4 mm (0.012 - 0.016 inch) opening.
NOTE: Avoid applying an excessive amount to the surface.
-
Parts must be assembled within 5 minutes of application. Otherwise the material must be removed and reapplied.
-
Immediately remove nozzle from the tube and reinstall cap.
(c)
Install the oil pan with the 16 bolts and 2 nuts.
Torque: 12.5 Nm (9 ft. lbs.)
11. Install flywheel housing under cover and dust seal.
12. Install crankshaft position sensor.
Install a new O-ring.
Torque: 8.5 Nm (74 inch lbs.)
13. Install generator, adjusting bar and bracket.