
Camry CE Sedan 4-Door L4-2164cc 2.2L DOHC MFI (1997)
Control Assembly: Service and Repair
Removal and Installation
REMOVAL
1. REMOVE THESE PARTS:
a. Cowl side trim LH and RH
b. Front door inside scuff plate LH and RH
c. No. 2 lower cover
d. Glove compartment
e. No. 1 lower instrument panel
f.
LH lower instrument panel
g. Center cluster finish panel
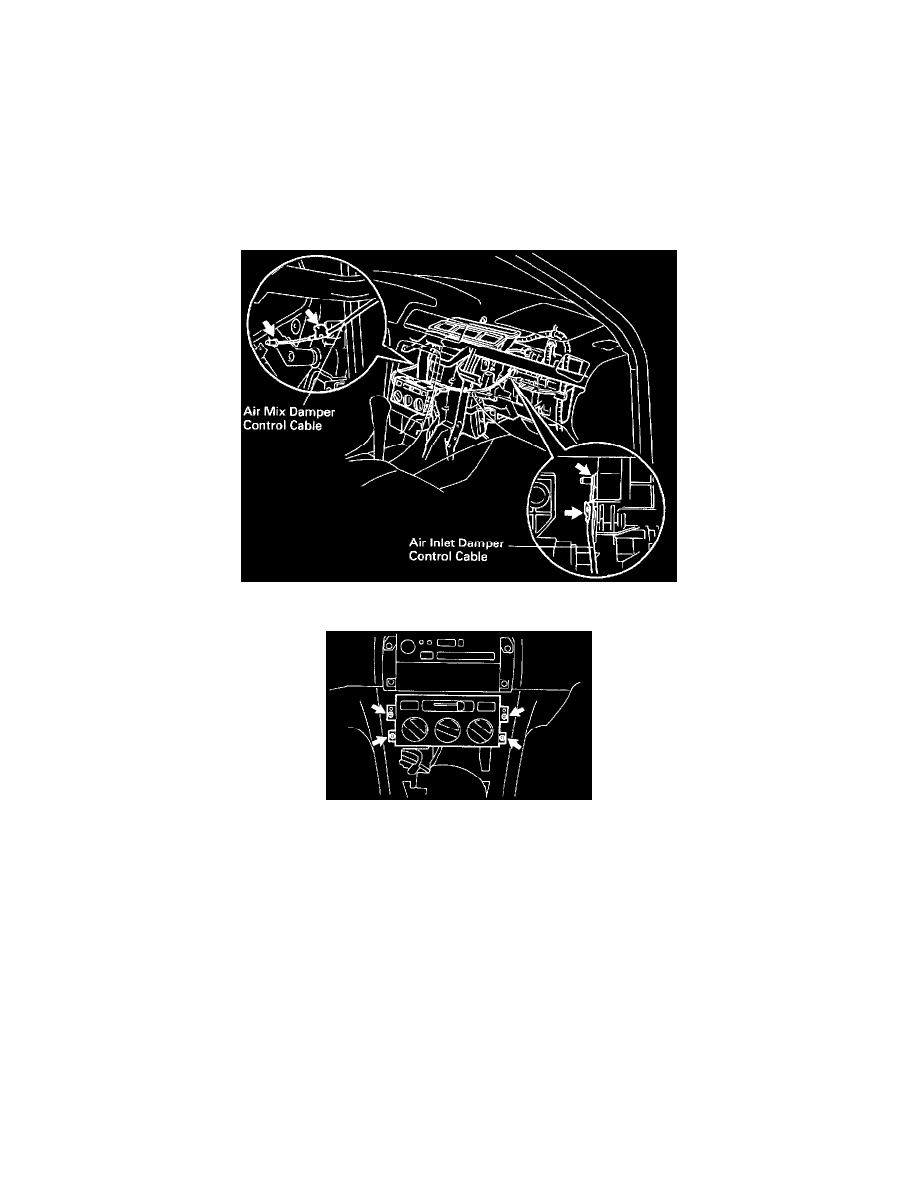
2. DISCONNECT A/C CONTROL CABLES
3. REMOVE A/C CONTROL ASSEMBLY
Remove the 4 screws and pull out the A/C control assembly, then disconnect the connector.
INSTALLATION
Installation is in the reverse order of removal.
HINT: If cable's adjustment is in need, refer to "Adjustments".
See: Adjustments