
Camry CE Sedan 4-Door L4-2164cc 2.2L DOHC MFI (1997)
4. Terminal bolt
5. O-ring
6. Packing and terminal insulator (outside)
Install the packing to the terminal insulator, and install them.
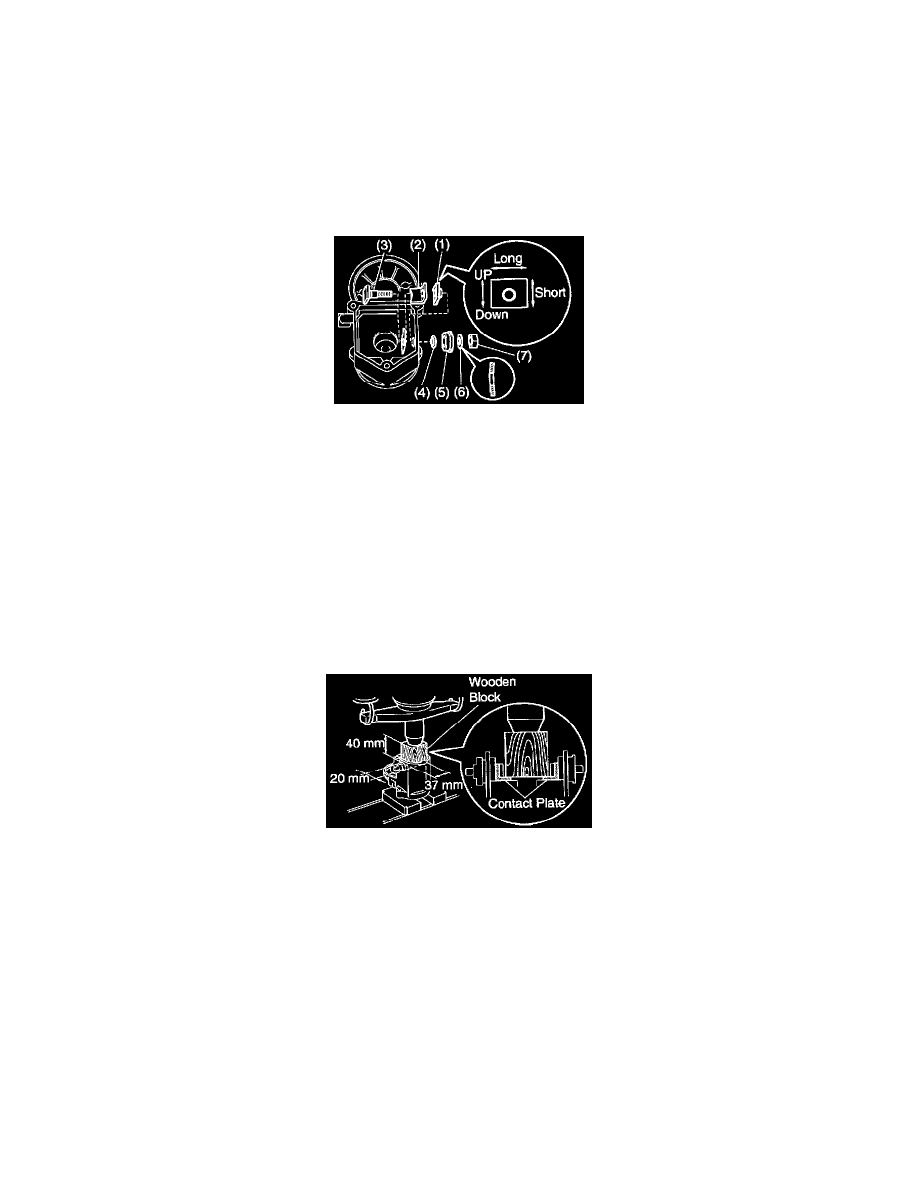
HINT: Match the protrusion of the insulator with the indentation of the housing.
7. Wave washer
8. Terminal nut
NOTE: Be careful to install the terminal insulators (inside) and wave washers in the correct direction.
Terminal C:
1. Terminal insulator (inside)
2. Contact plate
3. Terminal bolt
4. O-ring
5. Terminal insulator (outside)
6. Wave washer
7. Terminal nut
NOTE: Be careful to install the terminal insulators (inside) and wave washers in the correct direction.
b. Temporarily tighten the terminal nuts.
5. TIGHTEN TERMINAL NUT
a. Put a wooden block on the contact plate and press it down with a hand press.
Dimensions of wooden block:
20 x 37 x 40 mm (0.79 x 1.46 x 1.57 in.)
Press force:
981 N (100 kgf, 221 lbf)
NOTE:
^ Check the diameter of the hand press ram. Then calculate the gauge pressure of the press when 981 N (100 kgf, 221 lbf) of force is
applied.