
Camry CE Sedan 4-Door L4-2164cc 2.2L DOHC MFI (1997)
2. Turn the adjusting tube and assemble the No.2 lower suspension arm.
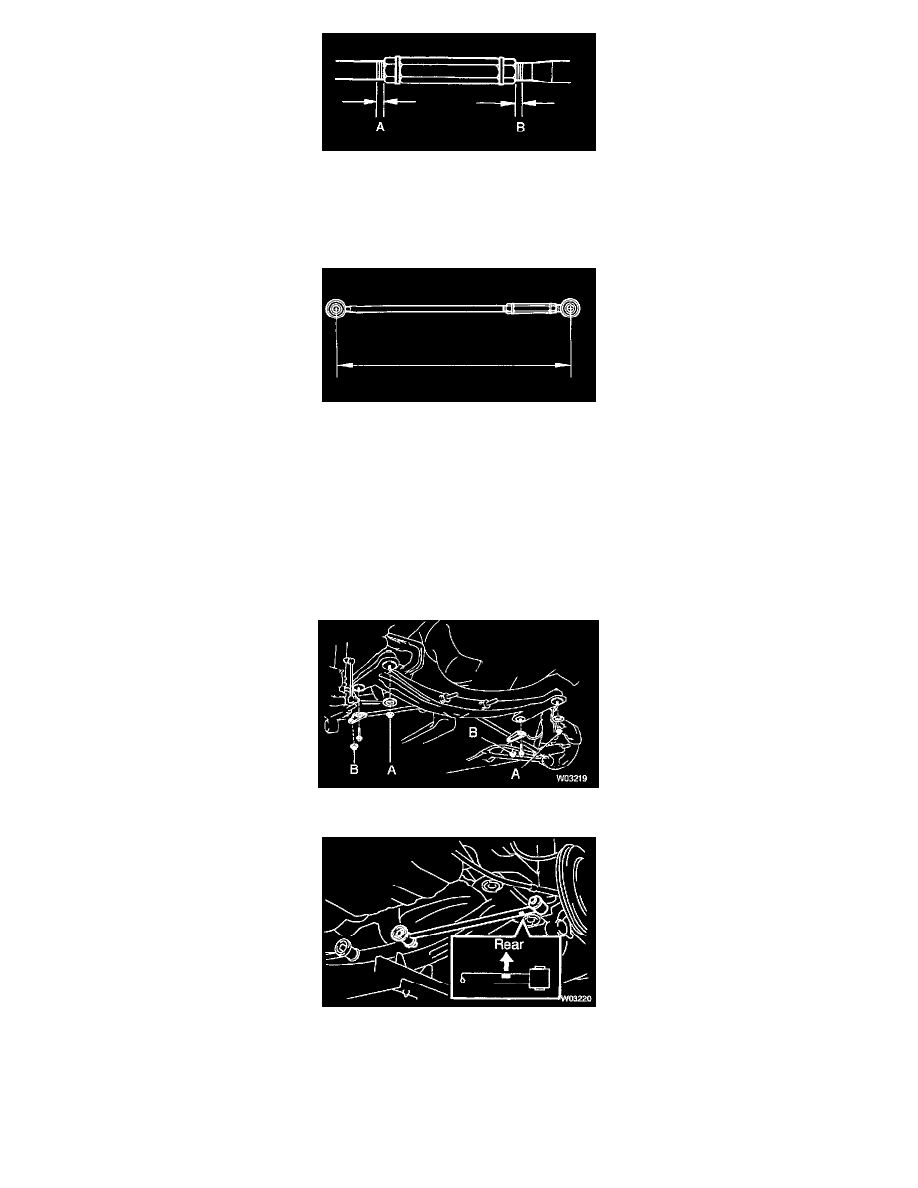
NOTE: When assembling the No.2 lower suspension arm, try to make dimensions A and B shown in the illustration as close as possible.
Maximum difference: 3.0 mm (0.118 inch).
3. Adjust the No.2 lower suspension arm length by turning the adjusting tube.
Arm length: 512.3 mm (20.169 inch).
4. Temporarily tighten the 2 lock nuts.
[Torque: 56 Nm (41 ft. lbs.)]
NOTE: After adjusting the rear wheel alignment, torque the lock nuts.
6. Remove left and right stabilizer brackets
7. Remove No.1 lower suspension arm
a. Support the suspension member with a jack.
b. Remove the 4 nuts, 2 bolts and suspension member lower stoppers.
[Torque:
Bolt: 51 Nm (38 ft. lbs.)]
Nut A: 51 Nm (38 ft. lbs.)]
Nut B: 38 Nm (28 ft. lbs.)]
c. Lower the suspension member.