
Camry LE Sedan 4-Door L4-2164cc 2.2L DOHC MFI (1997)
Alternator: Service and Repair
Disassembly and Reassembly
DISASSEMBLY
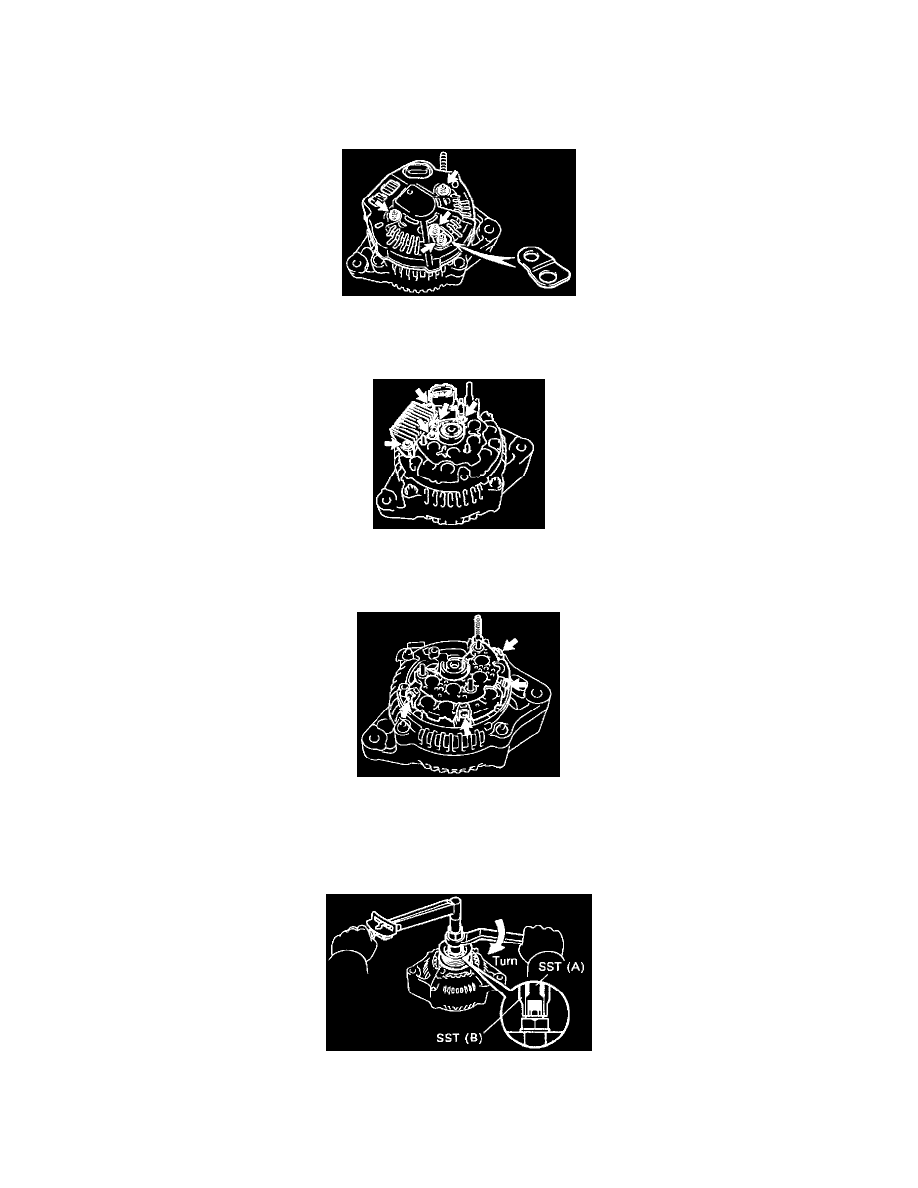
1. REMOVE REAR END COVER
a. Remove the nut and terminal insulator.
b. Remove the bolt, 3 nuts, plate terminal and end cover.
2. REMOVE BRUSH HOLDER AND VOLTAGE REGULATOR
a. Remove the brush holder cover from the brush holder.
b. Remove the 5 screws, brush holder and voltage regulator.
c. Remove the seal plate from the rectifier end frame.
3. REMOVE RECTIFIER HOLDER
a. Remove the 4 screws and rectifier holder.
b. Remove the 4 rubber insulators.
4. REMOVE PULLEY
a. Hold SST (A) with a torque wrench, and tighten SST (B) clockwise to the specified torque. SST 09820-63010
Torque: 39 N.m (400 kgf.cm, 29 ft.lbf)
b. Check that SST (A) is secured to the rotor shaft.