
Celica GT Convertible L4-2164cc 2.2L DOHC MFI (1997)
(b) While gripping the handle, adjust the stopper bolt so that dimension "B" shown in the diagram is 0.2 - 0.3 mm (0.008 - 0.012 inch).
CAUTION: If this adjustment is not done the claw may be damaged.
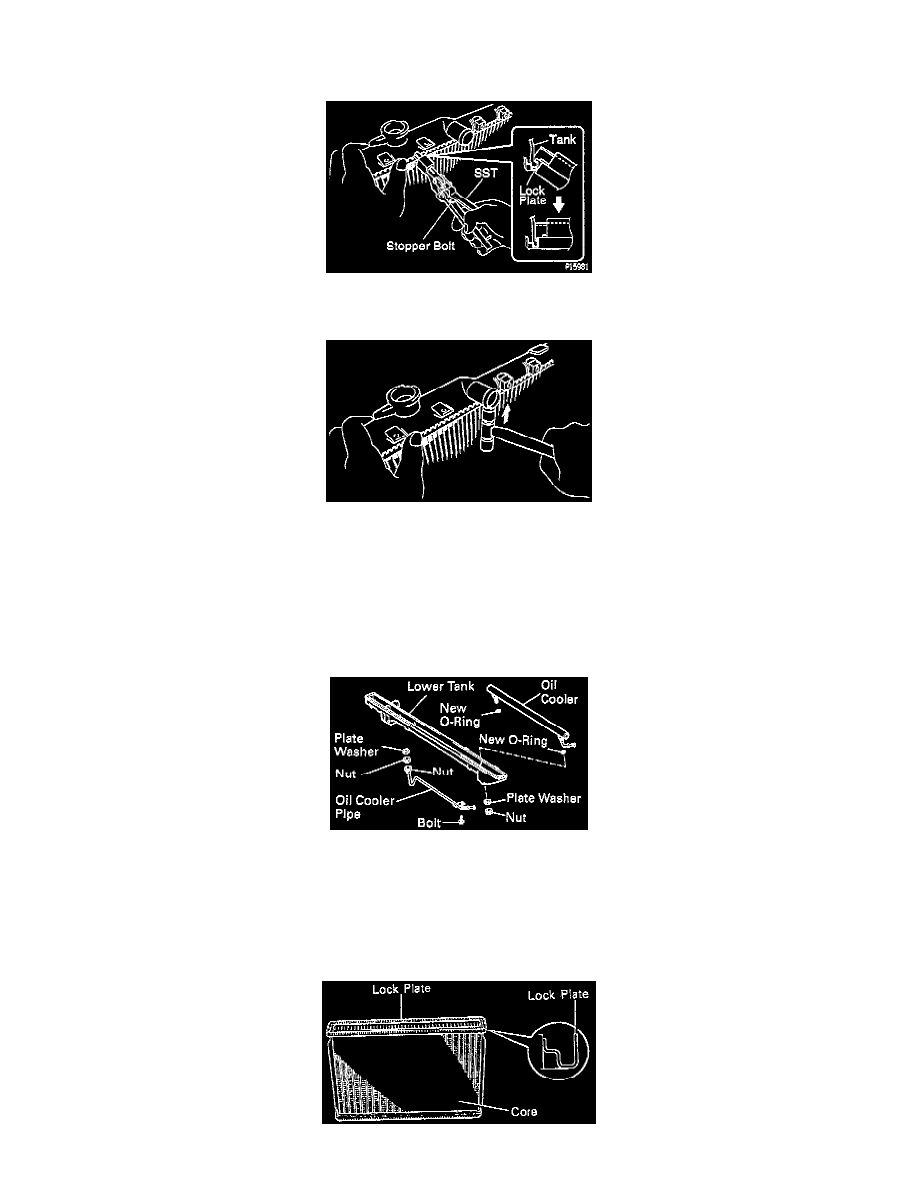
4. Uncaulk lock plates.
Using SST Radiator Service Tool Set # 09230 - 01010 or equivalent to release the caulking, squeeze the handle until stopped by the stopper bolt.
5. Remove tanks and O-rings.
Lightly tap the bracket of the radiator (or radiator inlet or outlet) with a soft-faced hammer, and remove the tank and the O-ring.
6. A/T: Remove oil cooler from lower tank.
(a)
Loosen the nut, and remove the bolt and cooler pipe.
(b) Remove the 2 nuts and plate washers.
(c)
Remove the oil cooler and 2 O-rings.
Assembly
1. A/T: Install oil cooler to lower tank.
(a)
Install 2 new O-rings to the oil cooler.
(b) Install the oil cooler with the O-rings to the lower tank.
(c)
Install the 2 plate washers and nuts.
Torque: 8.3 Nm (74 inch lbs.)
(d) Install the cooler pipe with the nut and bolt.
Torque: 14.7 Nm (11 ft. lbs.) for nut.