
Celica GT Convertible L4-2164cc 2.2L DOHC MFI (1997)
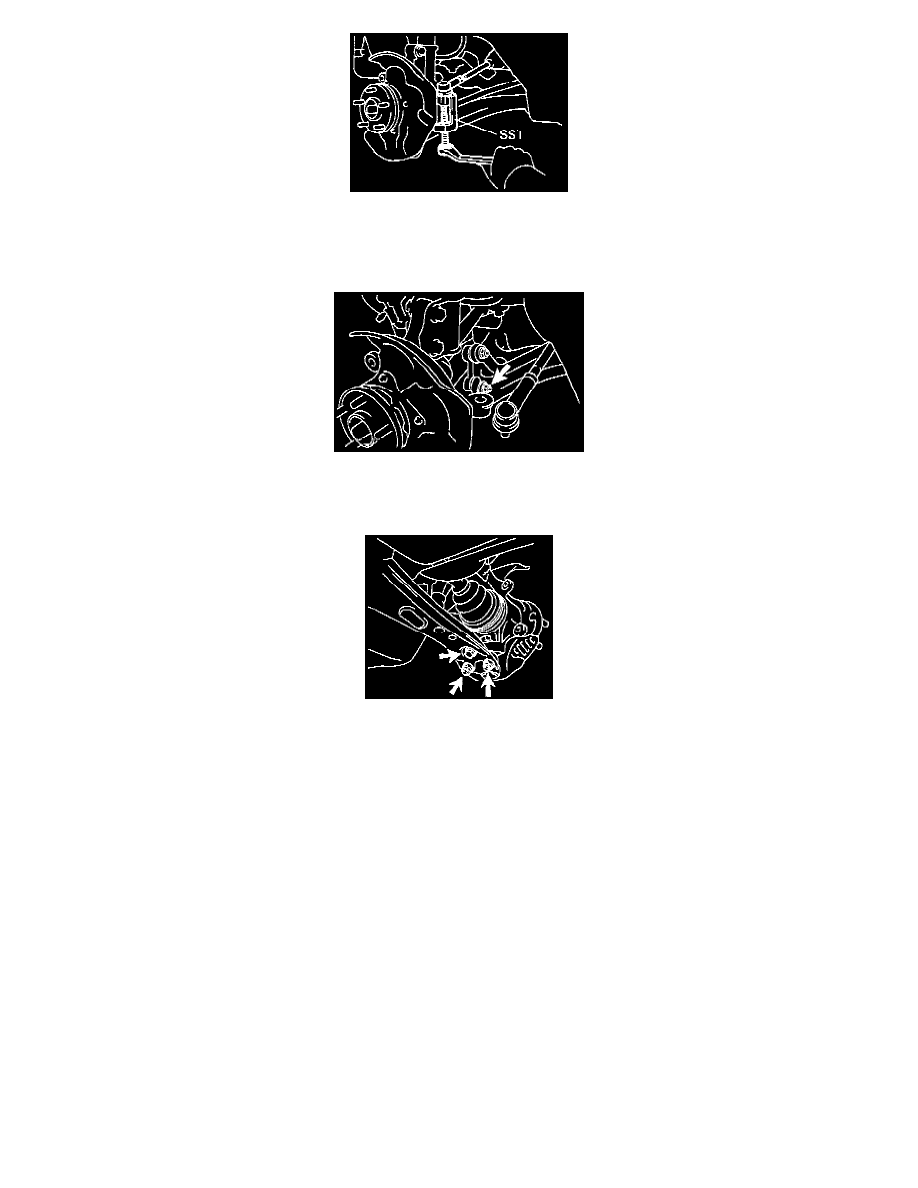
6. Remove the cotter pin and remove the nut, Using the 09610 - 20012 Special Service Tool (SST), disconnect the tie rod end from the steering
knuckle.
Installation Hint: torque to: 49 Nm (36 ft. lbs.).
7. Disconnect the stabilizer bar link from the lower suspension arm using a torque wrench adjusted to 44 Nm (33 ft. lbs.).
NOTE: If the ball joint turns together with the nut, use a 5 mm hexagon wrench to hold the stud.
8. Disconnect the lower suspension arm from the lower ball joint by removing the bolt and two nuts, using a torque wrench adjusted to 127 Nm (94
ft. lbs.).
9. Remove the steering knuckle with the axle hub after doing these steps.
a. Remove the two nuts and bolt on the lower side of the shock absorber.
NOTE: Coat the nut's threads with engine oil.
b. Remove the steering knuckle with axle hub.
10. Install in the reverse order of removal.
NOTE: After installation, check the ABS speed sensor signal and front wheel alignment.
See: Alignment