
Celica GT Liftback L4-2164cc 2.2L DOHC MFI (1998)
13. Install NO.2 timing belt cover.
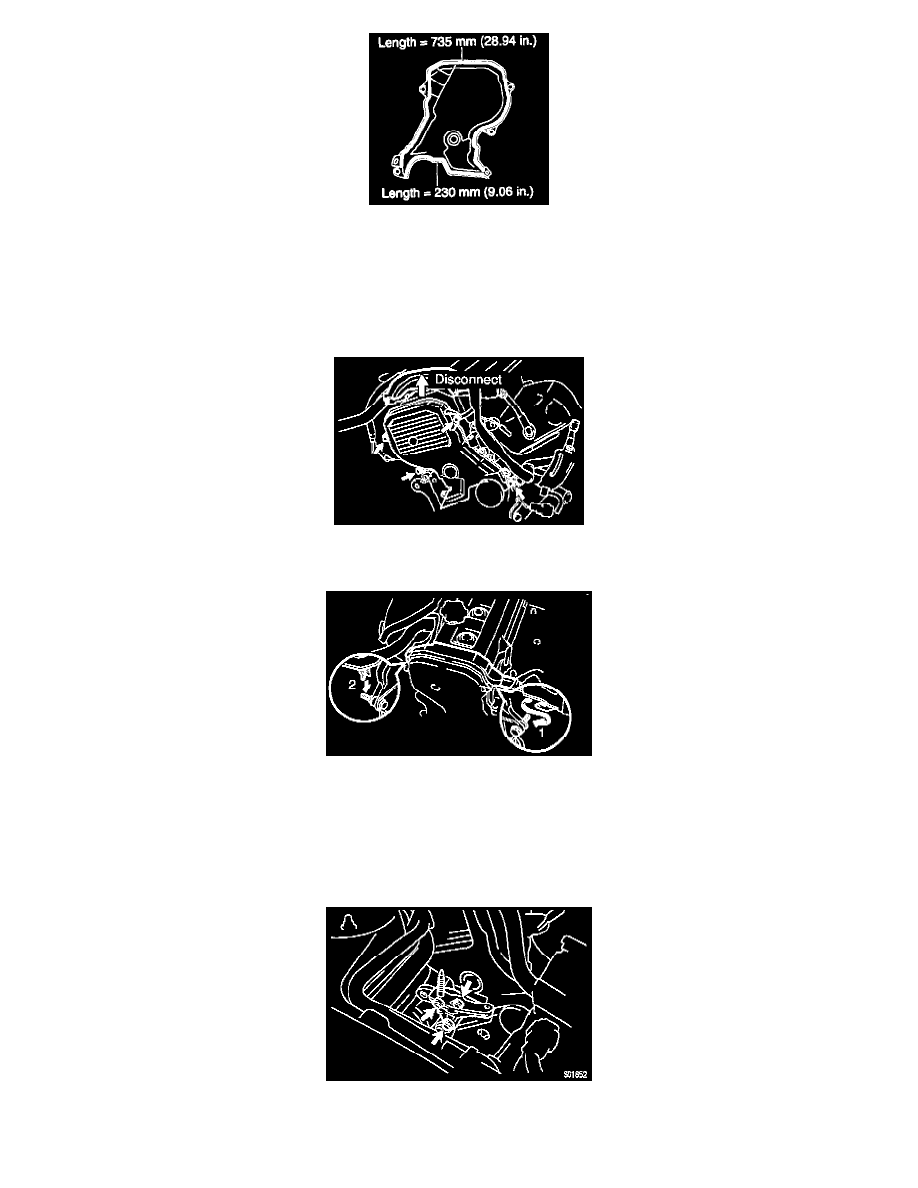
a. Check that the timing belt cover gaskets have no cracks or peeling, etc.
If the gasket has cracks or peeling, etc., replace it using these steps:
1) Using a screwdriver and gasket scraper, remove all the old gasket material.
2) Thoroughly clean all components to remove all the loose material.
3) Remove the backing paper from a new gasket and install the gasket evenly to the part of the belt cover shaded black in the illustration.
4) After installing the gasket, press down on it so that the adhesive firmly sticks to the belt cover.
b. Disconnect the engine wire protector between the cylinder head cover and No.3 timing belt cover.
c. Install the belt cover with the 4 bolts.
d. Install the engine wire protector to the 2 mounting bolts of the No.2 timing belt cover in the sequence shown.
e. Install the engine wire protector to the generator bracket and adjusting bar with the 2 bolts.
14. Install spark plugs.
a. Install the 4 spark plugs.
b. Connect the 4 high-tension cords to the spark plugs.
c. Install the 4 high-tension cords to the clamp on the cylinder head cover.
15. Install RH engine mounting bracket.
Install the mounting bracket with the 3 bolts.
Torque: 52 Nm (38 ft. lbs.)